It’s been a strange winter, and with this week warm-up, it’s time to take stock of the back yard. Every year, it gets a bandaid and a promise that a full redo is in sight. This year, we’re making it happen.
(or so we tell ourselves).
It’s been a strange winter, and with this week warm-up, it’s time to take stock of the back yard. Every year, it gets a bandaid and a promise that a full redo is in sight. This year, we’re making it happen.
(or so we tell ourselves).
Water will do what water wants to do. Water is a formidable adversary. Water seems to like our basement. Yes. We have issues with water.
After a good rain, our backyard used to look like this:

If you are familiar with Brooklyn brownstones, you know that they were typically built over a stone cellar. You may also know that brownstones typically have only one downspout. That means that the whole roof drains to just one area. Not only our roof, but all of our neighbors’ roofs do the same. Some people have connected their downspouts to the sewer line, but most have not. This means that a whole lot of water ends up pudling in the back yards – and water being water, it will follow the path of least resistance to go someplace else (which in our experience leads straight to our cellar).
There are a few things you can do to gently persuade water to go the other way: you can improve the grading so that it slopes away from the house, for example. But given the volume of water our backyard collects, that in itself is not the solution. We needed to do more. The easiest solution is to do something like a French drain: dig a hole, line it with landscaping fabric. Place a PVC pipe, with holes drilled into the sides, into the hole. Fill the hole with gravel. Cover with landscape fabric and the surface material of your choice. Add a drain cover to the pipe. Voilá. You have made a drain.
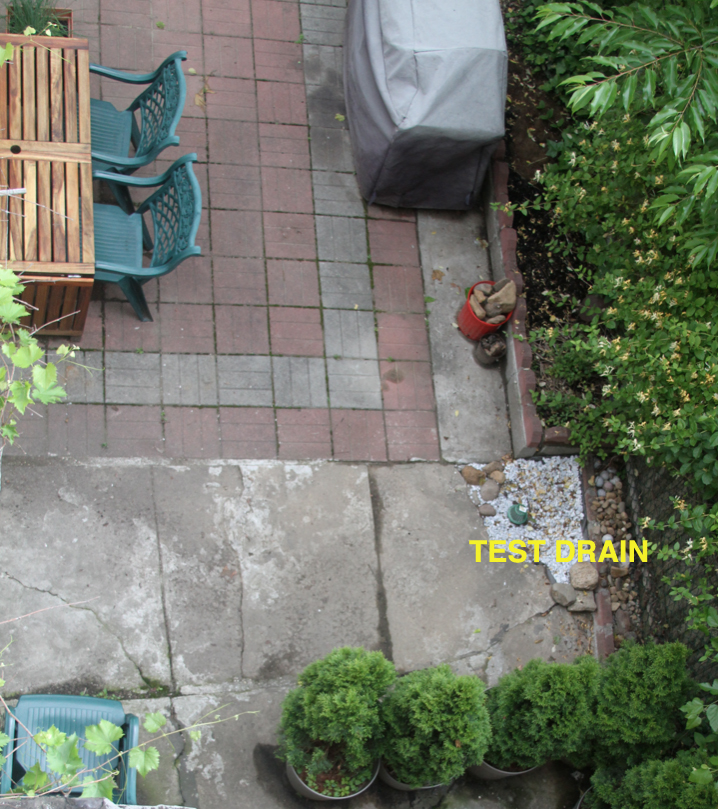
Last spring, I dug a test drain. It was about 2 1/2 feet deep and about 18 inches wide. It improved the moisture situation in the basement by about 75%. If one drain is good, 3 more would be much, much better!
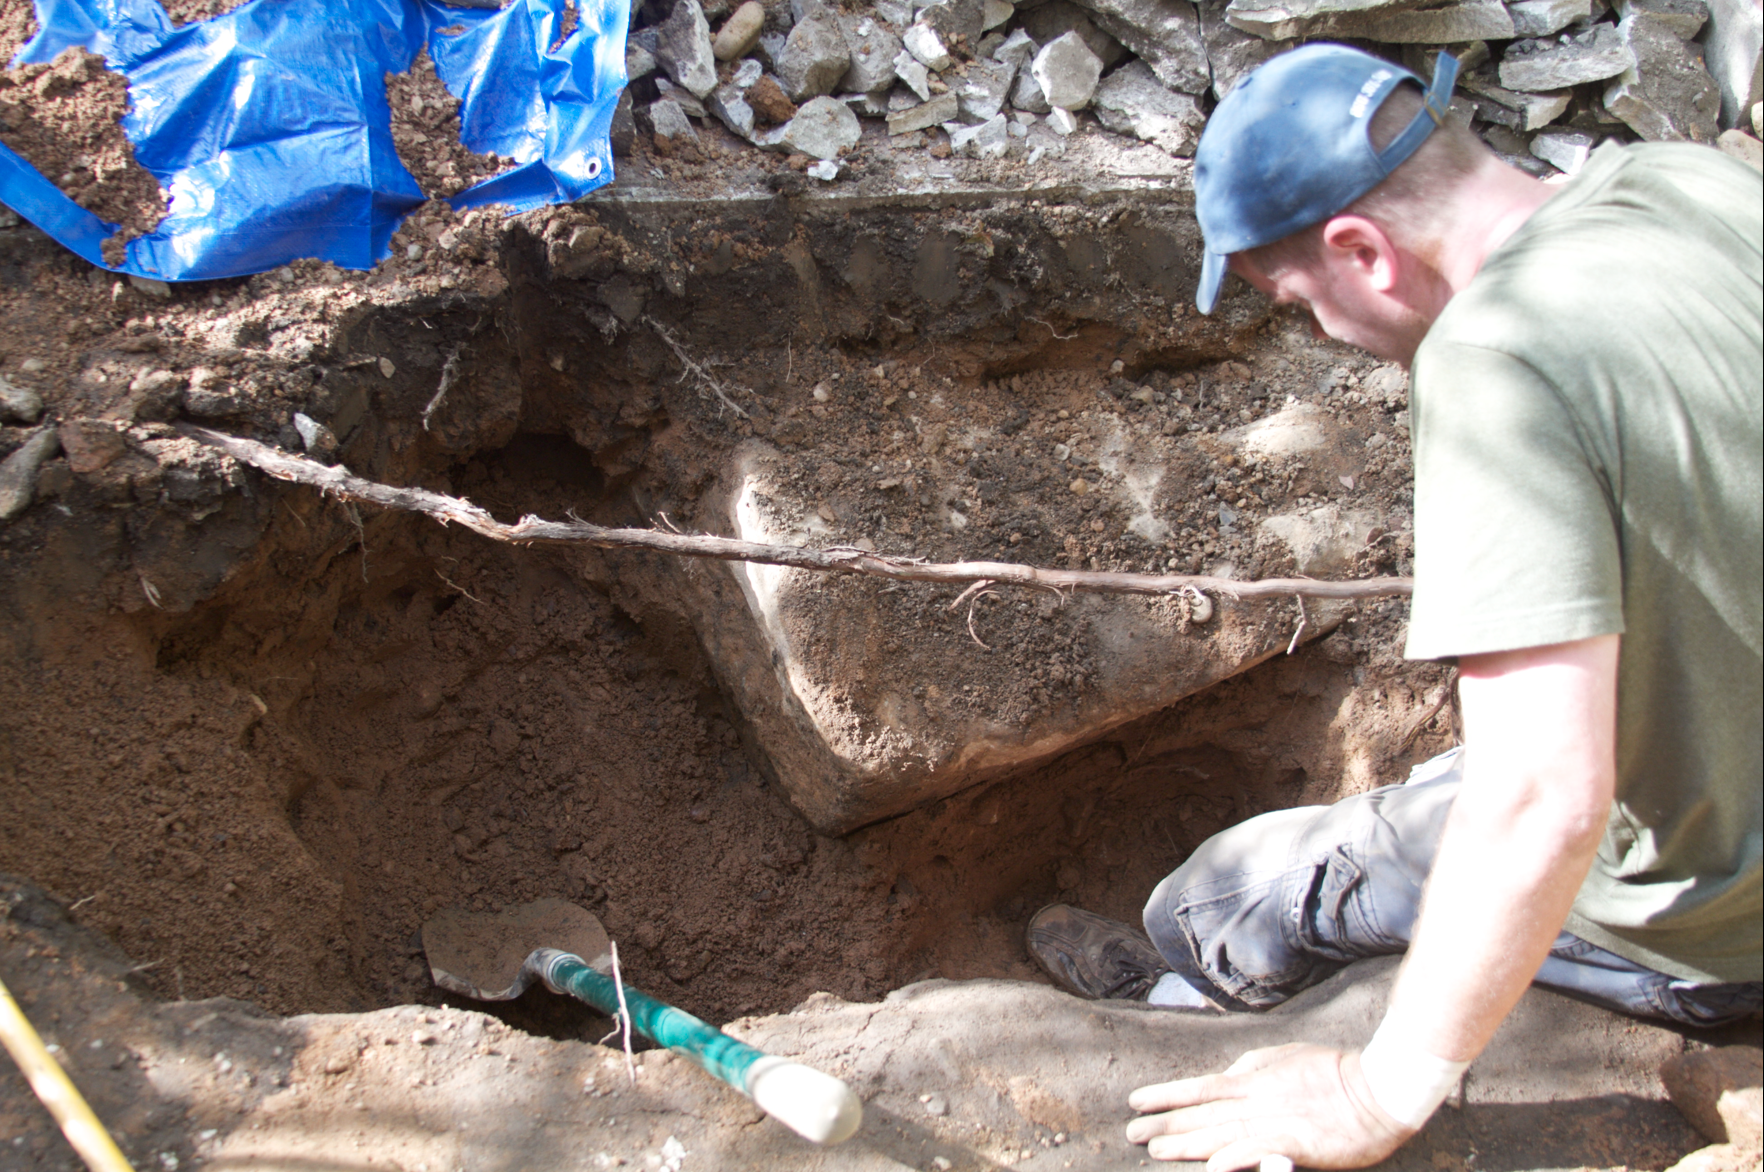
Armed with a brand new sledge-hammer, shovels and the enthusiasm of people who just don’t know any better, we set out to dig one blissful Saturday afternoon in July. Not 30 minutes in, this happened:

In our eager enthusiasm, the rhythm of drop chunk of concrete/pick up chunk of concrete fell out of sync and I ended up with the raddest manicure in all of Brooklyn (I also didn’t do a damn thing for the rest of the drainage project, because I had a boo-boo).
With me out of commission, the Mr pushed on. The first thing we learned is that our backyard is made up mostly of rocks. This sort of makes sense, since these seem to be left over rocks from the foundation. I suppose whatever didn’t get used, just got left behind and eventually buried. This is a small sample of the huge pile of rocks we dug up:
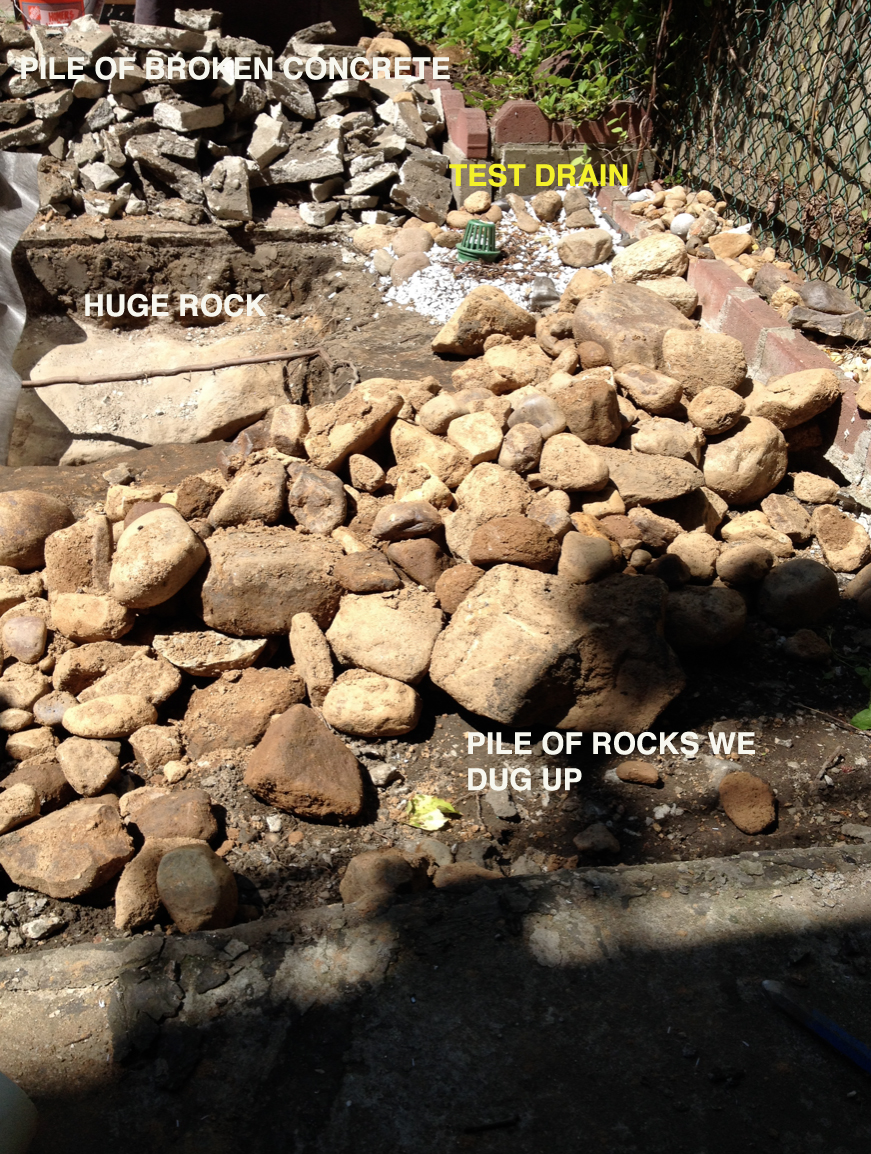
The plan was to dig 3 separate holes, but they quickly morphed into more of a trench because we had to un-earth SO.MANY.ROCKS! We found this super giant rock, which could have been an awesome addition to our landscaping, but too damn heavy to move.
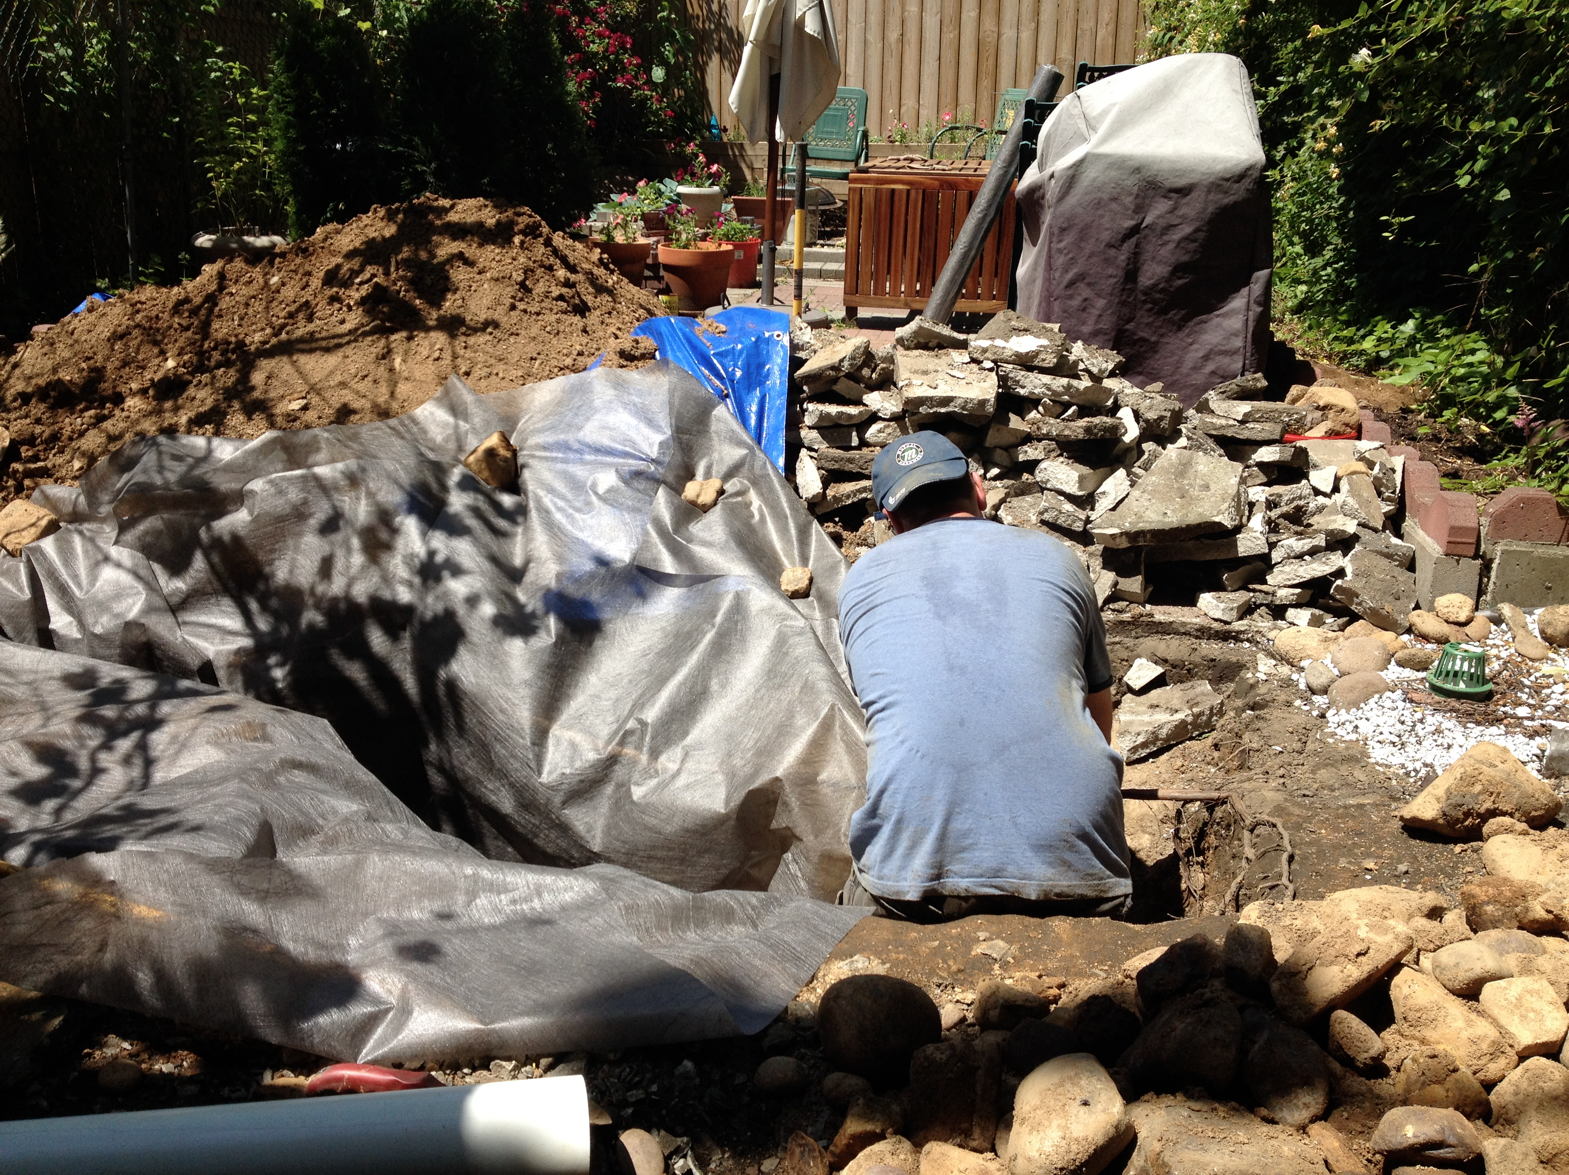
This is the mess we made, put into perspective.
Making the drains is quite simple: Dig a hold about 3 feet deep and line it with landscape fabric. Place a couple of inches of pebbles at the bottom. Take a PVC pipe and drill holes all up and down the sides (we used a 3 inch pipe), and place the pipe vertically into the pebbles. Fill the rest of the hole with pebbles/gravel, then cover with landscape fabric.

Place whatever surface material on top (soil, pavers, etc), and put a drain cover on the pipe. Ta-da! You’re done.

This is what the test drain looked like, half way done:

Test drain almost finished:

Instead of gravel, we crushed up the concrete we removed to dig the drains. That solved two problems: what to do with the concrete, and having to buy gravel and then carry it through the house to the back yard. Also, it’s immensely satisfying to bust up things with a heavy sledge-hammer (so long as you are careful not to smash your thumb).
The drainage project has been finished for a few months, and our basement has been dry ever since. Unlike many of the projects we take on, this one was relatively quick and simple – but it was hard work (I’m told…)
Our outdoor Ikea table was looking a little rough after a couple of years out in the elements. The sun/rain/heat/squirrels were definitely getting the best of it. We decided this was an easy enough thing to do over the course of one Sunday afternoon – and while we frequently grossly mis-calculate how long something will take to finish, this one was spot on.

We sanded whatever was left of the original finish to expose the wood, finishing it off with a super fine grit paper.

After wiping off the dust and giving the table a good cleaning, we followed up with about 4 coats of Tung Oil (24 hours between applications). This photo was taken after the first application.
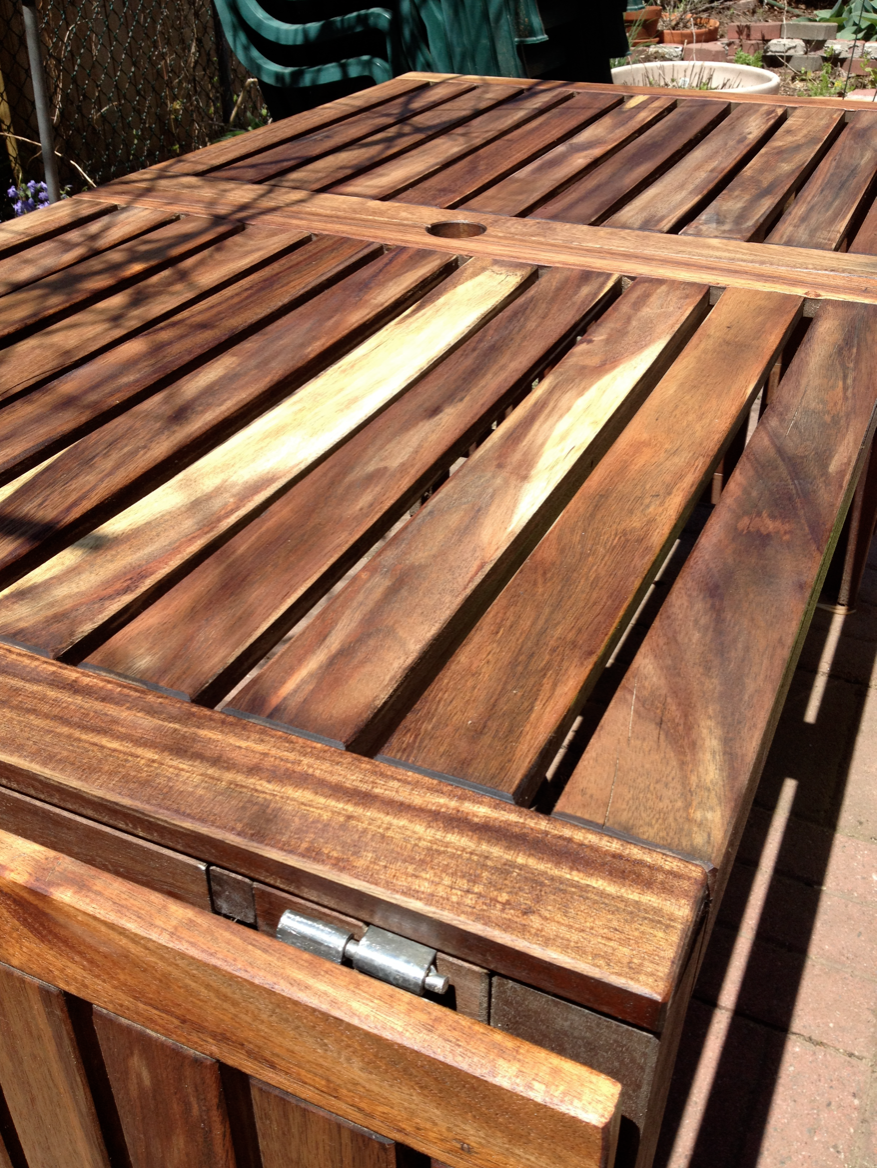
I like how the oil brought out the natural variation of the wood, previously hidden by whatever tinted finish Ikea uses. This is our first attempt at using Tung Oil outside but I figured since water just beads off, it would be a good choice. It has worked OK thus far, but I find myself re-applying it in spots here and there. On the plus side, it’s absolutely non toxic and you don’t have to worry about fumes or residue.
A note on Tung Oil: I used pure Tung Oil, not the stuff from the hardware store (which usually has other chemicals added to it). The Milk Paint Company stuff is a bit hard to find in a store (the place where I bought mine has since closed). You can order it online or Google your way to a local store that may sell it.
It’s been a cold, long winter in New York City. Yesterday was the first day of spring. Next week, we will likely be smacked upside the head with a Nor’easter once again. I am so done with the Polar Vortex. This time last year, I was already playing in the dirt. This year, however, I’ve been keeping my excursions outside to a minimum. A winter person I am not.
We spend a ton of time outdoors during the warm months, and while our back yard has been presentable(ish) over the past 2 summers, a big overhaul was always part of the house master plan. At some point. In the very very distant future.

Backyard in 2012, our first summer. The big bushy plants to the right are tomatoes. It was a fantastic year for tomatoes.

The backyard in 2013. The fence was replaced and we built a planter/retaining wall to compensate the height difference between our yard and the one behind us. It was a terrible year for tomatoes.
3/4 of the way through this particularly harsh winter, our garden redo got bumped up in priority, courtesy of the water that came gushing into our basement during a rain/freezing rain/snow/rain event. We realized we needed to pay some attention to the garden drainage and the pavement that is not sloping away from the house quite enough. Oh, and the holes. There are holes where the coal chute joins the house. Because, why not? True to the old adage of “project begets project,” we figure we might as well go the Full Monty on this. In addition to the must-do-to-keep-the-basment-dry (re-sloping the surface closest to the house and installing French drains throughout the yard), we’ll be doing a fair amount of cosmetic work, too. Woo hoo landscaping!

This is what happens when it rains: the water has nowhere to go, so it just hangs out.
This is actually really close to the house. Not good.
About 4 months ago, we had preliminary plans drawn by a fantastic landscape architect (aka, dad). The design calls for separate living areas in our compact yard: seating under the grape-vine (new arbor, pebbles underfoot), a grilling area and eating area (both paved with reclaimed old pavers), as well as shrubs and perennials evoking a Victorian garden.
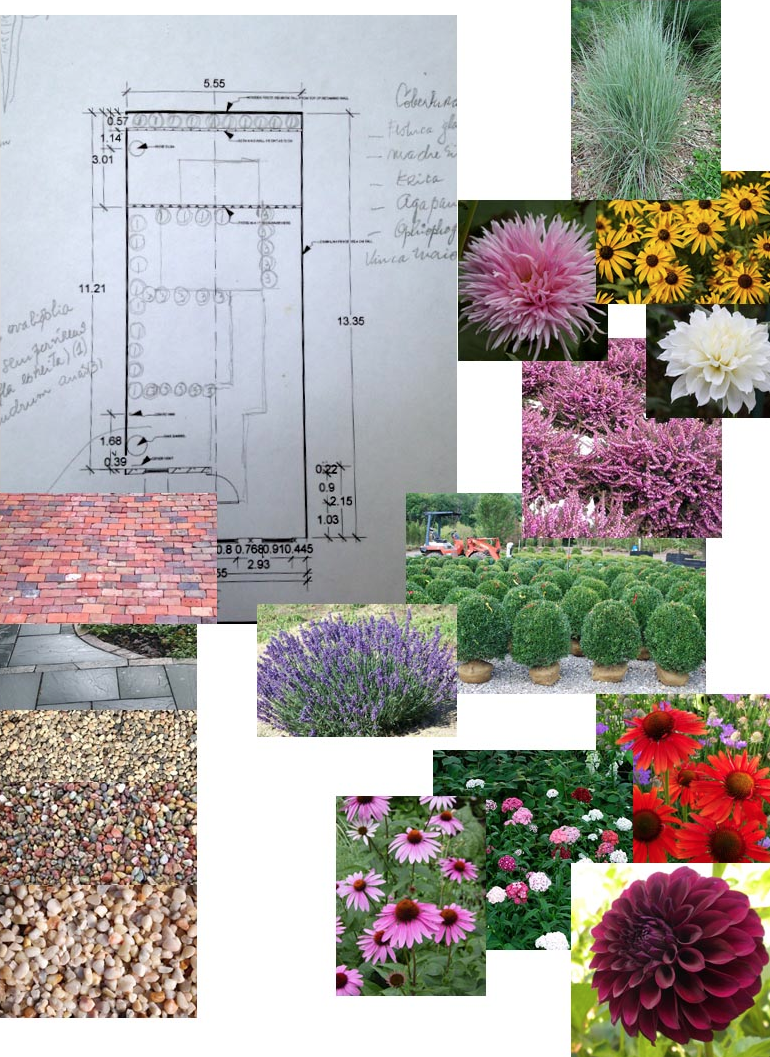
The design, along with some of the materials and plants. Yep, I do suck at Photoshop.
To put the design into practical perspective, I ventured outside today and drew it in chalk, making some changes along the way. I think I worked out most of the kinks (and found a dead bird along the way).

Pardon the ugliness, but the garden is still asleep.
Dad says good garden design has a bit of mystery drawn in. I don’t think he means all the blank spots on his sketch, but rather that one should not be able to see everything all at once, that one would wind their way through, and discover new areas. That is easier said than done with a back yard that measures about 40 feet x 18 feet. Dad proposes a complete re-think of how we use the space. The table will move to the back of the yard, where the vegetable garden is (at some point, it will get sanded and slathered with Tung oil – yep, on the list). The area beneath the grape-vine will get fine gravel, and will house a seating area with custom-built wooden benches. We’ll reduce the hard surfaces of the yard (which will also help with drainage), and use reclaimed old brick pavers as our main surface material.
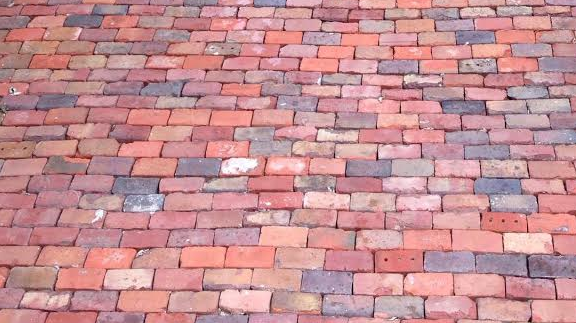
Sweet old brick pavers. How I love thee!
It all sounds fine and dandy. Once reality sinks in, including carrying all this stuff through the house, I’m sure it will be a different story.
Planting anything in our back yard is an adventure. Over the years, a lot of junk was buried back there, evidenced by the fact that it’s nearly impossible to dig a hole and not find anything unusual. Last year we dug up a bayonet, a bath tub and bicycle handlebar.
This year, I offer up a pick axe, random bits of metal, a giant bolt and a piece of a faucet.
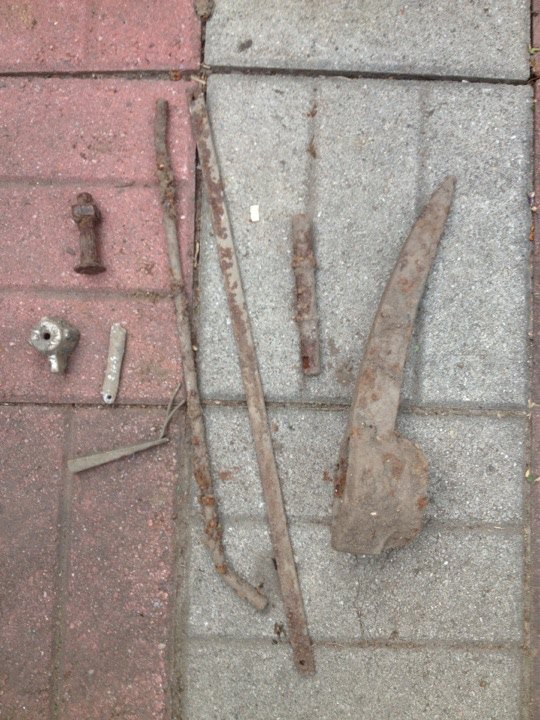
So far we haven’t found the hidden treasure, but I guess there is still hope…
I love having outside space. I missed it so much in all those years of apartment living. A major redo of the yard is in the future, when we build a deck and become all fancy. In the mean time the space is as utilitarian as the fire escape ladder we use to get to it.
Every year I like to plant a tomato plant. Or two. Or five. Trouble is, most of Brooklyn has soil contamination issues stemming from the borough’s industrial past. After having our soil tested and finding out that there were some substances in it we’d rather not eat, the solution was to create a raised bed, and fill it with fresh non-contaminated soil.
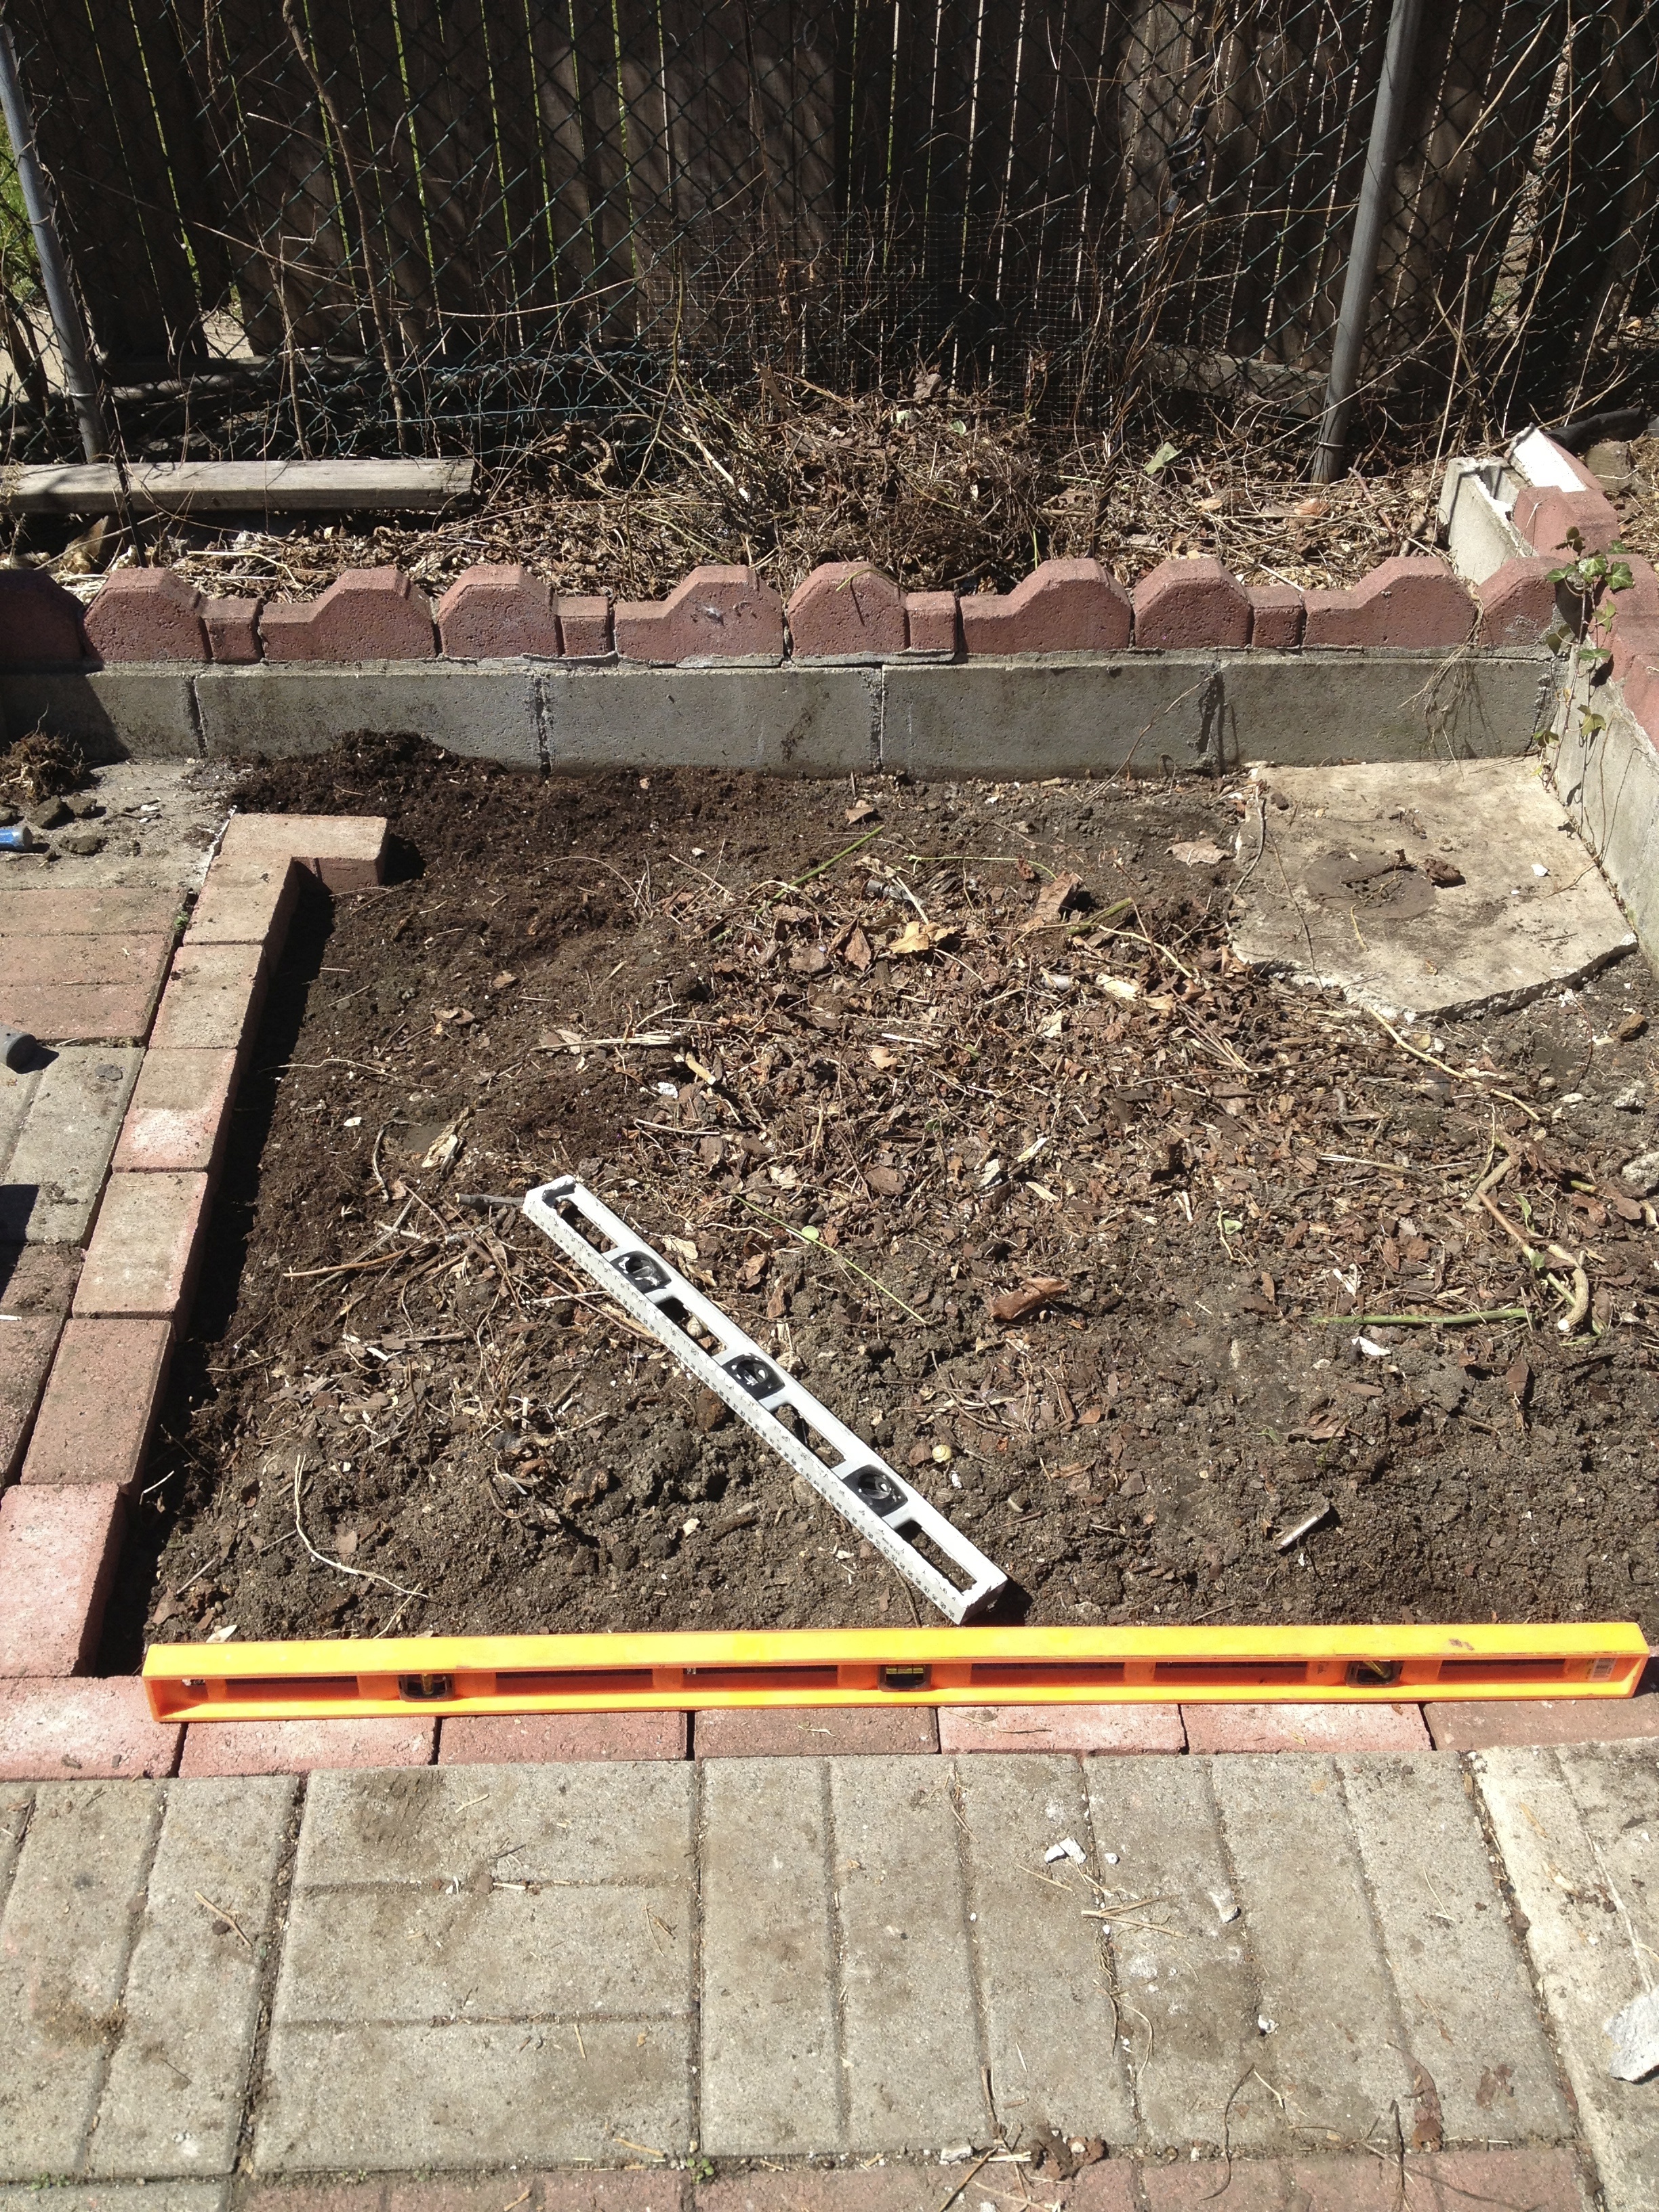
Because everything about our back yard is temporary, it really didn’t make sense to spend a lot of money, so we used stuff we already had – a surplus of paving bricks. With a level, a trowel and a whole bunch of pavers, I made a box of sorts. I then lined the bottom with landscaping fabric and filled with the clean soil – all 15 cubic yards of it, carried through our parlor floor and down the fire escape.
It started like this:
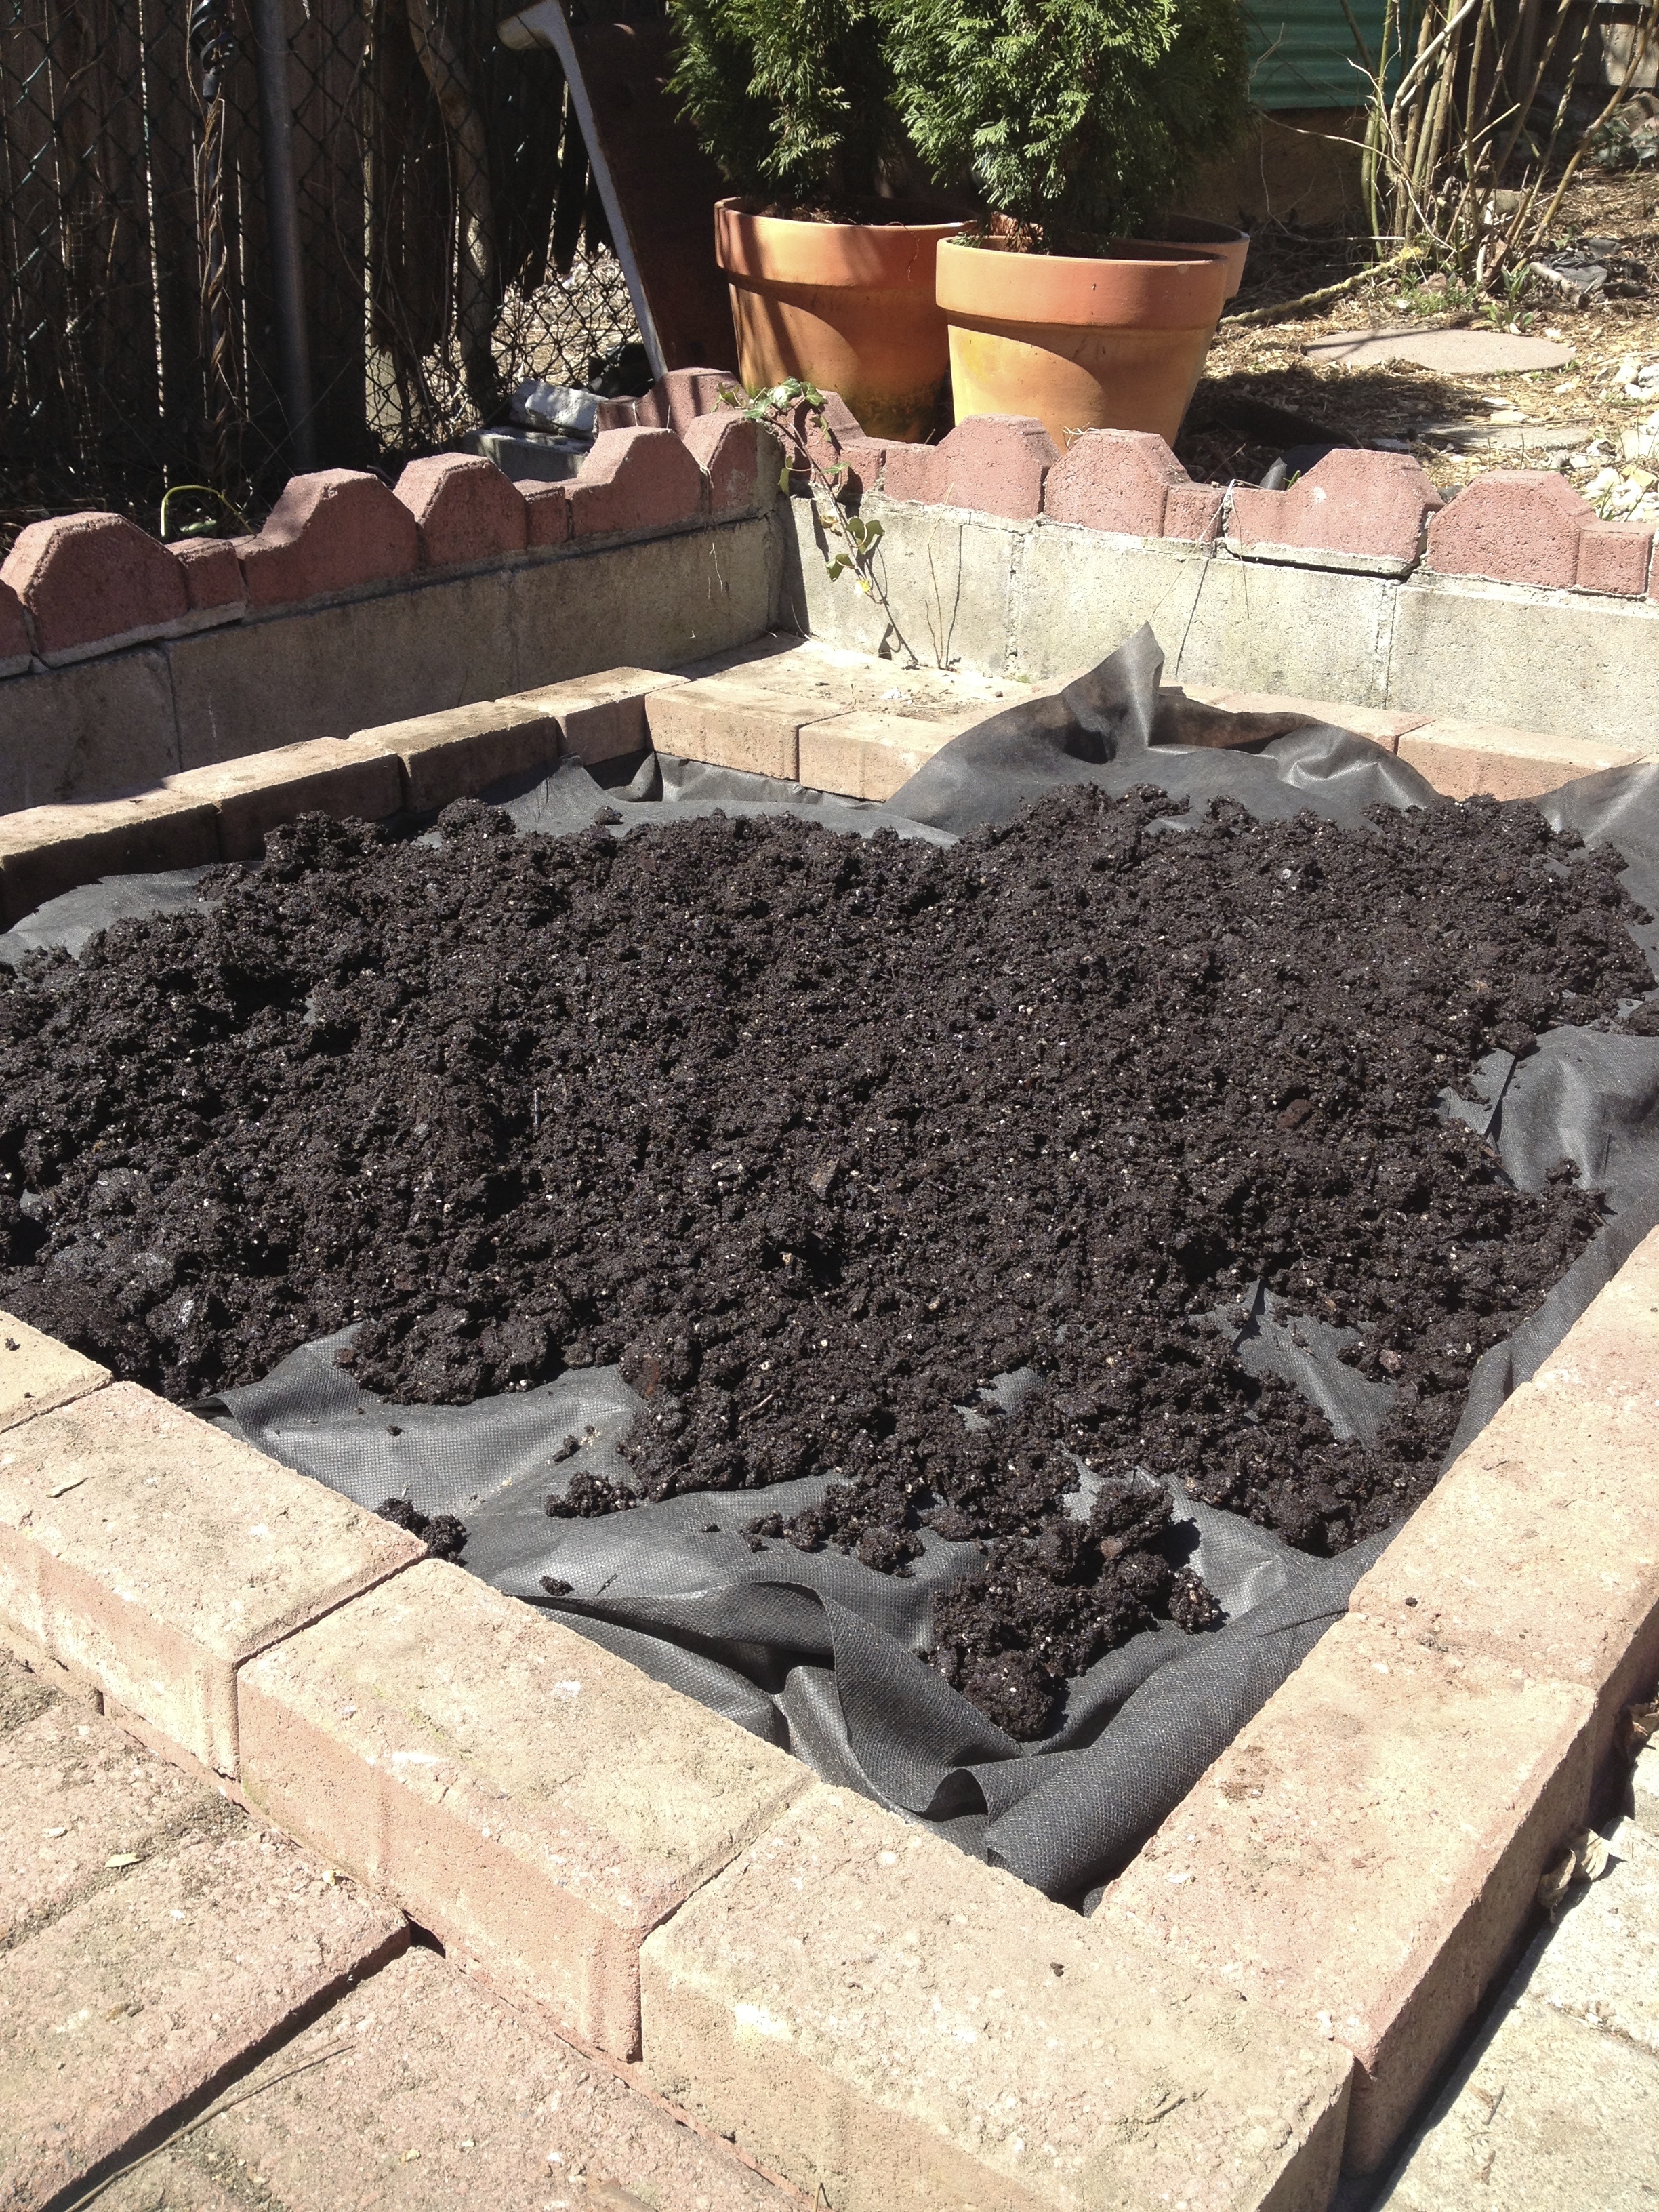
Landscaping fabric helps keep the new soil separated from the old.

And became this:

We also rebuilt the rear fence and added a retaining wall, to compensate for the height difference from the lot behind us. Because nothing is ever easy when trying to get things to the back yard of a row house, all of our construction supplies had to go through the house and down the fire escape:

The fence and retaining wall were then built into place:
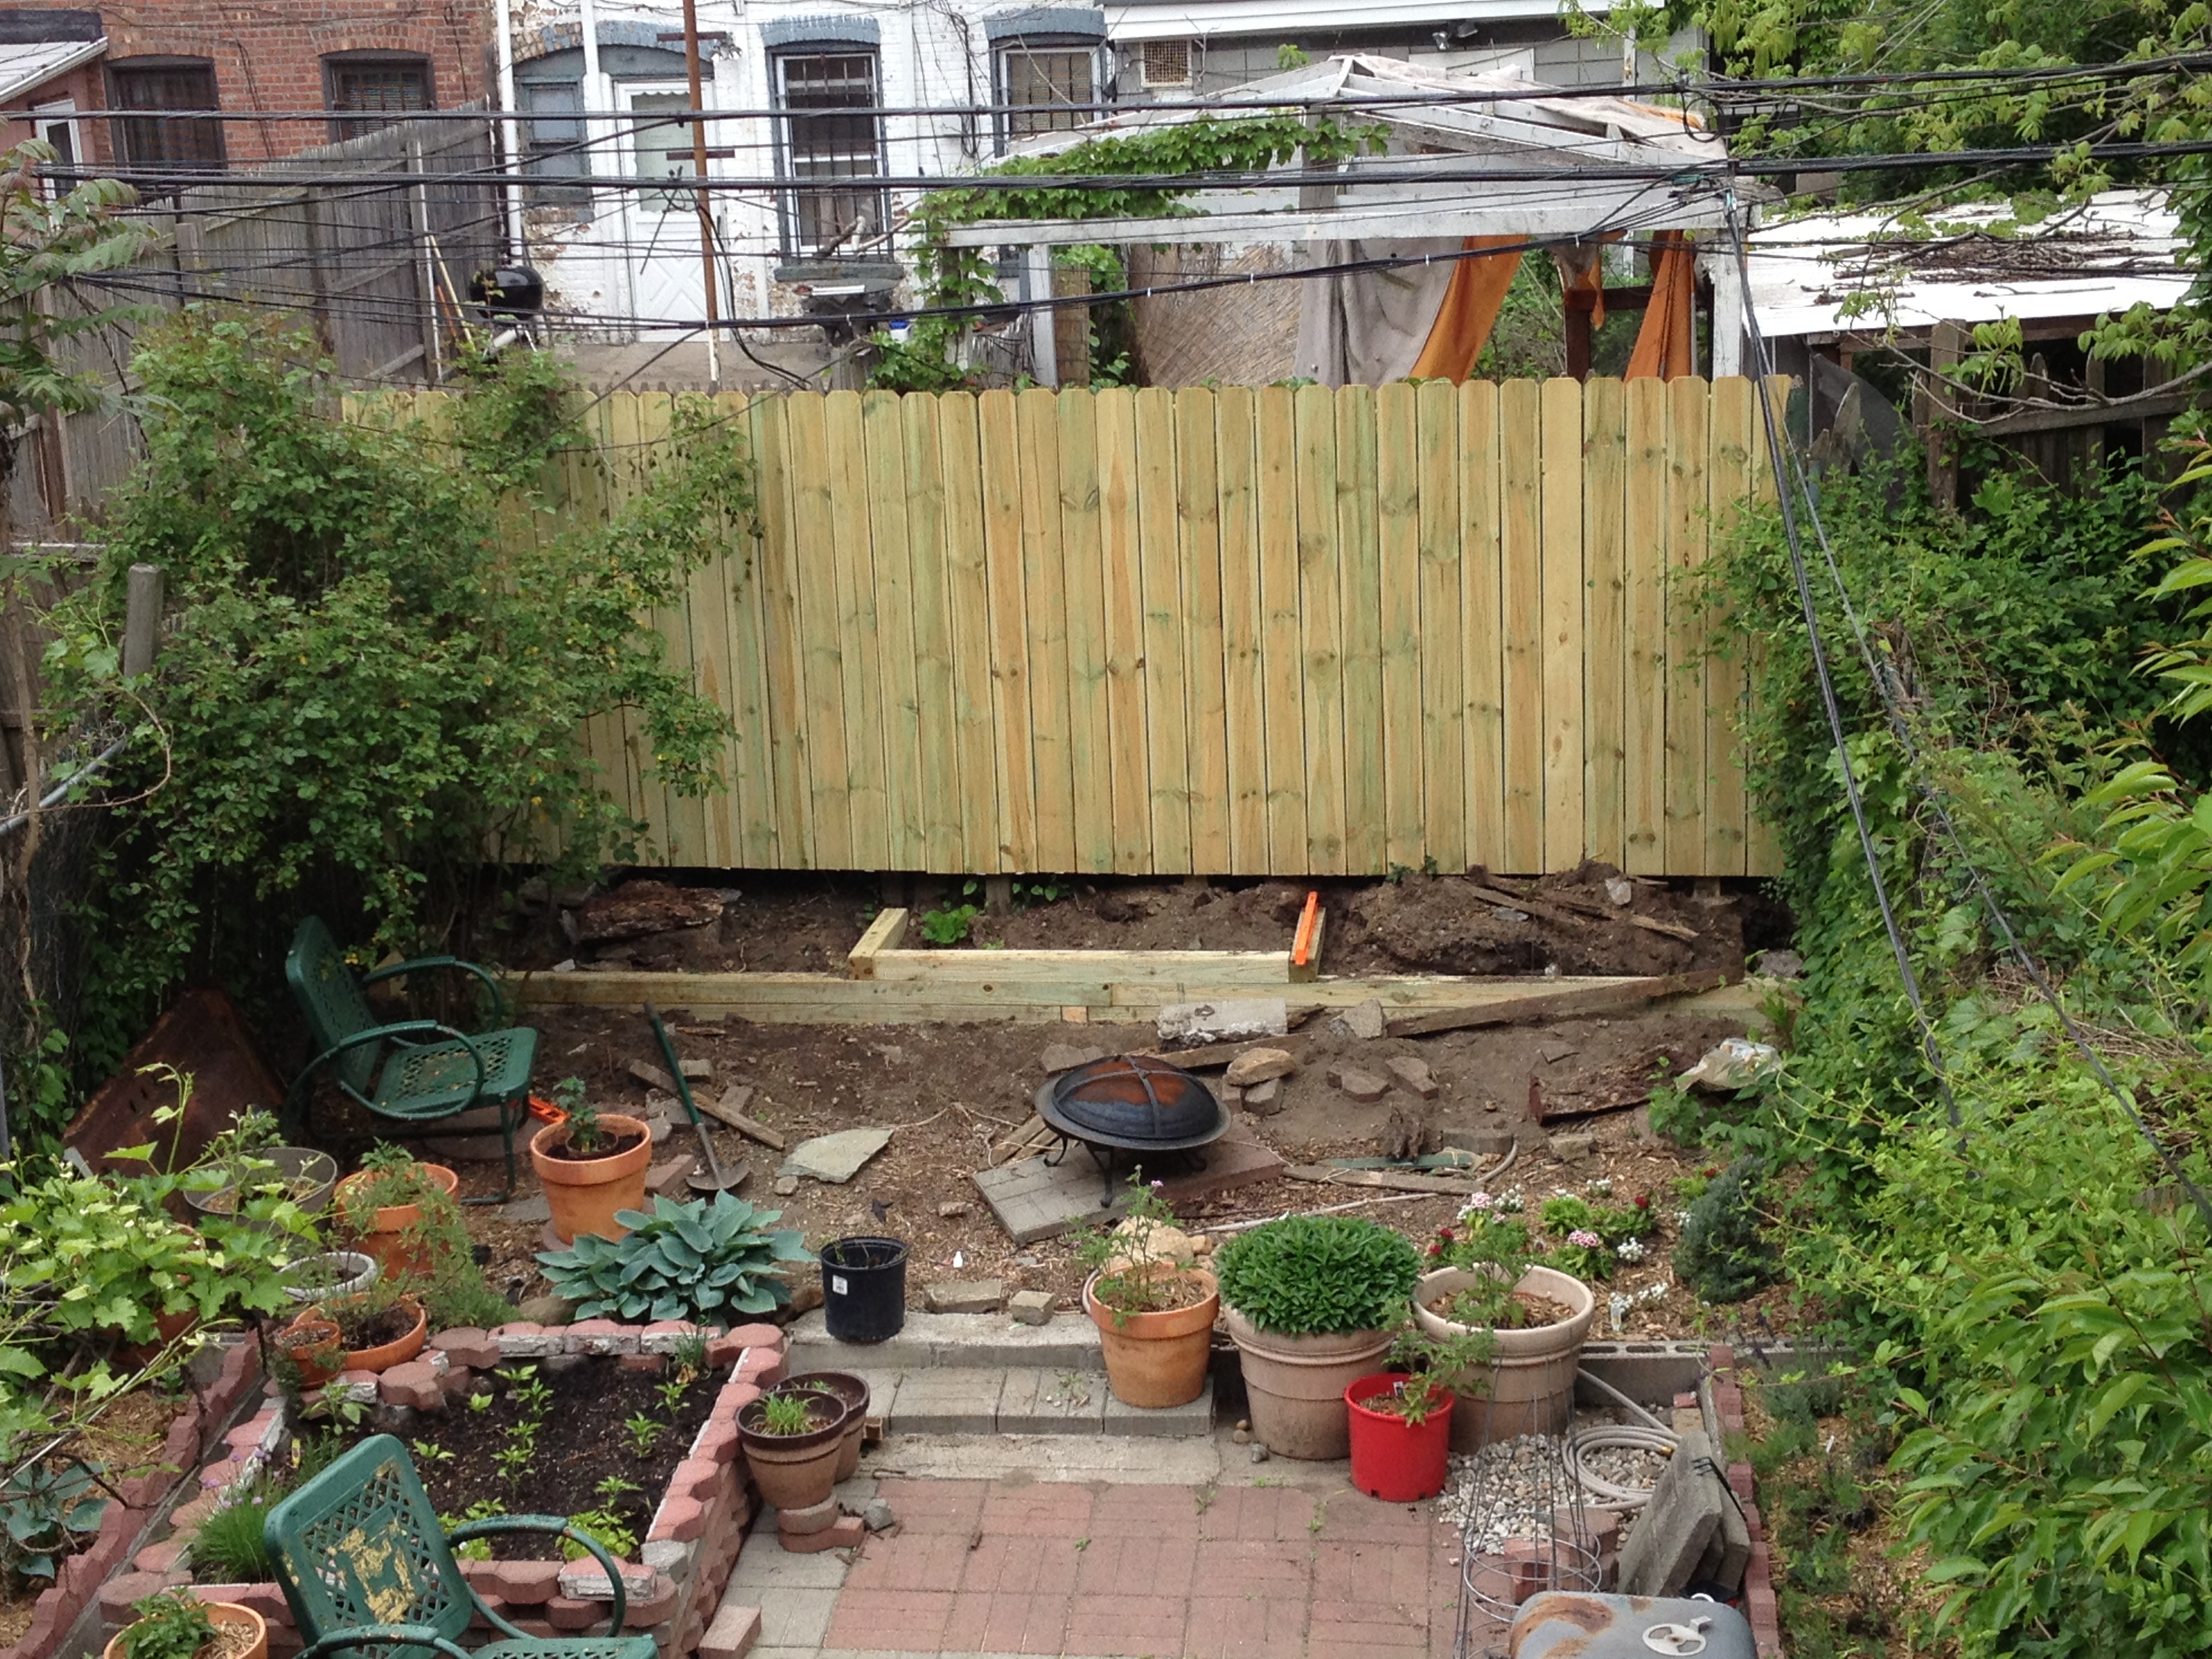
Came out pretty well, if I do say so myself… Now we wait for the Dahlias to bloom.

We have a mature grape (tree? vine? bush?) in the backyard. This makes me super happy because it brings back so many childhood memories – besides, how cool is it to be able to grow your own grapes? Even though we are super excited over the possibility of grapes, we’re much less excited about the condition of the grape-holding contraption:


A tangled mess of vines made the area directly below basically useless. Cue up some basic plumbing supplies and a lot of patience:

A few hours later, the plant was properly supported and the area beneath tall enough to stand up without fear of being poked in the eye by a branch.

Since we have no idea which kind of grapes we are growing, here’s hoping for some tasty mystery fruit in a few months.
With this amazing weather, it’s been hard to focus on inside work. The backyard has been screaming for attention, and attention it got this weekend. As is the case with everything at our house, nothing is ever easy or simple. So, true to form, what started as planing a few tomato plants ended up being a full day of digging. Turns out there are all sorts of things mixed into our soil – and I’m not just talking about a ton of rocks.
We dug up this thing – not sure what it is, but looks like a bath tub of some kind. It has the cast iron feet and a drain hole.


Once all the metal was pulled up, we saw this thing:

A blue stone slab with a couple of holes in it.
After much digging, we were able to pull it out and found this:


Best we can tell it is an old cistern (once again covered back up with the blue stone and soil) which continues to exist under what is now our vegetable garden.
It’s impossible not to be excited about spring when this is the first thing we see when we wake up:

Disclaimer: we haven't painted our bedroom yet. The color (and terrible paint job) pre-date us.
Sure conventional wisdom cautions against planting too early. Freak snowstorms or icy frost can kill even the hardiest of plants. But last week common sense was not at an all time high around here. As a result….

Pretty perennials
And something I’ve been meaning to do since, well… forever:

English Boxwood bushes flanking the door
Seeing such a close shot of the door reminds me we need to give it a little love at some point. In the mean time, or at least until the next frost, this too is hanging out on the stoop:

I'm all about pink flowers this season
We were poking around the backyard this weekend, looking for signs of perennial plants and came across something not so leafy.

It looks to be part of a bayonet

I’m not sure there is any way to tell if this is the real deal or a reproduction. But in any case, it was a cool find (and yes, we found some perennials, too!)
