A look back at 2020

2020 sucked.

Seems like this is something that doesn’t really need to be said. But just in case there was any doubt.

We are lucky to be have the option to work from home (and thus remain employed) and we are lucky that we have enough space to WFH without being on top of one another. Yet it was a year filled with anxiety, worry and a general sense of dread.

As we spent 99.9% of our time at home, we did manage to get a few projects done.

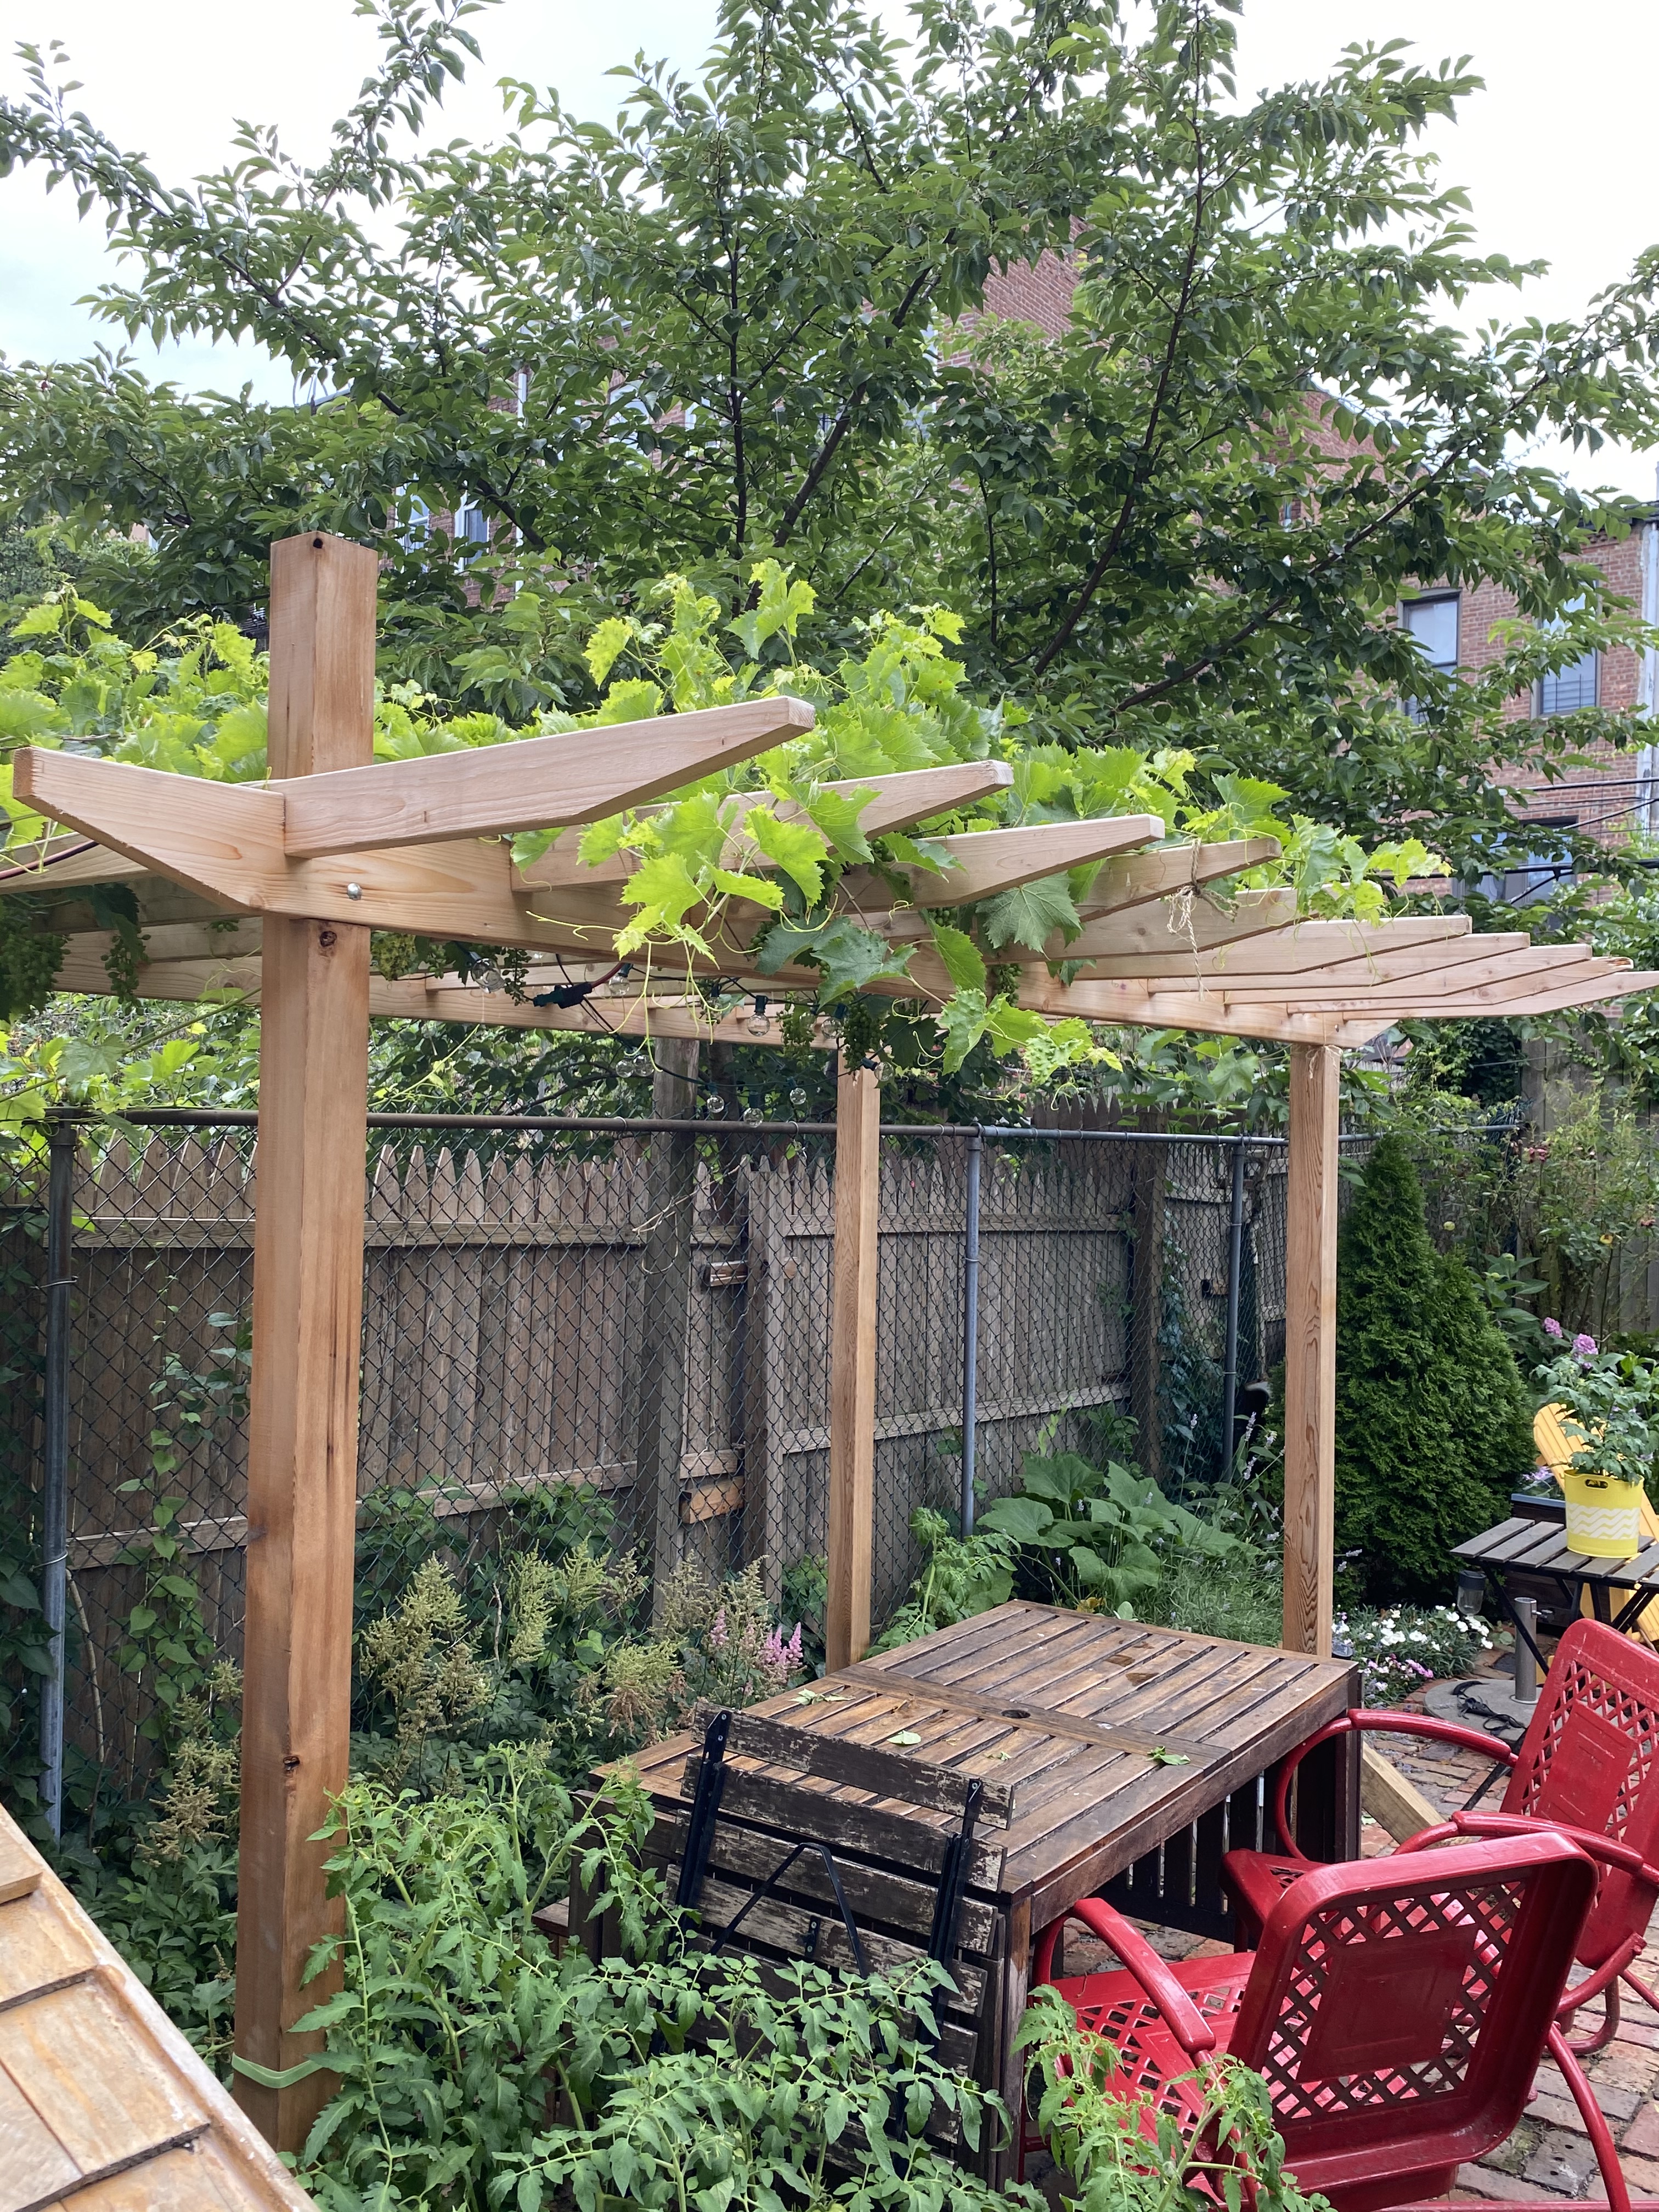
Right before shutdown we tackled the grape arbor. The somewhat ancient grape vine was precariously held up by a concoction of metal pipes, rusty wire and a broken broomstick. After slowly raising the vines to a point where we could actually walk under them, it was finally time to build a proper structure.

The empty shelves at the grocery stores were the impetus for the the next project: a small vegetable garden. I built these mostly with what we had on hand (bead board, scraps of lumber). I think they turned out pretty good, considering.

Boxes before stain/paint.

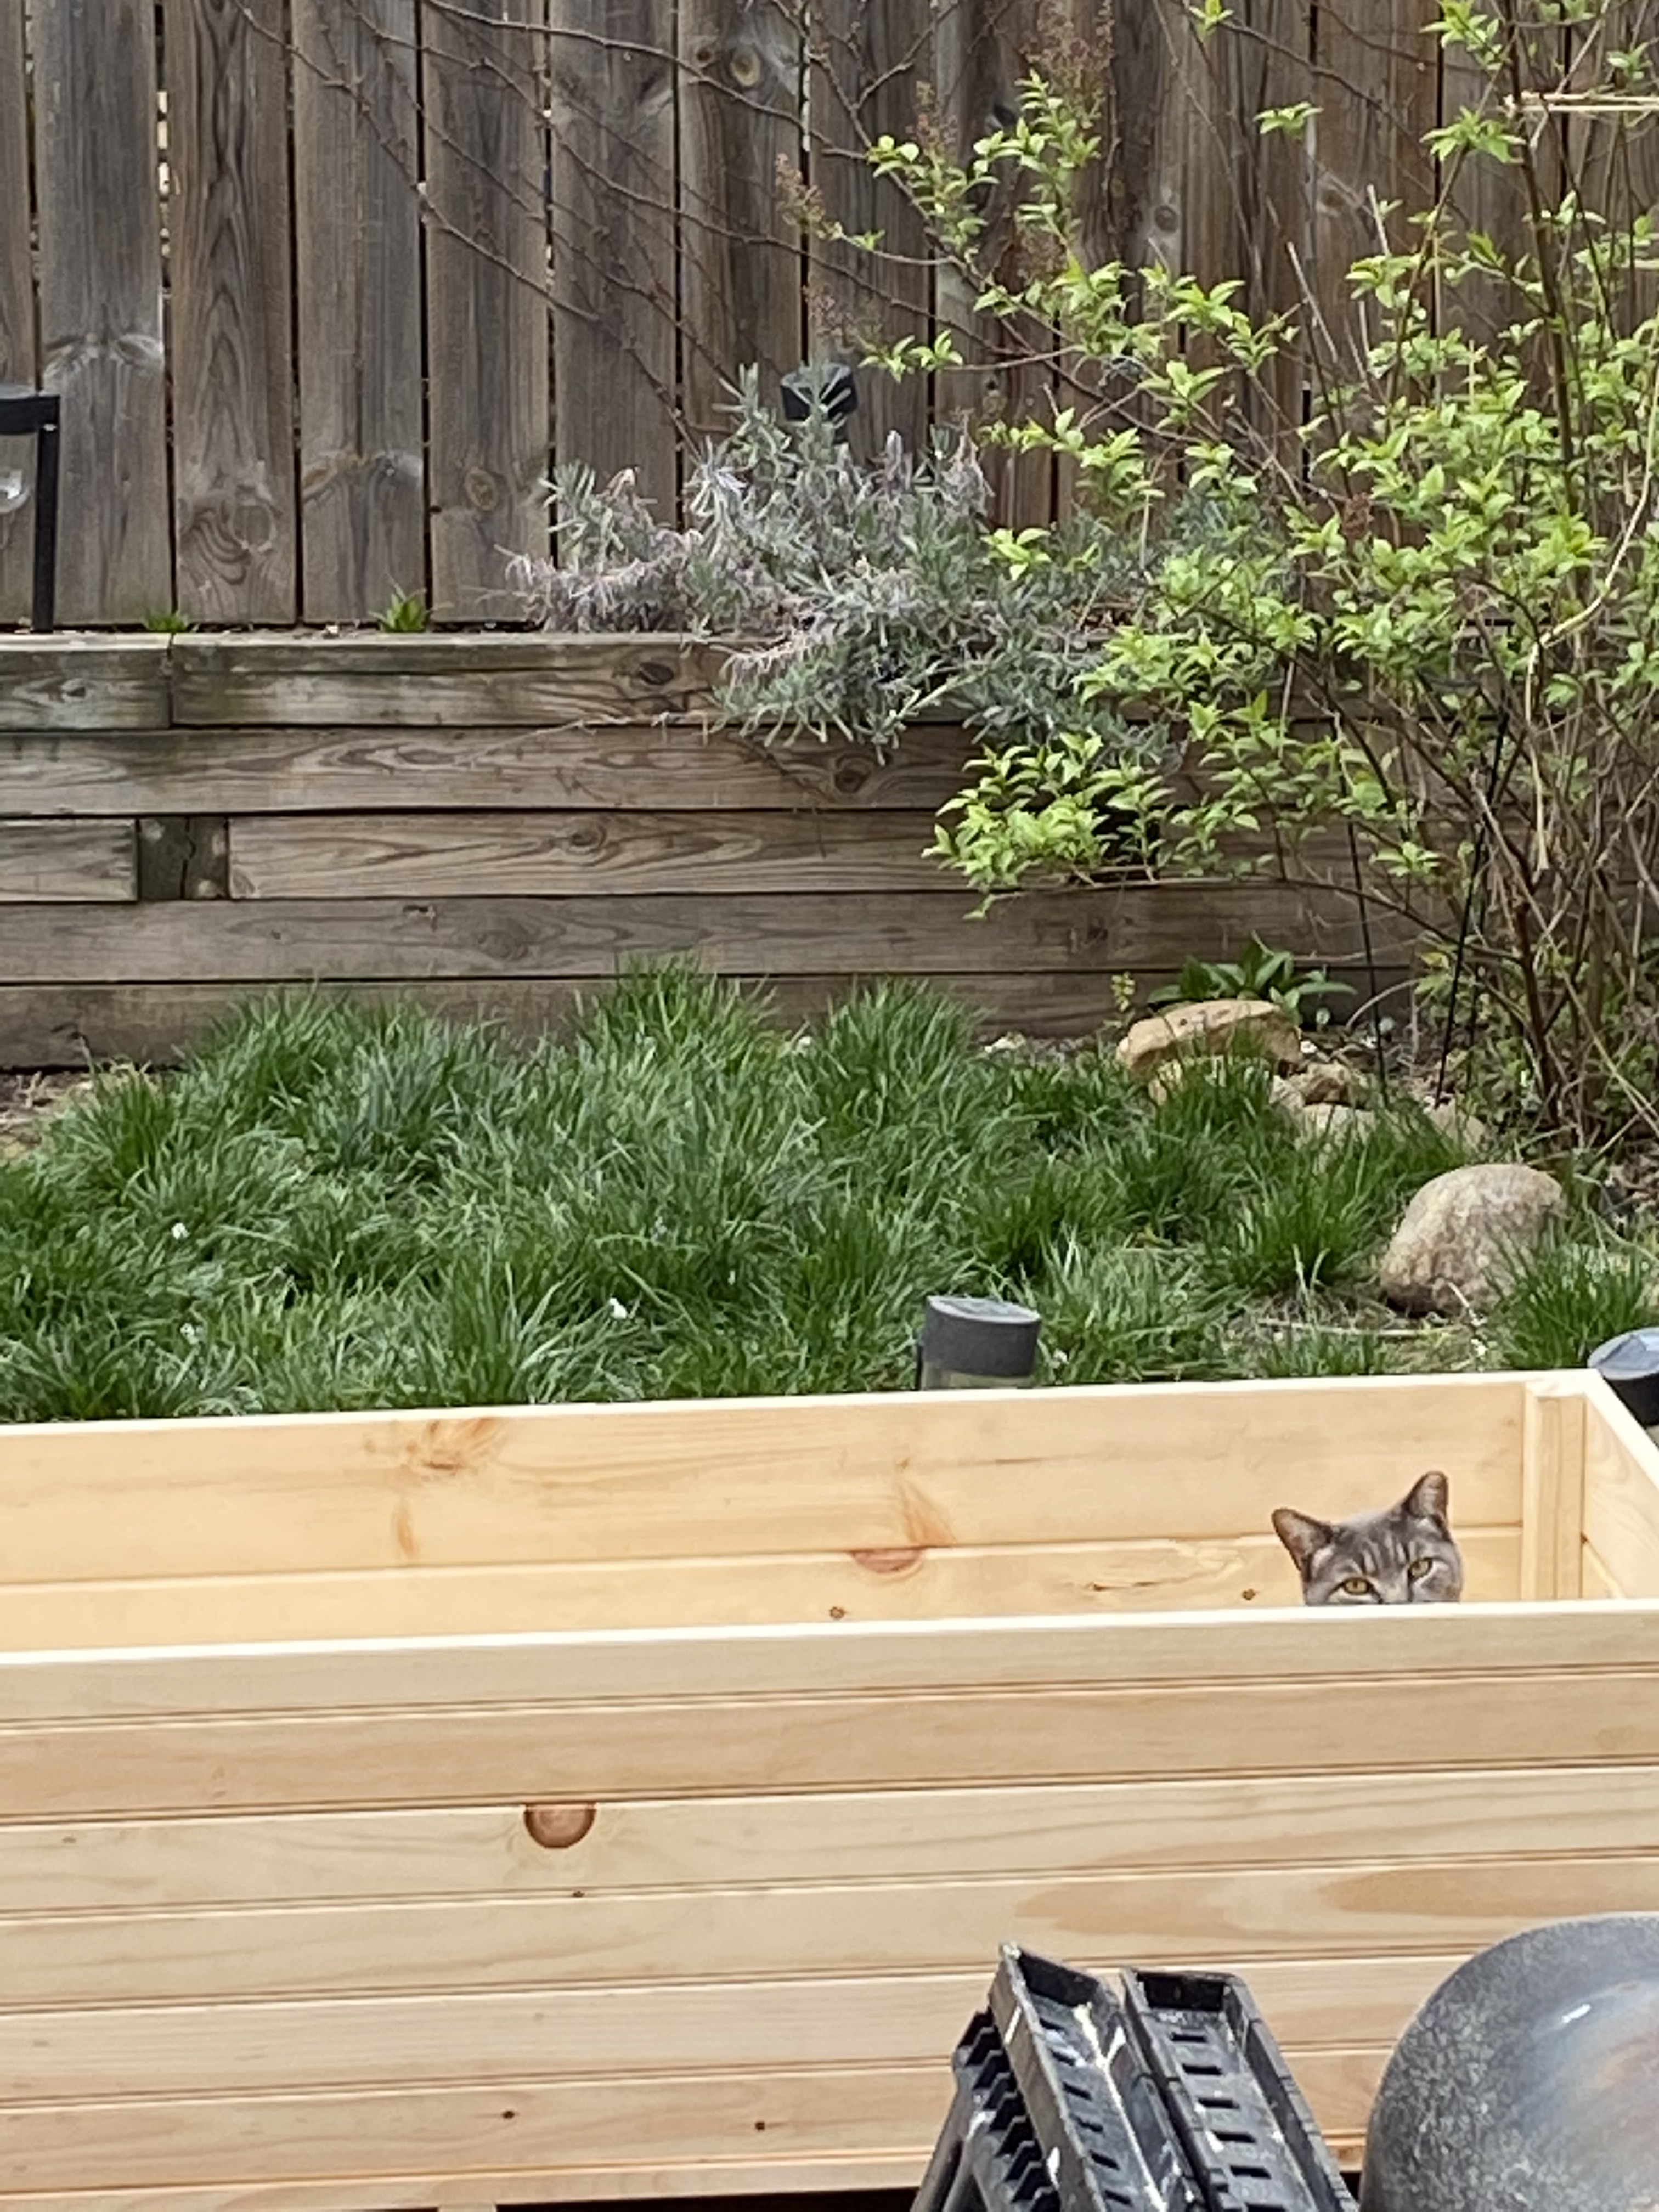
I used a dark mahogany stain on the outside (again, what we had on hand) and painted the inside blue with some leftover exterior paint. Not to worry, the boxes are lined and the soil doesn’t come in contact with the paint or stain. The thought behind painting the inside was to make them a bit more durable. As a bonus surprise, I think the color combo kinda works. These were completed at the height of the pandemic here in New York, when the city was absolutely quiet except for the wailing ambulances. We had no idea what the months ahead would bring, and in a small way being able to grow a few tomatoes and peppers seemed like a decent step against the food shortages we all feared.

A mesh top prevents said cat from using our “farm” as a littler box

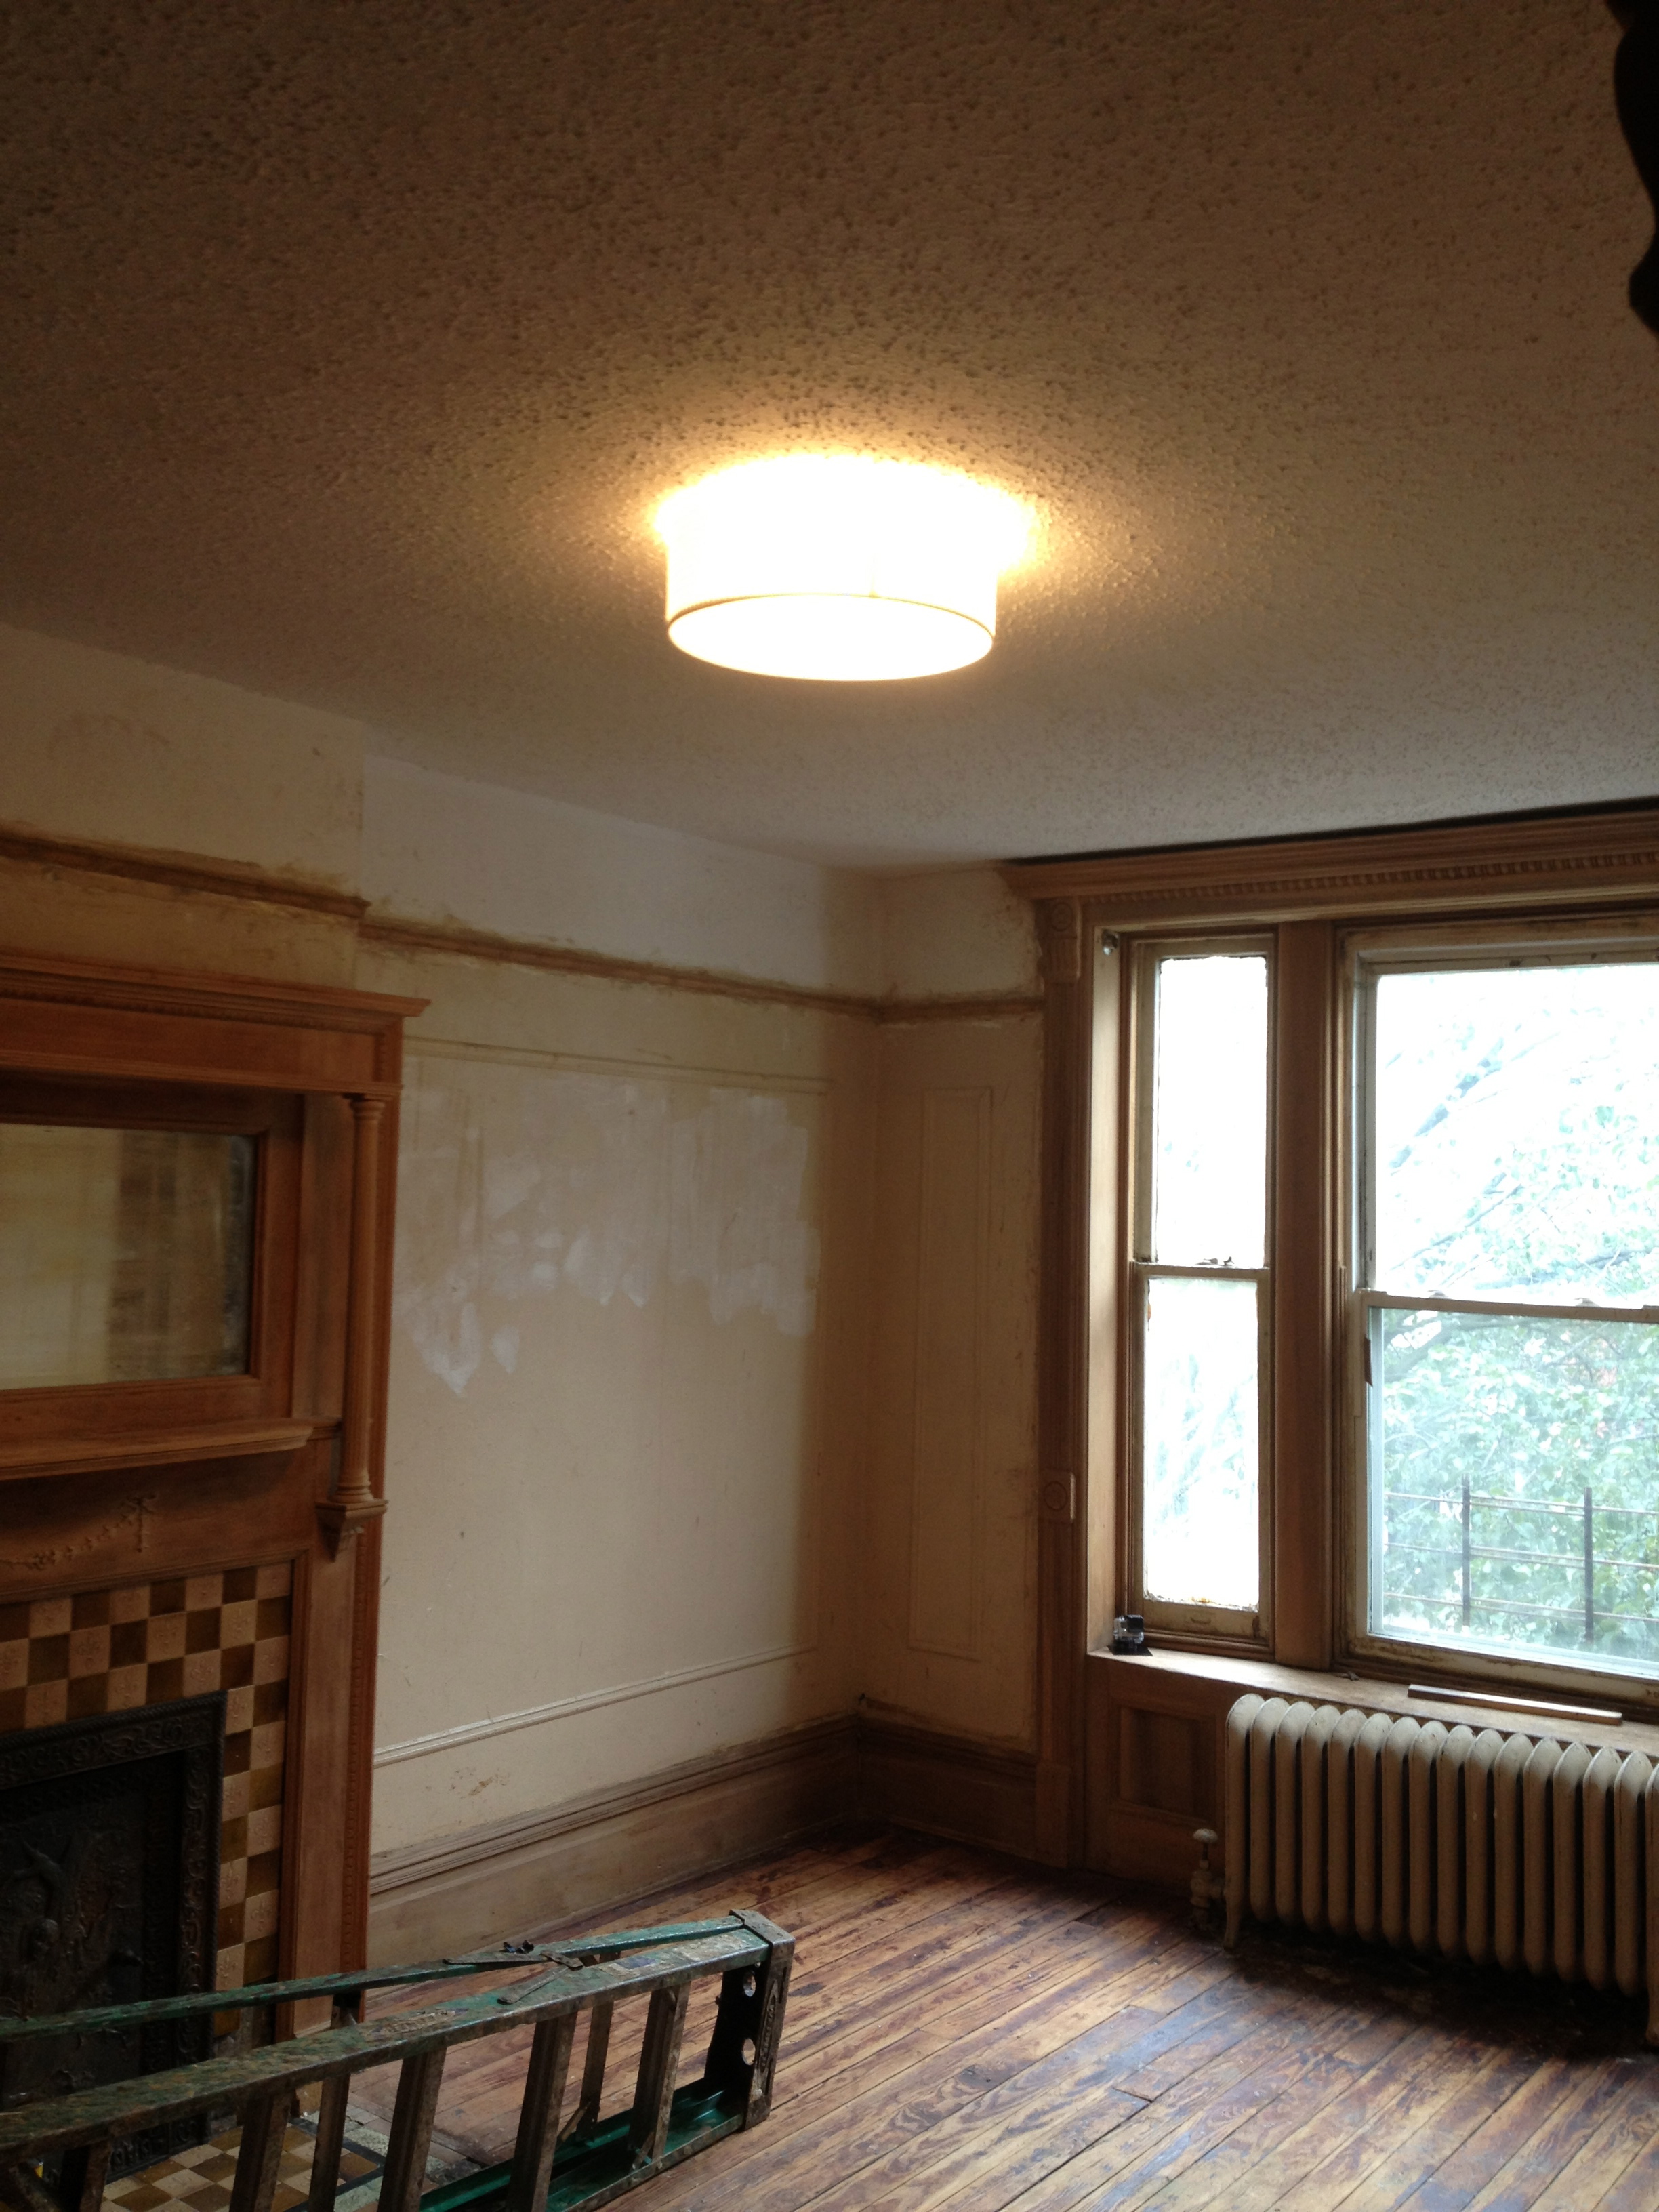
Next up came the upstairs bathroom. Measuring a whopping 27 square feet, this was the original bathroom on the top floor, however the only original thing left in it was the footprint. The tub, sink and toilet, along with flooring and tiles had been replaced over the years. The shower was leaking into the wall and the tiles around the tub were about to fall off.

The before. Note the two shower heads, because the one on the left was leaking into the walls.

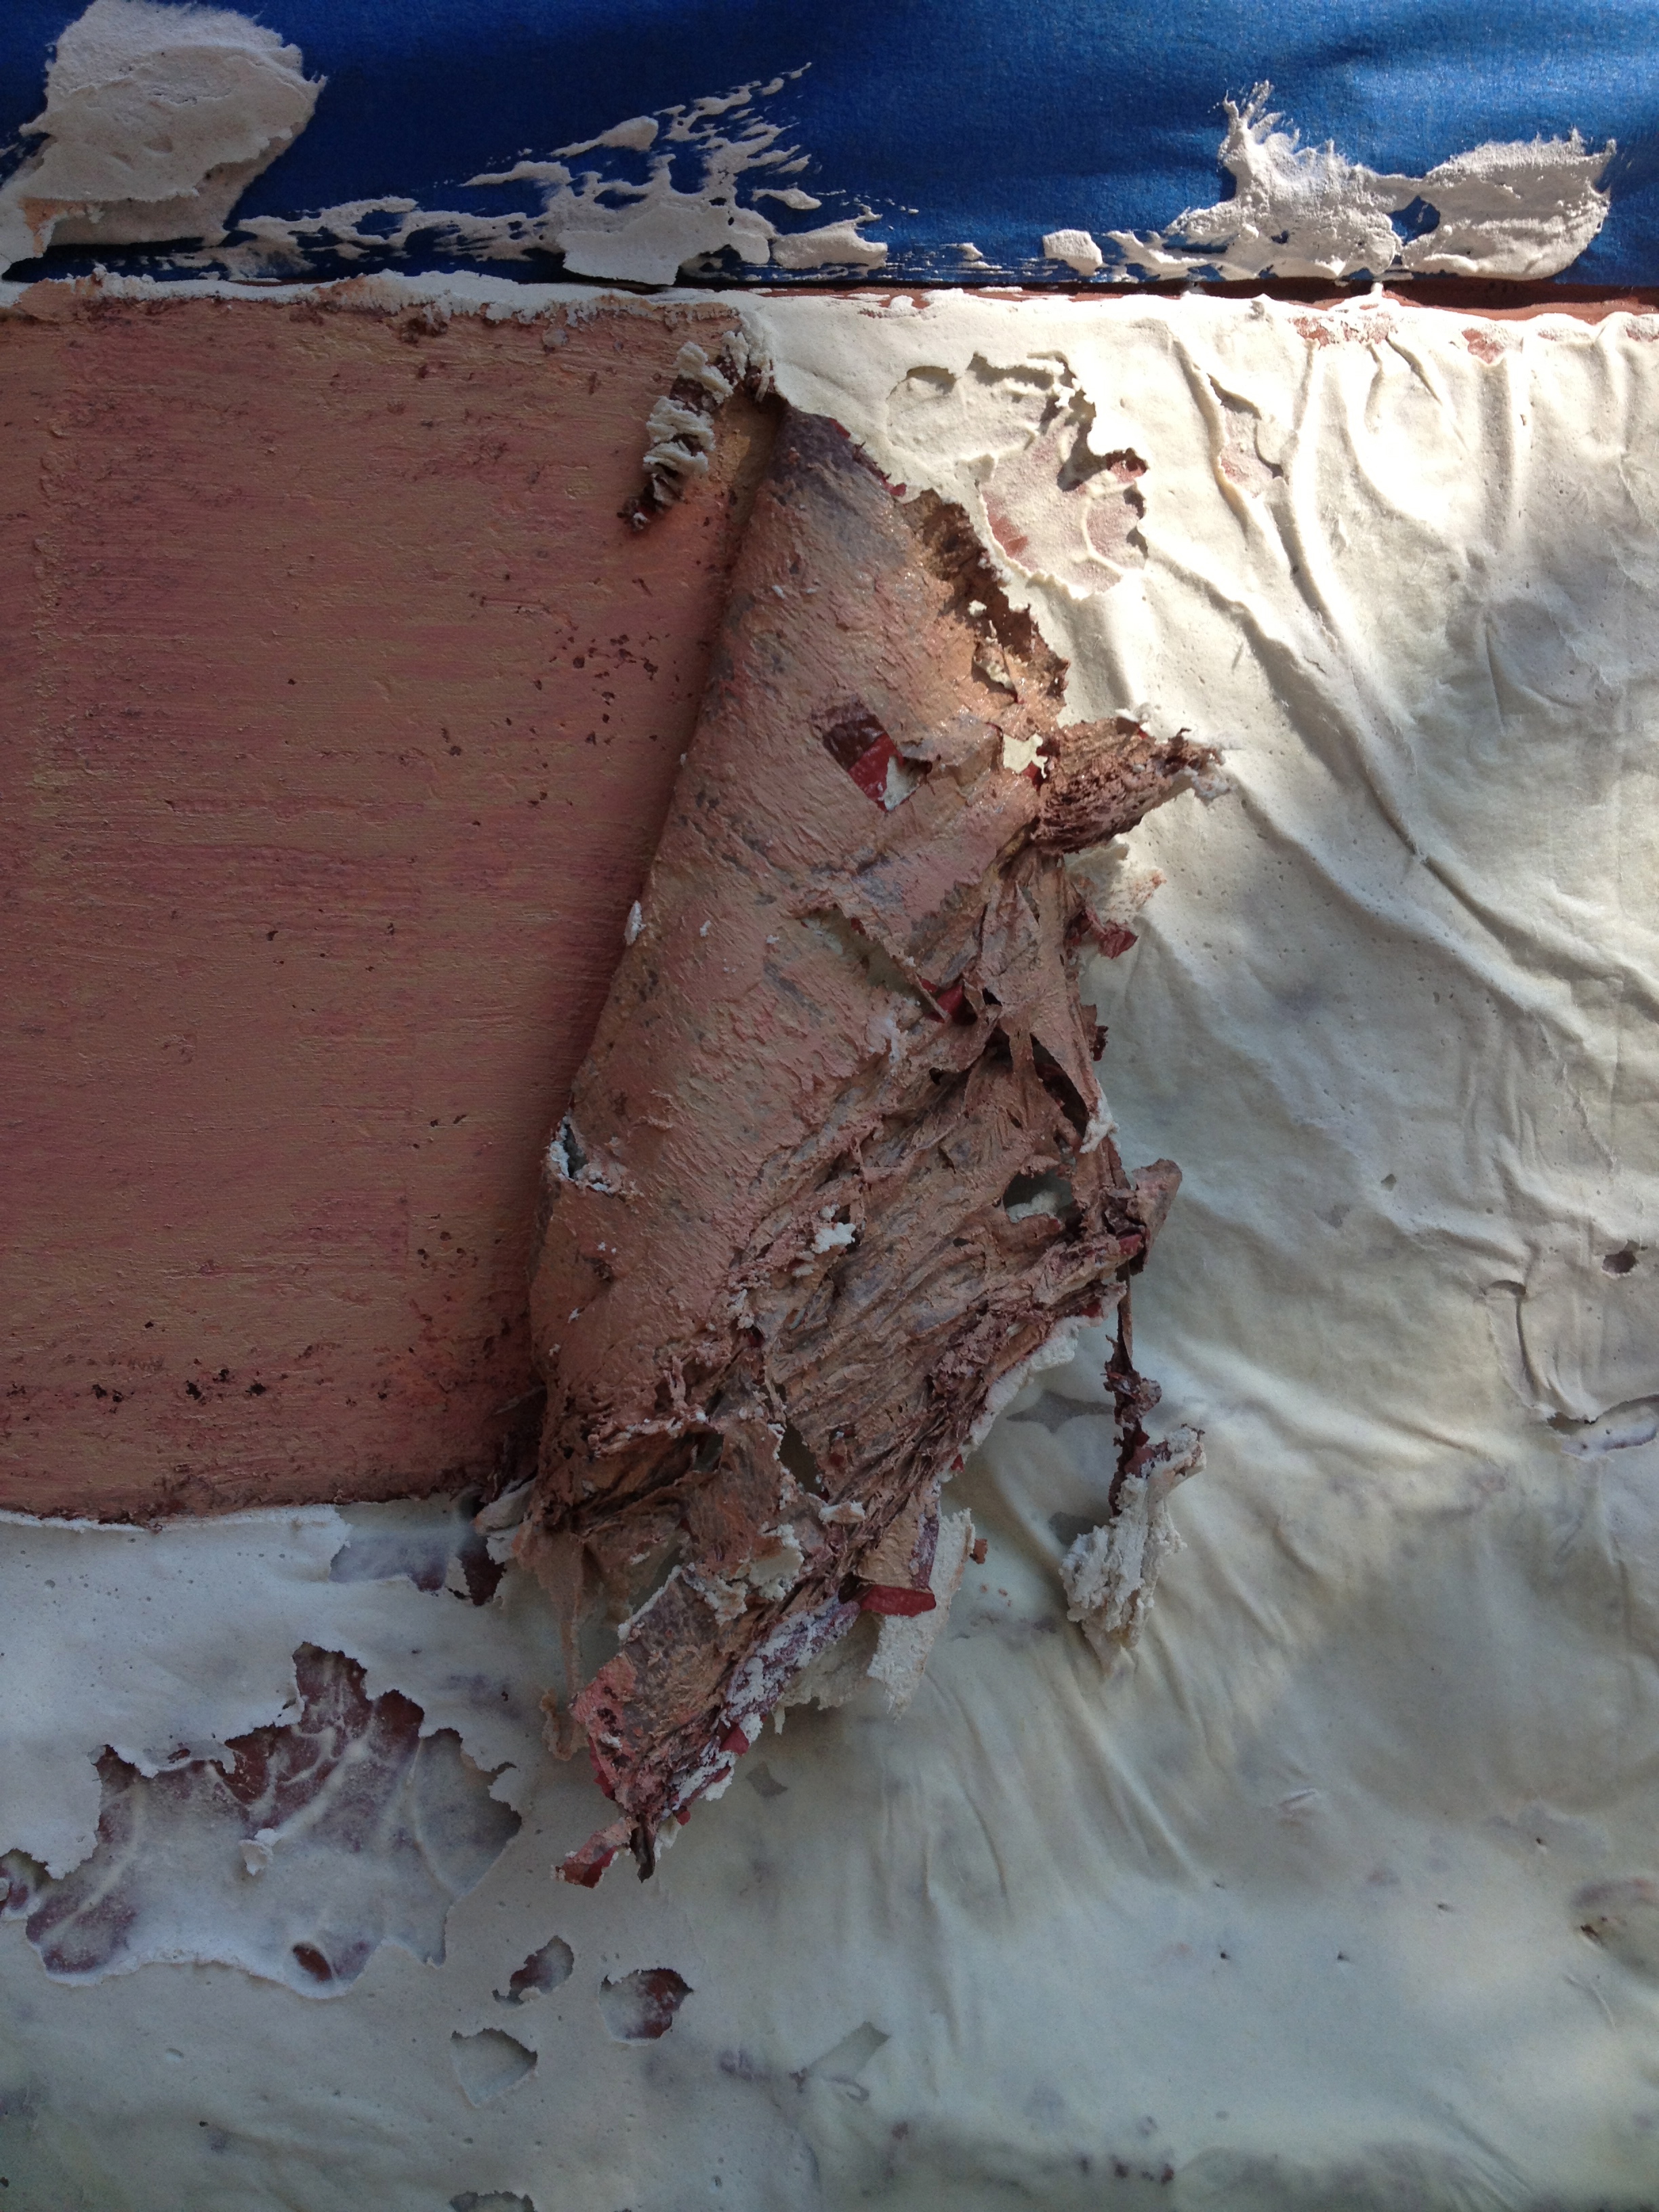
The space was gutted to the brick on the shower side. We salvaged as much of the plaster on the other side as possible New plumbing lines are run and proper waterproofing was done.

It always looks worse before it starts looking better.

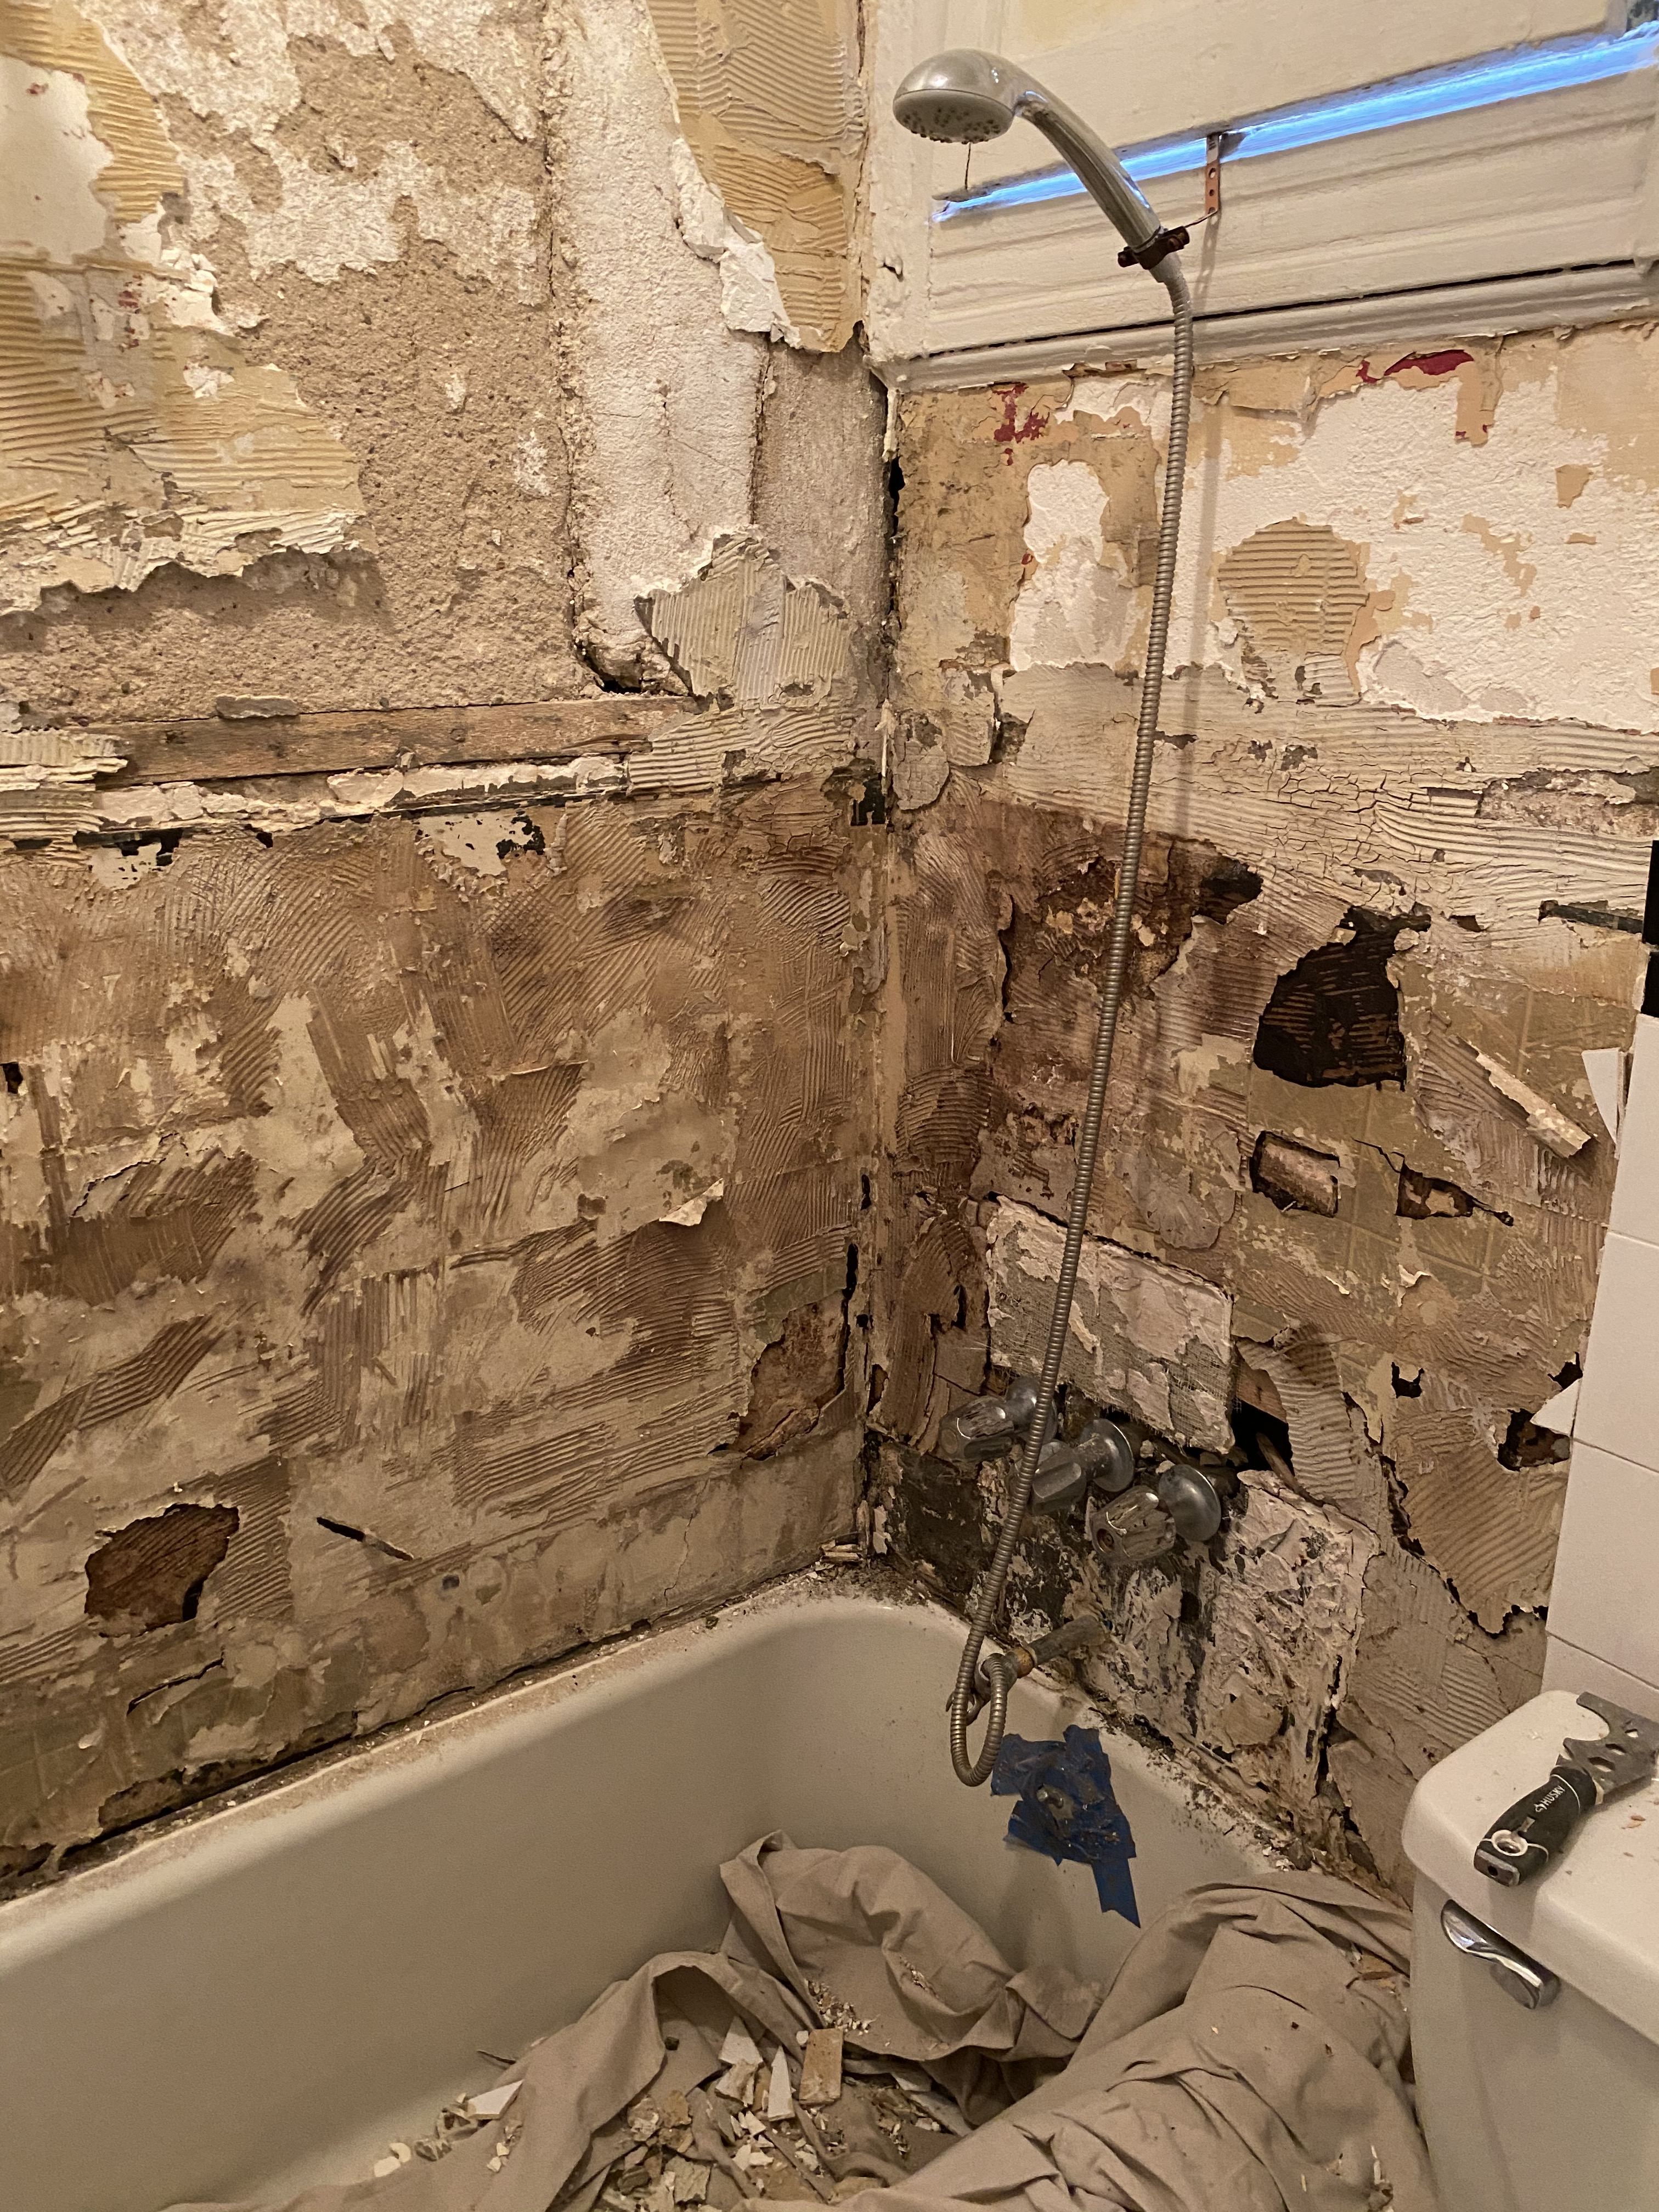
We chose to go with a simple classic subway tile on the tub wall. We stripped what felt like 10,000 layers of paint from the window trim and we restored the original window.

Getting there…

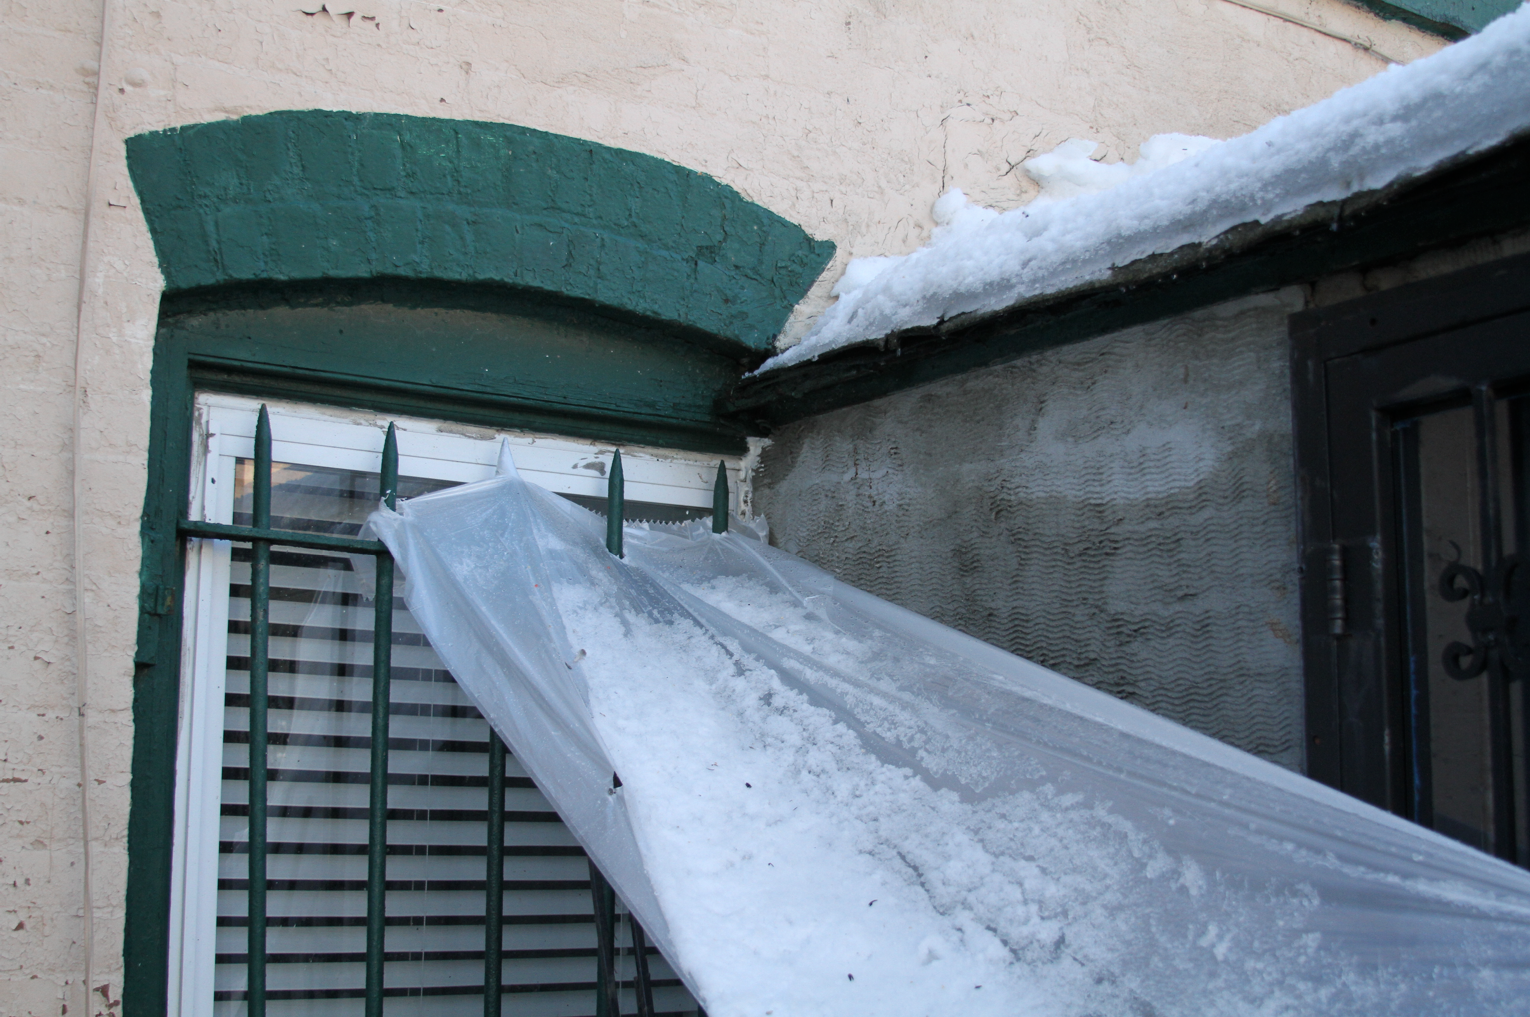
Next up, the air shaft. This small and utilitarian feature of the house dates back to when new building regulations relating to air circulation were put in place in the late 1800s. Sure we no longer believe in “the vapors” or the “miasmas” yet proper air circulation was quite the contemporary topic for 2020. In here we stabilized the plaster an added some waterproofing (just in case).

Yes this is inside our house and yes, it’s super creepy.
Looking down from the third floor bathroom window..

There was also time for an impromptu trip to the Catskills to pick up an old toilet from Max at Shadowcrest1901 which may or may not have been the toilet used by Mr. Fleischmann of Fleischmann’s yeast (another on-point 2020 reference).

So yeah. Not a whirlwind of activity, but a few things here and there did get done.

Onwards to 2021, which I hope sucks a little less (and be productive a lot more).

Kitchen Floor Band Aid

Our 1895-ish brownstone was originally designed as a 2-family house.  The rental apartment was on the top floor, with an owner’s duplex occupying the garden and parlor floors. But you knew that already.

This arrangement has always seemed weird to me, because it means that the most ornate floor of the house, the parlor with it’s fancy-ish entrance, is mostly closed-off. When we bought our house, after more than a decade of having upstairs neighbors (and all the fun that goes along with that – water leaks, office chair derby, loud children), we decided it was enough. We set up our house as an owner’s duplex over a garden rental. This means we get to use our fancy-ish entry way, but in return we also have the very small top floor rental kitchen, as the original owner’s duplex kitchens in brownstones were always on the back of the garden level.

Some day when we win the lottery save enough money, we will move the kitchen to the parlor level and create the 1920s kitchen of my dreams. Until then, we make do with tight cooking quarters. How tight of cooking quarters, you may ask? Tight enough that the fridge is in a separate room.

Continue reading

The tyranny of water in its many forms

Fun fact: snow is made of water. Snow melts and turns into water. Water will follow the path of least resistance and end up in the basement. Given its liquid slinky-ness, water flows a lot faster than you’d expect.

Last night, as I was feeling pretty accomplished for asking the Hubs to check on the wonky dehumidifier in the basement. I thought “way to go! We’ll get ahead of all this humidity and make sure the basement is not damp. Yey me, the responsible homeowner.” Without a care in the world, I amused myself by taking the stupid Buzzfeed quiz on what profession should I have, or what Muppet character I should be (CEO, Animal). Hubs is in the basement a looooong time, and eventually resurfaces in a huff. Water is pouring in through the hatch. A lot of water, he says. Our basement is notoriously damp (hence the dehumidifier), but the look on his face makes it clear that this is worse. Much worse.

I immediately think it’s my pseudo snow moat in the front yard. I piled the snow pretty high on top of the coal chute. I thought it was fun. Stupid me, the silly and immature homeowner.

IMG_2093

My moat just needed some water and a drawbridge

Turns out the problem was with the rear hatch instead. A lot of water was coming through and it was hard to tell exactly where, because (of course) this happened around 10 pm. Down the fire escape we go with flashlights and shovels. Did I mention it was raining?

The culprit was a frozen downspout, actually  THE frozen downspout since there is only one for the whole roof. Why? Because in spite of its beauty, Victorian architecture doesn’t always make sense. Anyway, the rain was melting the snow and the water was finding alternate routes to the ground. It just so happens that the best path was into a puddle at the base of the hatch.

After a lot of shoveling and moving stuff out of the way, we concocted this makeshift gutter to channel the water away from the house.

Tarp gutter

Last night’s McGyver gutter as seen this morning.

It actually worked. The problem was this spot, where water was coming down super close to the foundation and just making an enormous puddle.

tarp gutter 2

Shockingly, this held up with the wind and all the rain. Yey 0.7 mil plastic drop cloth.

I don’t have any photos of the water in the basement, as we were in full crisis mode to make it go away. I think we probably vacuumed up about 1oo gallons or so, maybe more. Of course, the wonky dehumidifier that got us started on this is broken. So happy Valentine’s Day Hubs. Haven’t you always wanted a shiny new dehumidifier?

Living in a construction zone

You bought the perfect house, and so what if it needs a ton of work? You are a hardy person. You have experience buying a less than livable space and making it awesome. You are not afraid of getting dirty completely filthy. You are not a girly girl, and the only reason you keep nail polish remover in the house is to help dissolve adhesive and other construction related substances from your skin, as not to look like a complete hobo when you (finally) leave the house. You totally got this.  You understand the pitfalls and the drawbacks of DIY-ing your way to a fantastic home.  Yet, every now and then reality sets in, and what gets old is not just the never-ending list of projects, but  living amidst the chaos and aforementioned filth that go with fixing up an old house. While regular construction is dirty, an old house is exponentially dirtier – all those decades of dust, pollution, smoke, all just waiting to waft free.

IMG_1441

Exhibit A: dirt

Take our bedroom for example.  It has been un-inhabitable  for about 5 weeks. The professional paint stripping begat the ceiling restoration, which begat the fixing of some minor electrical things, which begat – oh god, where will this end? Over dinner recently,  these words actually came out of my mouth: “Our bedroom is in shambles, and we’ve been forced to take up residence in the rear parlor. And the cats, there are so many cats…”  at which point I realized I’m one six toed cat away from sounding like Little Edie of Grey Gardens.

But onward we push. If the weather holds I think I should be able to finish the stripping of the garden level of the façade. The bedroom now has a functioning light, and the circuitry has been sorted out.  And yes, the beams have been leveled. Photos and details ahead.

Weekend projects by crazy people

A  comment from a neighbor pretty much sums it up: “I always see you here, working. Never partying.  Just working.”

Before

I’m pretty sure the neighbors think I’m absolutely certifiable. Stripping a stone façade is really not a typical DIY project. People usually hire professionals to do that, and methodology aside, I do understand why.  Passers-by provide random words of encouragement, usually punctuated with “that’s a lot of work,” or “this would go a lot faster if you hired someone.” No shit!

This past Sunday over the course of 8 hours, I managed to strip about 18 sq feet of stone. At first glance, seems like a worthy amount, until you realize that it’s really a drop in the bucket. Not accounting for windows and doors, the area of the façade is 558 square feet – give or take.

Some of the paint came off super easy, yet there are patches of stubborn pink that will need a second application of PeelAway. Damn you pink paint!

SlowProgress

The angle of the sun makes it difficult to see any progress. Behold my amazing Photoshop skills! Yellow denotes done-ish. Click to enlarge. 

But wait! There is more!

Because we have two major projects going at the same time (hence the crazy people part) while I scrapped and scrubbed, the hubs worked on leveling the bedroom ceiling beams. The question of the day was “level it to what?” Under normal circumstances, you’d level to gravity: something is either level or it’s not – simple as that. But  nothing is ever as simple as it should be, at least not at our house. As is the case with many old buildings, ours settled over time and the floors are no longer level. The Pink Lady has a noticeable dip towards the center, common to brownstones. It used to drive me crazy and I wanted it gone, but I’m so used to it now I don’t really notice it anymore. Call it charm. Call it being realistic.

The previous fake ceiling was leveled to gravity, making the moldings look super crooked.

Old Ceiling


If we leveled the new ceiling to gravity, then leveled the floors, we would have to open the walls and adjust the all the door openings (2 regular doors and the massive double pocket door), or else the doors wouldn’t close). That just seemed too big of a job in the grand scheme of things.

So reality rears its ugly little head again, and since the dip is normal and is not affecting the structural integrity of the house, we decided to level the ceiling to the floor. By having everything crooked together, it will appear straight. Basically we’ll be mimicking the original ceiling (minus the sag in the middle).  Cooky plan, I know – but it seems like the best option.

After the required number of trips to the hardware store, the uttering of a lot of profanity, and a few beers, we are perhaps a teeny tiny bit closer to being done.

Another day, another project (and a post with terrible photos).

A normal person may look at what projects need to be done and prioritize accordingly. A normal person may look carefully at the options available and make sure not to overburden themselves by taking on more than they can handle. A normal person will finish a project before starting a new one.

Well, normal people we are not.

Over labor day weekend, we tore out the bedroom ceiling. A cheap patch job of installing a false dry wall ceiling (and covering it with popcorn) robbed the room of its original height – plus it left us wondering what lurked above it.

Old Ceiling

This is how it used to be (pardon the cell phone photos, but in possibly what was the only case of good judgment here, we did not bring the big camera in with us).

Half gone

Dry wall pulled down, you can see the old ceiling through the 2x4s

Turns out the damaged original ceiling was still up there, minus a big chunk of plaster right in the middle. It was severely bowed towards the center of the room, which is probably why the plaster fell off. There were signs of water damage. Fun!

Just a little bit of plaster missing...

Just a little bit of plaster missing… And seriously – what’s up with all the popcorn?

After we removed both ceilings and the original lath, we discovered that the support structure  was compromised: the strips of wood attaching the ceiling to the roof had come lose over the years.

lath

Presented without comment

Open ceiling

Open ceiling, cockloft above.

With the ceiling gone, we had a good look at the space above – more like a crawl space than an attic, it’s called a cock loft (and yes, because I’m totally immature I can’t say it without giggling). It’s kinda interesting to see the structure from above: the sky lights, some strange built-in alcoves. The filth up there is indescribable, the dirt is nearly impossible to wash off the skin. I suppose that’s what 120 years of dust, coal, cigarette smoke, and old fart residue looks like. Absolutely gross.

Dirt

This photo doesn’t fully capture how dirty we were. And by the way, the Facetime camera on the iPhone is absolutely awful!

The space is now ready to be re-built. We saved a piece of the ceiling molding so that we can restore it in the new ceiling. Sadly, most of it was gone so we’ll have to rebuild from scratch.

Moulding chunk

It was a total bummer to have to remove the moulding, but most of it was already gone. What was left did put up a good fight. We will use this chunk as a template for the restoration.

Since all the prep work has been done, you’d think we’d finish it off quickly. That is where you’d be wrong. This past weekend was dedicated to working on the stoop railing and doing a test stripping of the brownstone. Why? Well, winter is coming and it needs to be done. The stoop has been the Hubs pet project during the summer. Amidst finishing grad school, the crazy rains of June and the sweltering temps of July, progress has been slow. Happy to report one whole side has been stripped and coated with primer.

As for the masonry, we’re having a hard time finding someone who will strip/repair the brownstone the in the way we feel it should be done.   So I decided to do some tests and see if I could do it myself.

Cue stripping test #1: Some PeelAway 1, a bit of time, some water and some citric acid later – voila! Brownstone without paint.

IMG_1454

Step 1: apply layer of PeelAway that is at least 1/8 of an inch think. Kinda like frosting a warm cake. Got a bit melt-y…

IMG_1456

Step 2: Cover with the nifty paper provided. And wait.

IMG_1462

Step 3: remove the goop and wash. And wash. And wash. Then spritz some citric acid and wash again.

IMG_1474

And there you have it: stone (mostly) free of paint.

My biggest problem is that I’m super afraid of heights and I have no idea how I’ll get to the second and third floors….

The Shower of Sadness

Wednesday was our first night at the house with most of our stuff. Some last minute things are still not finished and the shower in our micro-bathroom (more on this amazing architectural marvel in a later post) had not yet been dealt with.

The next morning, I scrambled around for a towel (settling for a retired bath towel now used for cleaning) and went on to use the shower. I turned on the hot water and waited. And  waited. And then realized it was as hot as it was going to get. I turned on the shower and figured the trickle of warm water was going to have to do.

This morning, back to the shower of sadness I went; the location of the box of towels still unknown. The new shower head was a reprieve from the trickle of the old one, but I guess it doesn’t much matter when there really isn’t enough hot water to wash off the soap.

I’ve been working crazy long hours on a project and been coming home feeling like a drunk zombie. Two more weeks and the project will be over and I will have all the time in the world to hunt down some towels and give the boiler a good stern talking to.