Forgive me, Gods of Carpentry, for I have sinned I am sinning.
I am painting woodwork.
(Gasp!) Continue reading
Forgive me, Gods of Carpentry, for I have sinned I am sinning.
I am painting woodwork.
(Gasp!) Continue reading
Choosing paint colors was never hard – “was” being the operative word here. Ever since we became the owners care-takers of the Pink Lady, I have been struck with what I call Paint Paralysis. Maybe it’s because we’re spending so much time removing all vestiges of questionable paint choices of the past (all manner of pink, blue and, of course, Muppet Flesh). I’ve been mulling over paint colors for almost 3 years, and I haven’t really decided. First I thought I’d jump head first into the gray wagon, but on second thought, that seemed too trendy (although I have used it in the house)
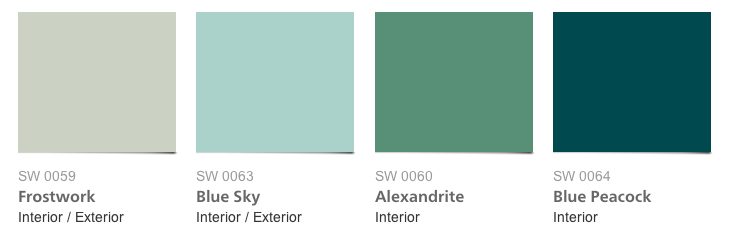
As part of the Style Cure, I must pick a wall color. Needless to say, I’m way behind schedule: I simply can’t decide. My gut keeps veering over to aqua, or what I’d like to call Hospital Green. We used the color in our previous kitchen and I just love it so much. It’s kitsch, it’s wonderful. But do I want it in my dining room? I don’t know.
To help me decide, I looked up Late Victorian Period paint colors. It didn’t help. While the Victorians were into color, they were not necessarily into colors I would put on my walls – and that makes me feel terrible, because our restoration of the Pink Lady aims to honor the historical character of the house.
Upon further poking around, I found a color palate from the Jazz Age, and that one I like quite a bit (perhaps because of this):
Benjamin Moore also has a historical paints palate, but they neglect to properly qualify what period goes with what color.
Retro Renovation has a super useful list of 20th historical pants by manufacturer and The National Trust for Historic Preservation has a collection of Valspar paint colors that cover Georgian, Neoclassical, Southwestern and Victorian colors.
The more I research, the more I realize that I don’t see eye to eye with my beloved Victorians when it comes to wall color. I’m going to have to jump ahead a few decades to the Jazz Age. And since the Pink Lady certainly lived through the roaring 20s, that’s historical enough for me. Bring on the aqua Blue Sky SW00 63!
Things have been a bit sluggish over the past few months, but a few projects did get crossed off the list. First up: front doors.
The doors are not original, but they are close enough. The previous owner installed these and overall, we’re really happy with them. They are a close match to what the original doors looked like. The problem was the finish – or lack thereof. Our house has southern exposure and it gets quite a bit of morning sun, which was unkind to the varnish.
Here is a before/during shot (of course I forgot to that a proper before photo). Both sides used to look like the one of the left.

Removing the finish (with ZipStrip)
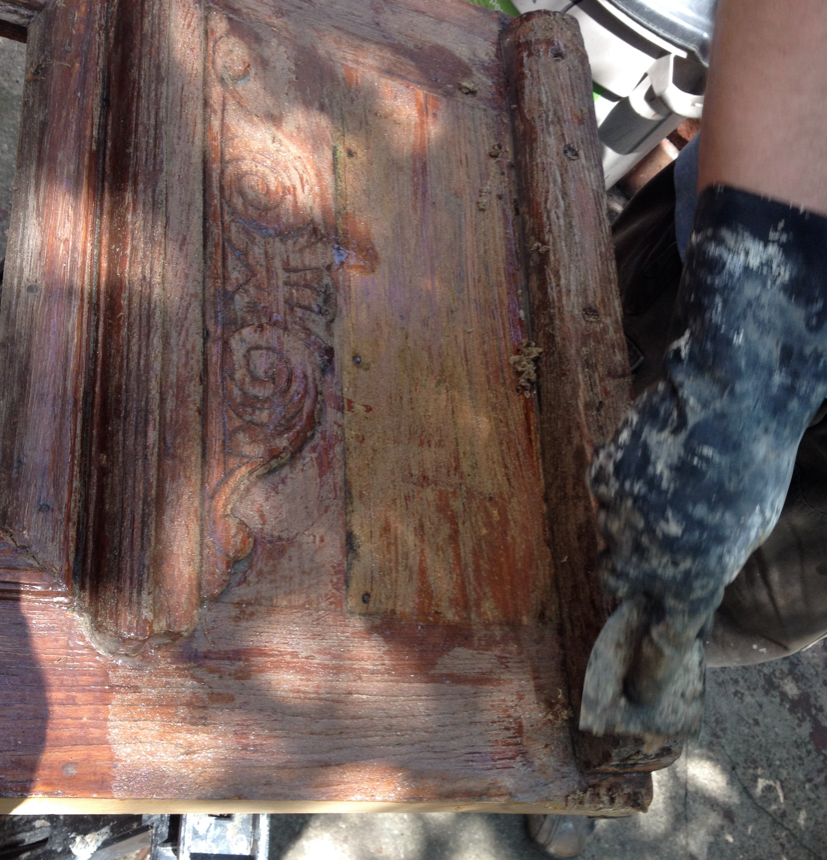
Once free of the varnish (and whatever else coated the door), we gave it a light sanding and filled in some holes with putty.
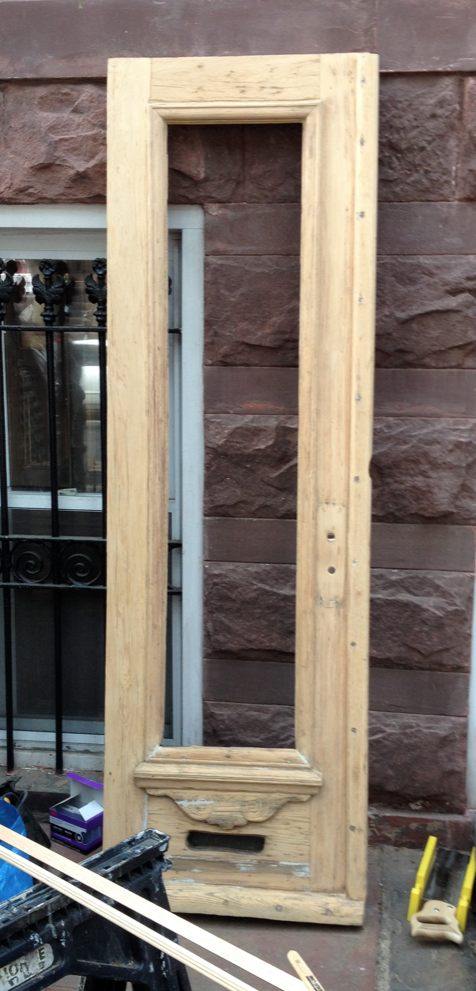
The wood was quite damaged in some spots, and we decided it would be better to paint rather than stain it. We decided on black with just a tad of shine (which is a fun thing to go buy at the Benjamin Moore paint store).
– You just want black?
– Yes.
– We have this new onyx color that has a little bit of gray…
– No thanks. Just black.
Anyway, here is what it looked like with one coat of paint:

And this is what the doors look in place. Of course, we forgot to paint the outside of the trim holding the glass. We also learned that entry door hardware is absurdly expensive (particularly the period appropriate kind I want), so the full makeover of the door will have to wait a little longer. Considering I’ve been slacking on the façade job, pretty sure no one will notice the unpainted trim…

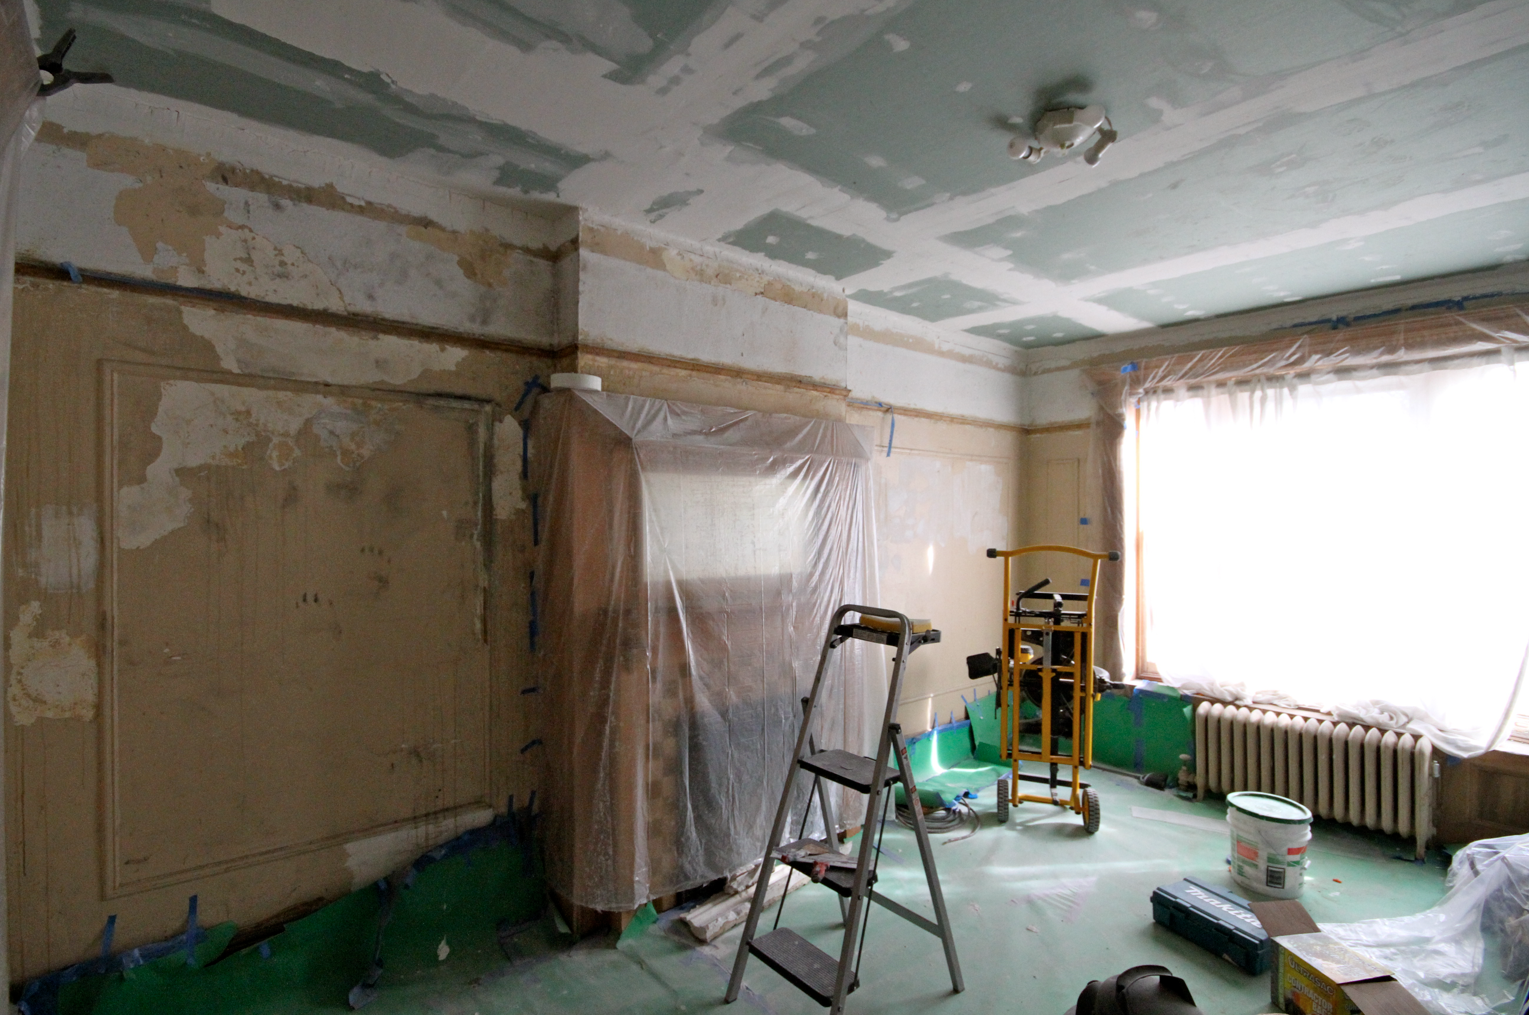
It’s been 147 days since we last occupied our bedroom. It all started back in August, when we treated ourselves to some professional help and had all the woodwork in our bedroom stripped. Our paint-caked walls were a casualty of the ferocious paint removal activity, and the room looked like an alien murder site. What started as 2-week project, has morphed into a monster of a redo – actually, I think it’s more aptly an undo, since we’re trying to undo what has been done to the space over the years and restore it to what it once was.

This is what happens when ZipStrip drips down your walls.

But it’s totally worth it: after a full on chemical assault, details like this appeared.
Since the room was already an empty hot mess, we decided to tackle the ceiling next, and a bigger mess was made. (Never underestimate the filth that hides in a 120 year old house. Nothing can prepare you for that). Because the plaster was beyond saving, everything came down to the bare joists. The ceiling was leveled and dry wall went up. (I intensely dislike dry wall, but that’s fodder for another post). Once the ceilings were closed up and the first layer of joint compound was applied, we hit a bit of a morose patch and not much happened. Didly squat. Zilch. Nada. We camped out in the rear parlor and our lovely victorian home now resembles a very messy dorm room.
Things finally got back on track this weekend, when we tackled the walls and started removing all the evidence that an extra terrestrial being was slayed here. The advice we were given was to skim coat the walls, which basically means applying a thin layer of joint compound over the entire wall. I didn’t much like that idea, because just knowing all of this grossness would forever live beneath our pretty walls really bothered me.
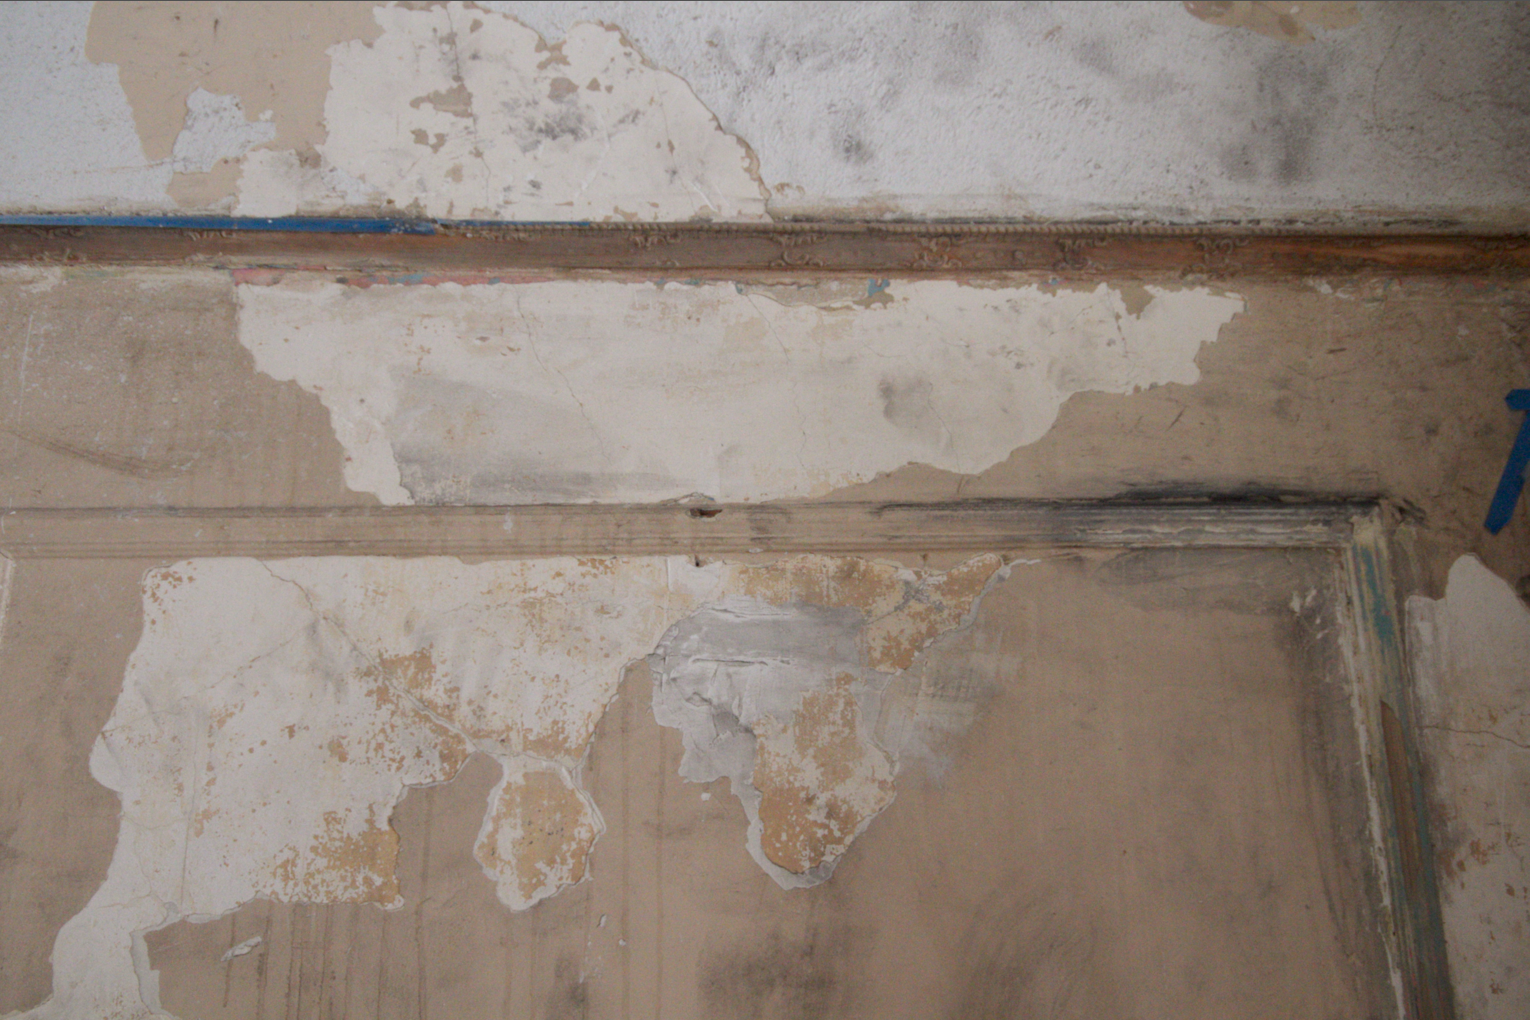
Damaged plaster, filth from the ceiling demo, and splotches of paint stripper.
The hot mess in all of its glory.
Since my experience with removing paint from the brownstone façade was pretty straight forward, we figured it would be a total cake walk to strip the walls back to the plaster. Our old friend PeelAlway1 was called back into service. Ignoring all advice to work in manageable chunks, and still under the delusion that this would be easy, we decided to tackle one whole side of the room.
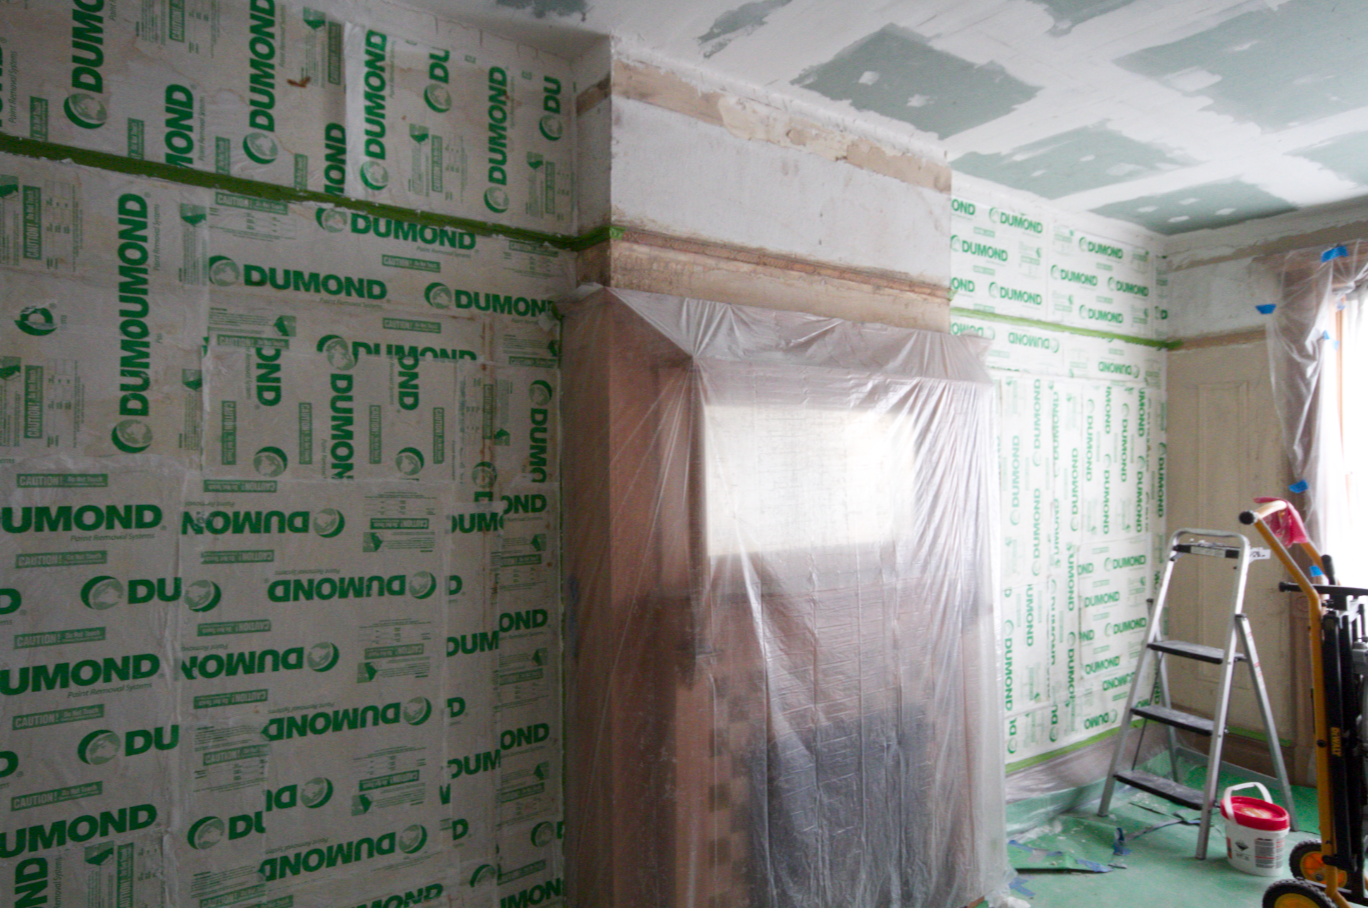
This is what more or less 4 gallons of paint stripper look like.
In a sign of uncharacteristic restraint, I decided that perhaps we should save that little sliver of wall above the fireplace for another time. About 18 hours later, it was time for this:

A glimmer of plaster somewhere back there
A previous resident of our home must have been a pink enthusiast: the house is pink on the outside, and at one point, it was pink on the inside too. Removing the paint from the interior walls proved to be much more difficult than I originally thought. Given the smooth surface of the wall, the paint will not let go without a fight. And fight we did. After about a half day worth of scraping, brushing and picking, most of the paint is gone. We’ll need another spot treatment for the stubborn patches and the wall trim. 3 guesses as to what we’ll be doing next weekend…

Stubborn paint and cracks galore
When it comes to the master plan of our house, I pretty much know what I want – right down to the bathroom tile and the refrigerator in our yet to be built kitchen. These are part of bigger projects that are somewhat off in the future. But there are small projects all around our home that could make a huge difference in our day-to-day living – as in make it more like living, less like camping. That is where I seem to have decision paralysis.
For example, I could paint the bedroom. It’s currently an awful shade of beige/flesh. It’s depressing. It’s drab. It’s the last thing we see before we go to bed and the first thing we see when we wake up. And yet, I can’t decide what color to paint it over. I’ve had paint chips taped to the wall for a year. And I still can’t decide.
Exhibit A: curled up paint chips from a long time ago.

Our bedroom is currently a hovel. It’s utilitarian, but not pretty. A master bedroom as an oasis? Ha! Not ours.
Exhibit B: Our gross walls.
The walls are cracked and need to be skim coated (I could do that). There is ugly popcorn on the ceiling and moldings (I could remove it – actually started and got about 1/3 done and stopped for some inexplicable reason). It’s really time to just take a deep breath, pick a color and get it done already!
On a side note, why would anyone paint their walls this awful flesh-tone color?
It has been a while since the last post. As with any reno project, sometimes life gets in the way. We’ve been tackling smaller projects that we can start and stop as needed. For example, we’ve been stripping our shutters, which is easy – yet incredibly time consuming. Most of our front windows have shutters, all of which are painted in and caked with many layers of paint and goop. At 8 panels per window x 5 windows, there are a lot of shutters in need of some love…

First we removed the shutters and labeled them so that they can go back in the correct location. They are probably interchangeable, but didn’t want to risk it.


Cue the tools: PeelAway6, Mineral Spirits, Denatured Alcohol and a variety of scrapers, brushes and small metal tools that will help get paint off the small crevasses. And gloves. You’ll need many pairs of gloves, as they quickly get sticky and unusable.

The next step is to apply a generous layer of PeelAway6. I have tried all the other non-toxic products and PeelAway6 seems to work the best. It’s a bit hard to find these days, as Home Depot doesn’t seem to carry it anymore. As the chemicals react with the paint, you’ll see some bubbling. The shutter on the left is almost ready to peel, while the one on the right still has some time to go.

Once the surface is nice and blistered, use a scraping tool to peel off the paint. In this case, there is an almost intact layer of paint below, which will require a second application.

Using the scraping tool and a hard bristle brush with mineral spirits, you’ll eventually get to something like this: the first few layers of paint cleared up, ready for a second application of paint stripper.

Cue the PeelAway6 again:

After three applications of paint stripper, the shutters look like this – it’s one of those “it will get worse before it gets better.” At this stage I find it’s actually more effective to use denatured alcohol to remove the last stubborn bits of paint. For bigger clumps, however, another application of paint stripper may be needed.

The back sides of the shutters (the side that is visible only when the shutters are open, was covered in old varnish. The finish has deteriorated over the years, becoming sticky and splotchy. Luckily, varnish is super easy to remove. Apply a bit of denatured alcohol with an old brush and wipe clean with a rag.

Here is my disclaimer: If you tackle any projects that involve old paint,you have to be aware of lead paint. When in doubt, assume it’s lead paint and don’t anger it – meaning if the paint is in good condition, it’s safe as is and you can just paint over it. You can have paint chips professionally tested to determine whether it’s lead or not. I find that the do-it-yourself kits available at the hardware store are hard to use and the results seem to be inconclusive (at least the ones I tried). You should never ever (ever!) sand anything that contains lead paint, as it’s super bad if it gets airborne. Little bits and flakes of lead paint are also dangerous, particularly to kids.
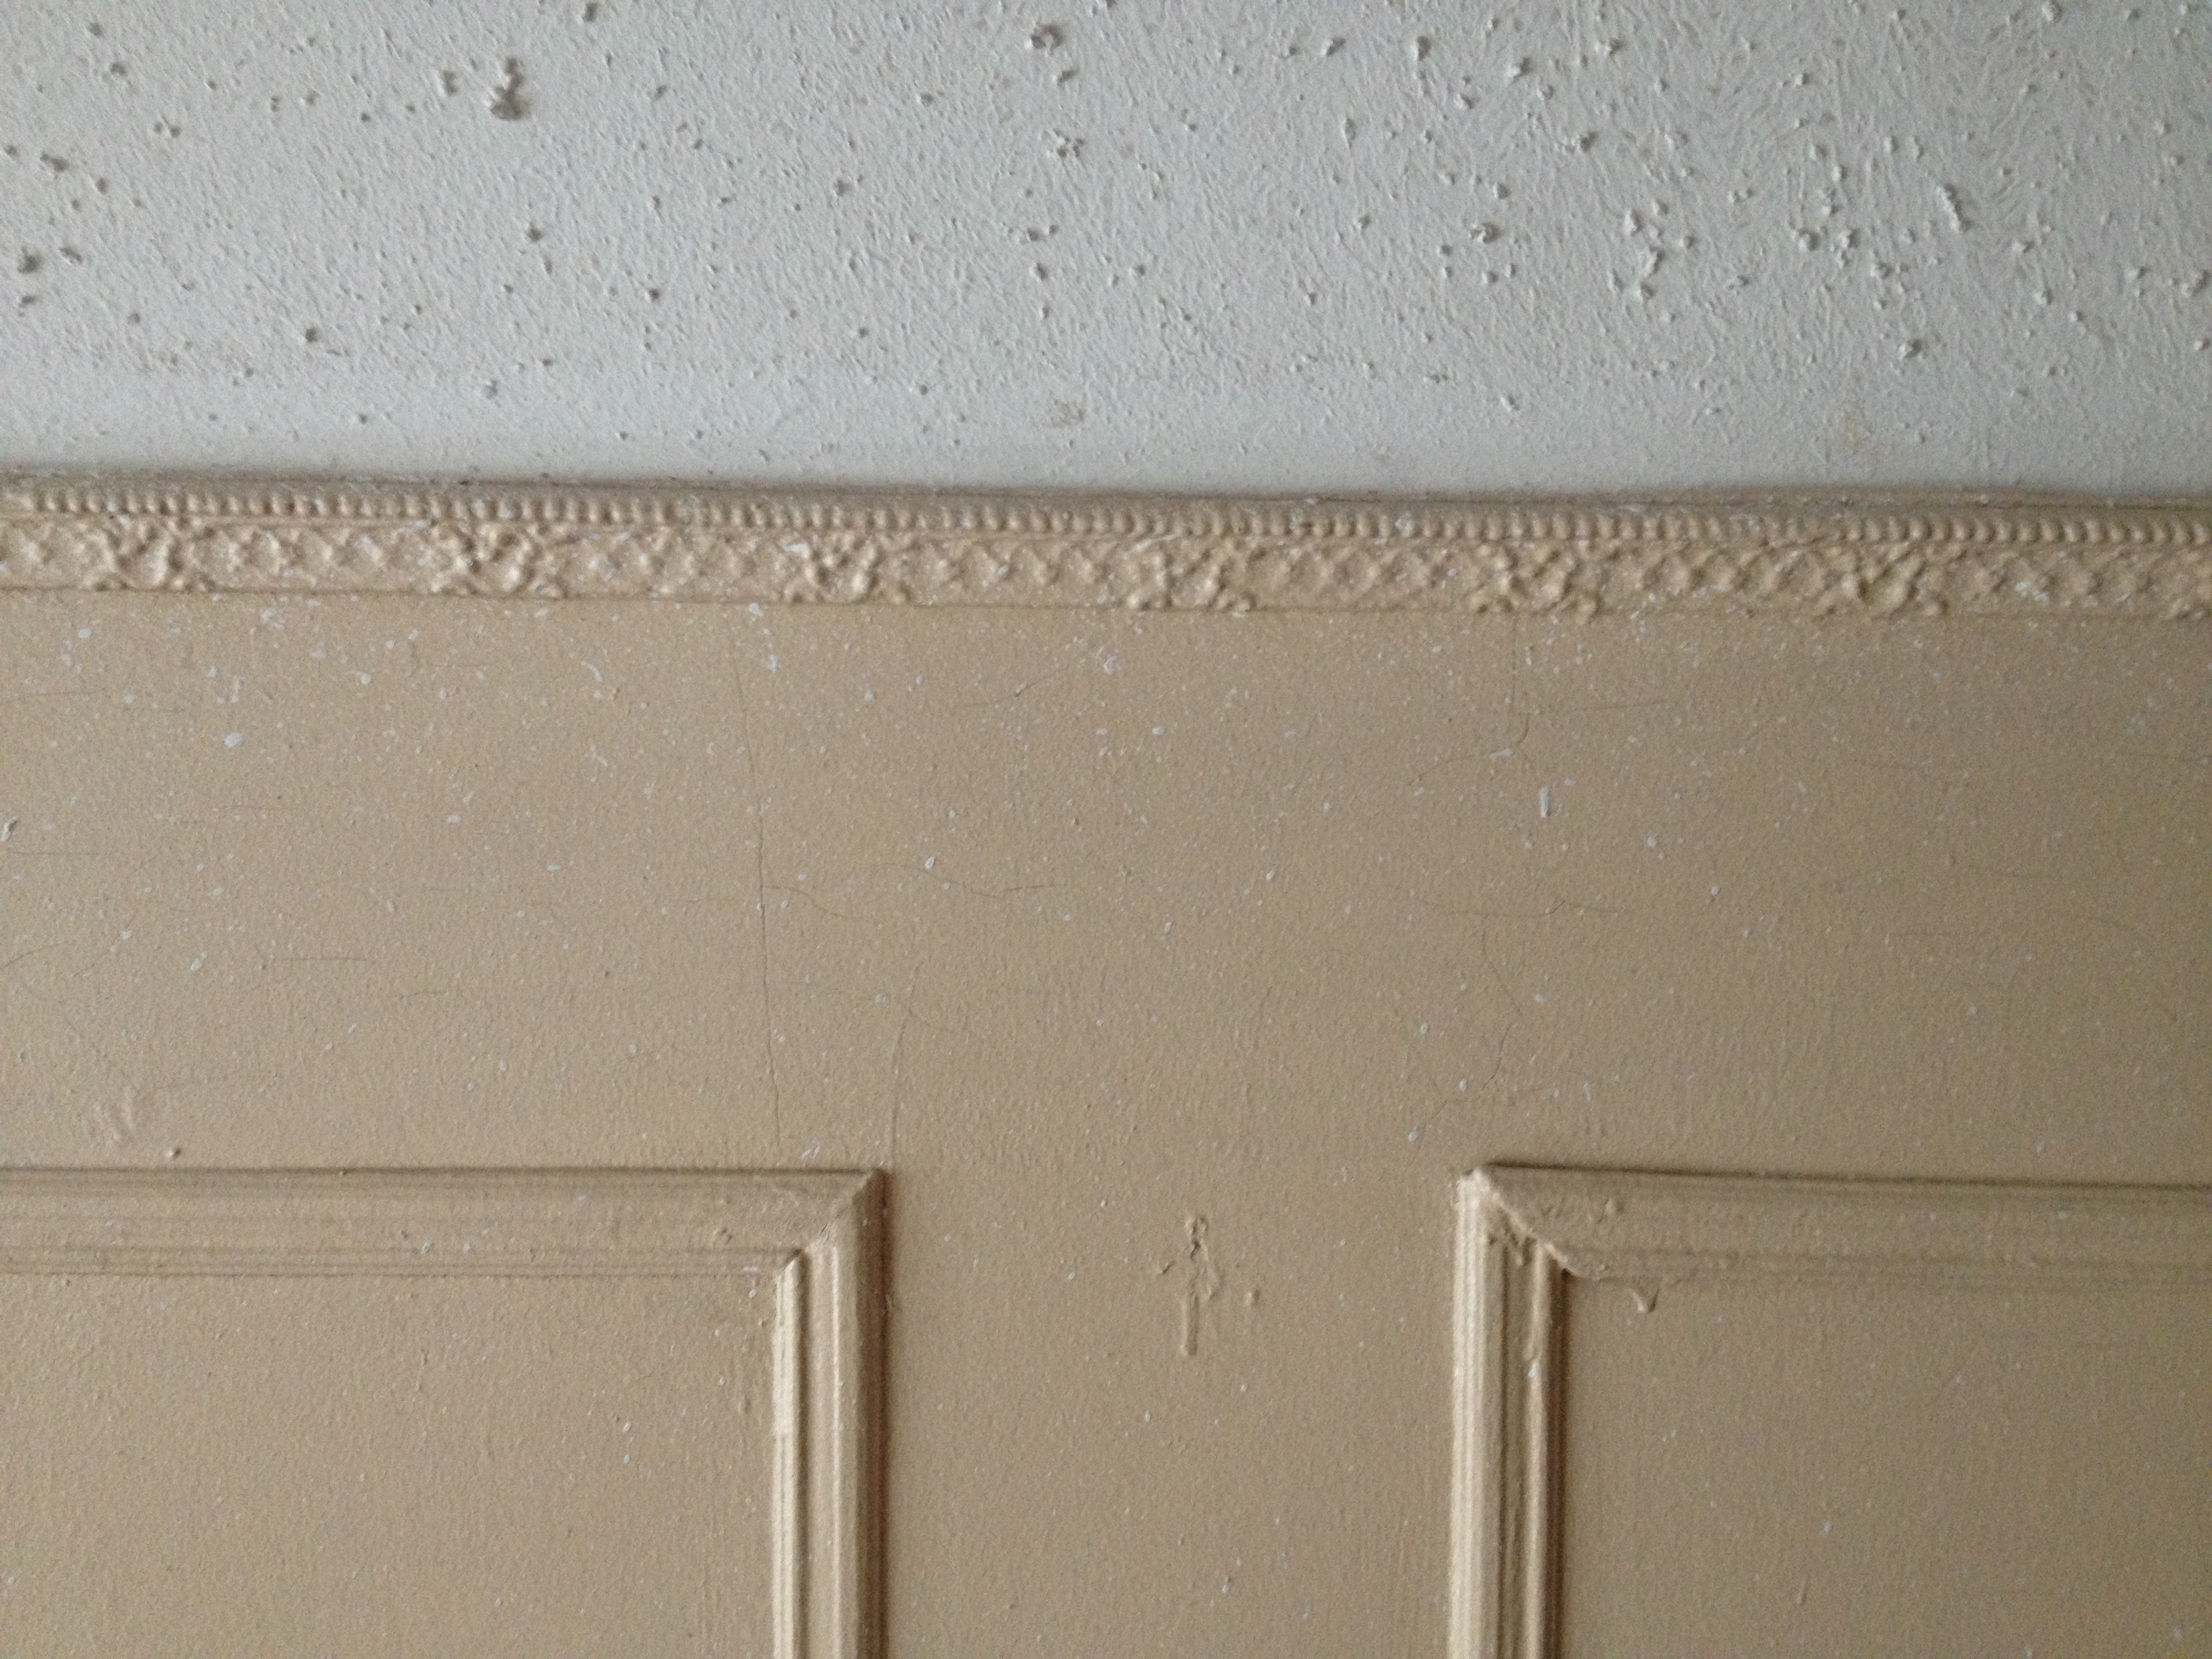
The top floor of our house has a new-ish ceiling. Best we can tell, there was damage to the original plaster that was “fixed” with dry wall. Eventually we’d like to take down the ceiling and restore it back to its original condition. In the mean time, we can live with it as is. What we cannot live with is the popcorn. There is popcorn on the ceilings. On the walls. On the woodwork. It’s a hot mess.
This is what some of the woodwork in our bedroom looks like:

There is similar sloppiness on the walls and on the doors. Our bedroom looks like a cannon of popcorn ceiling exploded – an no one bothered to clean it up. Until now.
Turns out it’s not hard to remove stray popcorn bits. A wet towel helps saturate the dribbles, which turns them into a paste you can just wipe off. It was a lot less messy than I expected.

The biggest challenge has been the heat wave we’ve been having in New York these past weeks, so this is still a work in progress. To ensure we don’t slack off too much, Sir Kitty provides careful work site supervision:

This makes me insanely happy. Giggly even!
Behold all of the paint colors available in Behr paint.

It took me three separate trips to Home Depot to collect every single Behr paint chip. The stack became so tall I could no longer hold it in my hand – and didn’t want to risk stashing it in my purse and it falling out of order. After the wishy-washiness of trying to find the perfect shade of non-commital for our entry hallway, I decided life would way better if I just had all the colors available (not to mention it would be much cheaper, since it’s basically impossible for me to go into a hardware store and not buy anything).
The husband thought this was ridiculous at first. I reminded him that it could be much worse: I could be hoarding diamonds. Since paint chips are free, that was the last he ever spoke of it (and I have seen him eying my stash…)
A side note on paint: as is the case with anything, you get what you pay for. I find that Behr paint does the job better than cheaper brands (Glidden, I’m talking to you), plus it comes in a low VOC formula as well. Colors such as red are a pain in the ass to paint evenly, so buy expensive paint if you’re going in that direction. Because I’m basically lazy, I prefer to be able to buy paint at the hardware store. Maybe someday I will put on my fancy pants and go to the paint store. Until then, Behr will have to do.
My grand plan of a subtle tone-on-tone color palette was a colossal fail.

The Granny Smith White is just too white to play off the bright white starting at the picture molding. I was afraid of going too dark, given the current dark-ish industrial beige currently on the wall.
I’ve been a tad obsessed with the color gray… the actual color – get your mind out of the gutter. We shall not discuss how I ran into Barnes & Noble last week in dire need of a bathroom, only to find an absurdly long line thanks to the massive crows that were there for the 50 Shades of Gray lady. No we shall not mention that at all.

This wall has since been repaired and painted (white), yet not even crappy books can shake my love of gray. I suppose it could be worse… it could be pink!