(except for my laziness to write about it) Continue reading
Progress?
Unfinished projects – a visual guide of procrastination
Starting a project is always fun. The excitement of change, the endless possibilities… which end up simply turning into endless projects. Yep, we have a few of those.
An ode to our pine floors
(this is long).
(I promise I will make a point eventually).
(or not).
As part of the epic never-ending bedroom restoration, it’s time to tackle the floors. Continue reading
T-43
It’s official: we have out-of-town guests arriving in 43 days. That means we have to vacate the rear parlor/guest room and move back into our bedroom.
This is what it looks like right now: Continue reading
Austerity (or the fear of unannounced visitors)
Progress has been slow these days and work happens in fits and bursts. In the 3 years since we’ve taken over care of the Pink Lady, there has been a grad school graduation, a new job, and a miscellany of small events that go along with being an adult (ha!). In other words, life continues to chug along and compete for time with the house projects.
We got to the point where we grew accustomed to the detritus that comes with living through construction: don’t mind that door leaning against the balustrade; pay no attention to that massive tile cutter in the foyer. Oh, those 803 bricks stashed under the stoop? Yeah, we’ll get to them at some point. You accumulate things you have grand plans for, yet never seem to get around to the execution phase. (We are prolific accumulators of architectural salvage. In my mind, that makes it all OK and not crazy. Not at all…)
I’m tired of the piles of stuff everywhere, the stuff we’ll get to eventually, yet never seem to. I’m so tired of being worried one of the neighbors might knock on our door and I may have to invite them in and let them see our utilitarian hovel. I don’t know about you, but I believe that unannounced visitors are the Kryptonite of the DIYer. Anytime we have friends over, there is a at least a half day worth of frenzied cleaning and organizing and just shoving things behind a door we won’t let anyone open (don’t go in there – fumes! the magical word that keeps people away). As we learned, normal people don’t have a 120-year old salvaged sink and marble vanity sitting in their hallway for months. Weird.
All this brings me to the Austerity Measures we have just declared. This year, no big projects will get started. Instead, we’ll focus on finishing what we have already started, then we’ll focus on “quality of life projects,” like finally banishing all traces the Muppet Flesh paint (even if it means painting over it for now), to pulling up the shitty parquet floor in the parlor (the floor has been helping us along by removing itself from the subfloor) and finally accepting the fact that our new kitchen is light years away and might as well spruce up the one with have.
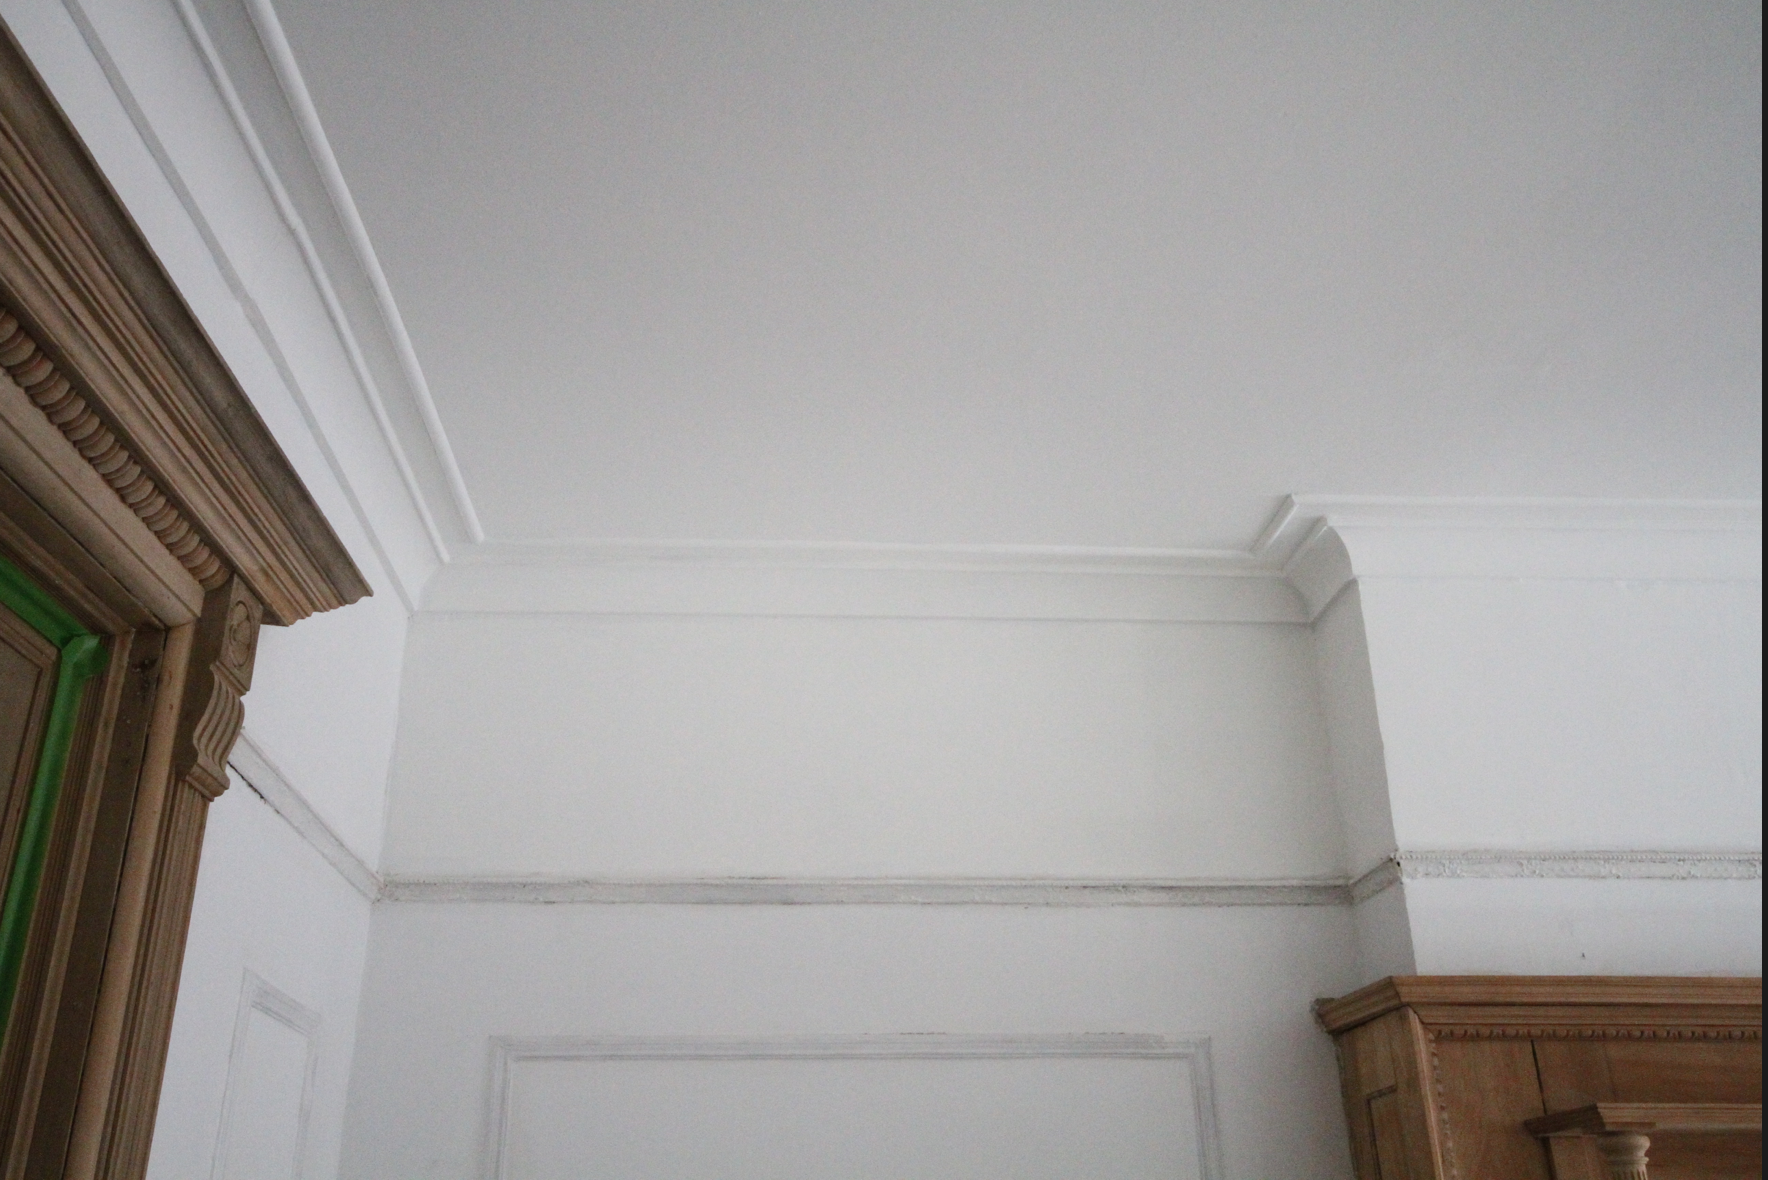
We haven’t been total slackers, though. After redoing the bedroom ceiling and stripping the walls, it’s looking like this (walls have been primed, not painted yet).
Progress has been made
Still working on that picture rail that lost most of its detailing in the stripping process.
If you recall, it used to look like this (shield your eyes, not for the faint of heart):
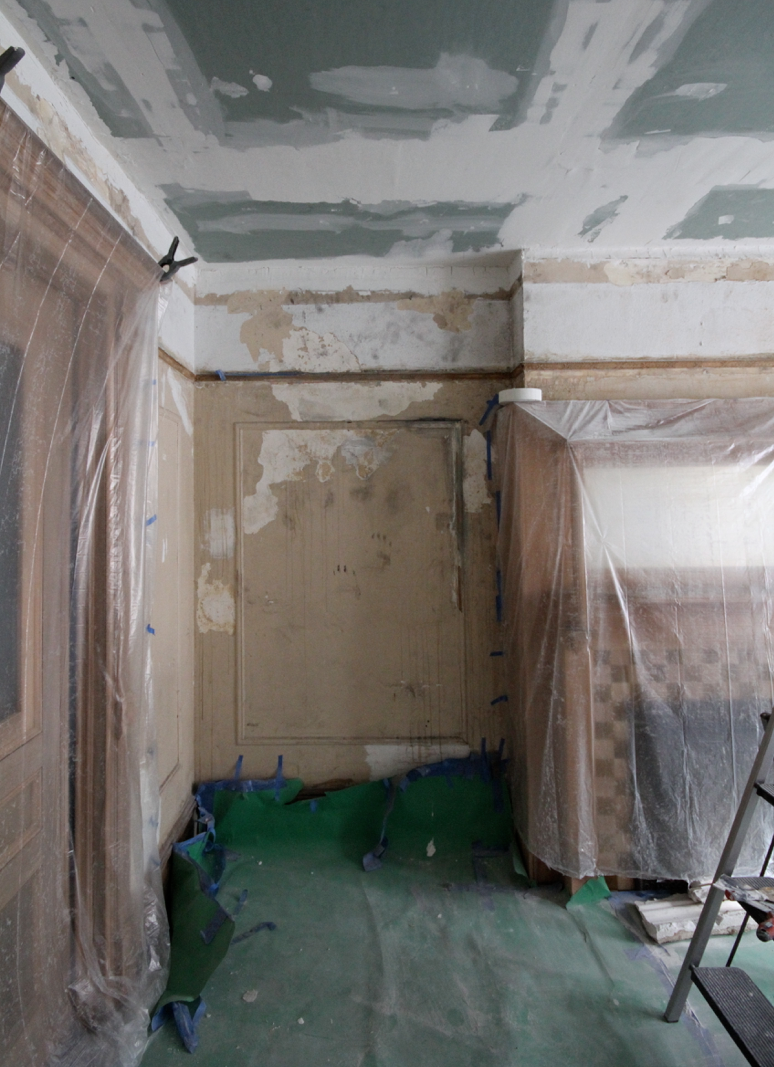
At the point of no return.
Our seam-taping skilsl have improved considerably and I’m happy to report that there are no visible seams, bumps or other unsightly blemished on our new ceiling.
On we go. What are the odds we get to move back into our bedroom before August 3, 2015 (the 2 year anniversary of this project)?
A plan of sorts
We’ve been in the house just under 27 months, at that point where things just drag on. The initial steam wore off and we got used to camping in our home. No oven? No problem, use the toaster oven. No direct access to the back yard? No problem, climb down the fire escape and use a rope and pulley system to lower a picnic basket. Resourceful as it may, the McGyvering is getting old. It would be lovely not to have to step over tools or construction supplies on our way to the bathroom.
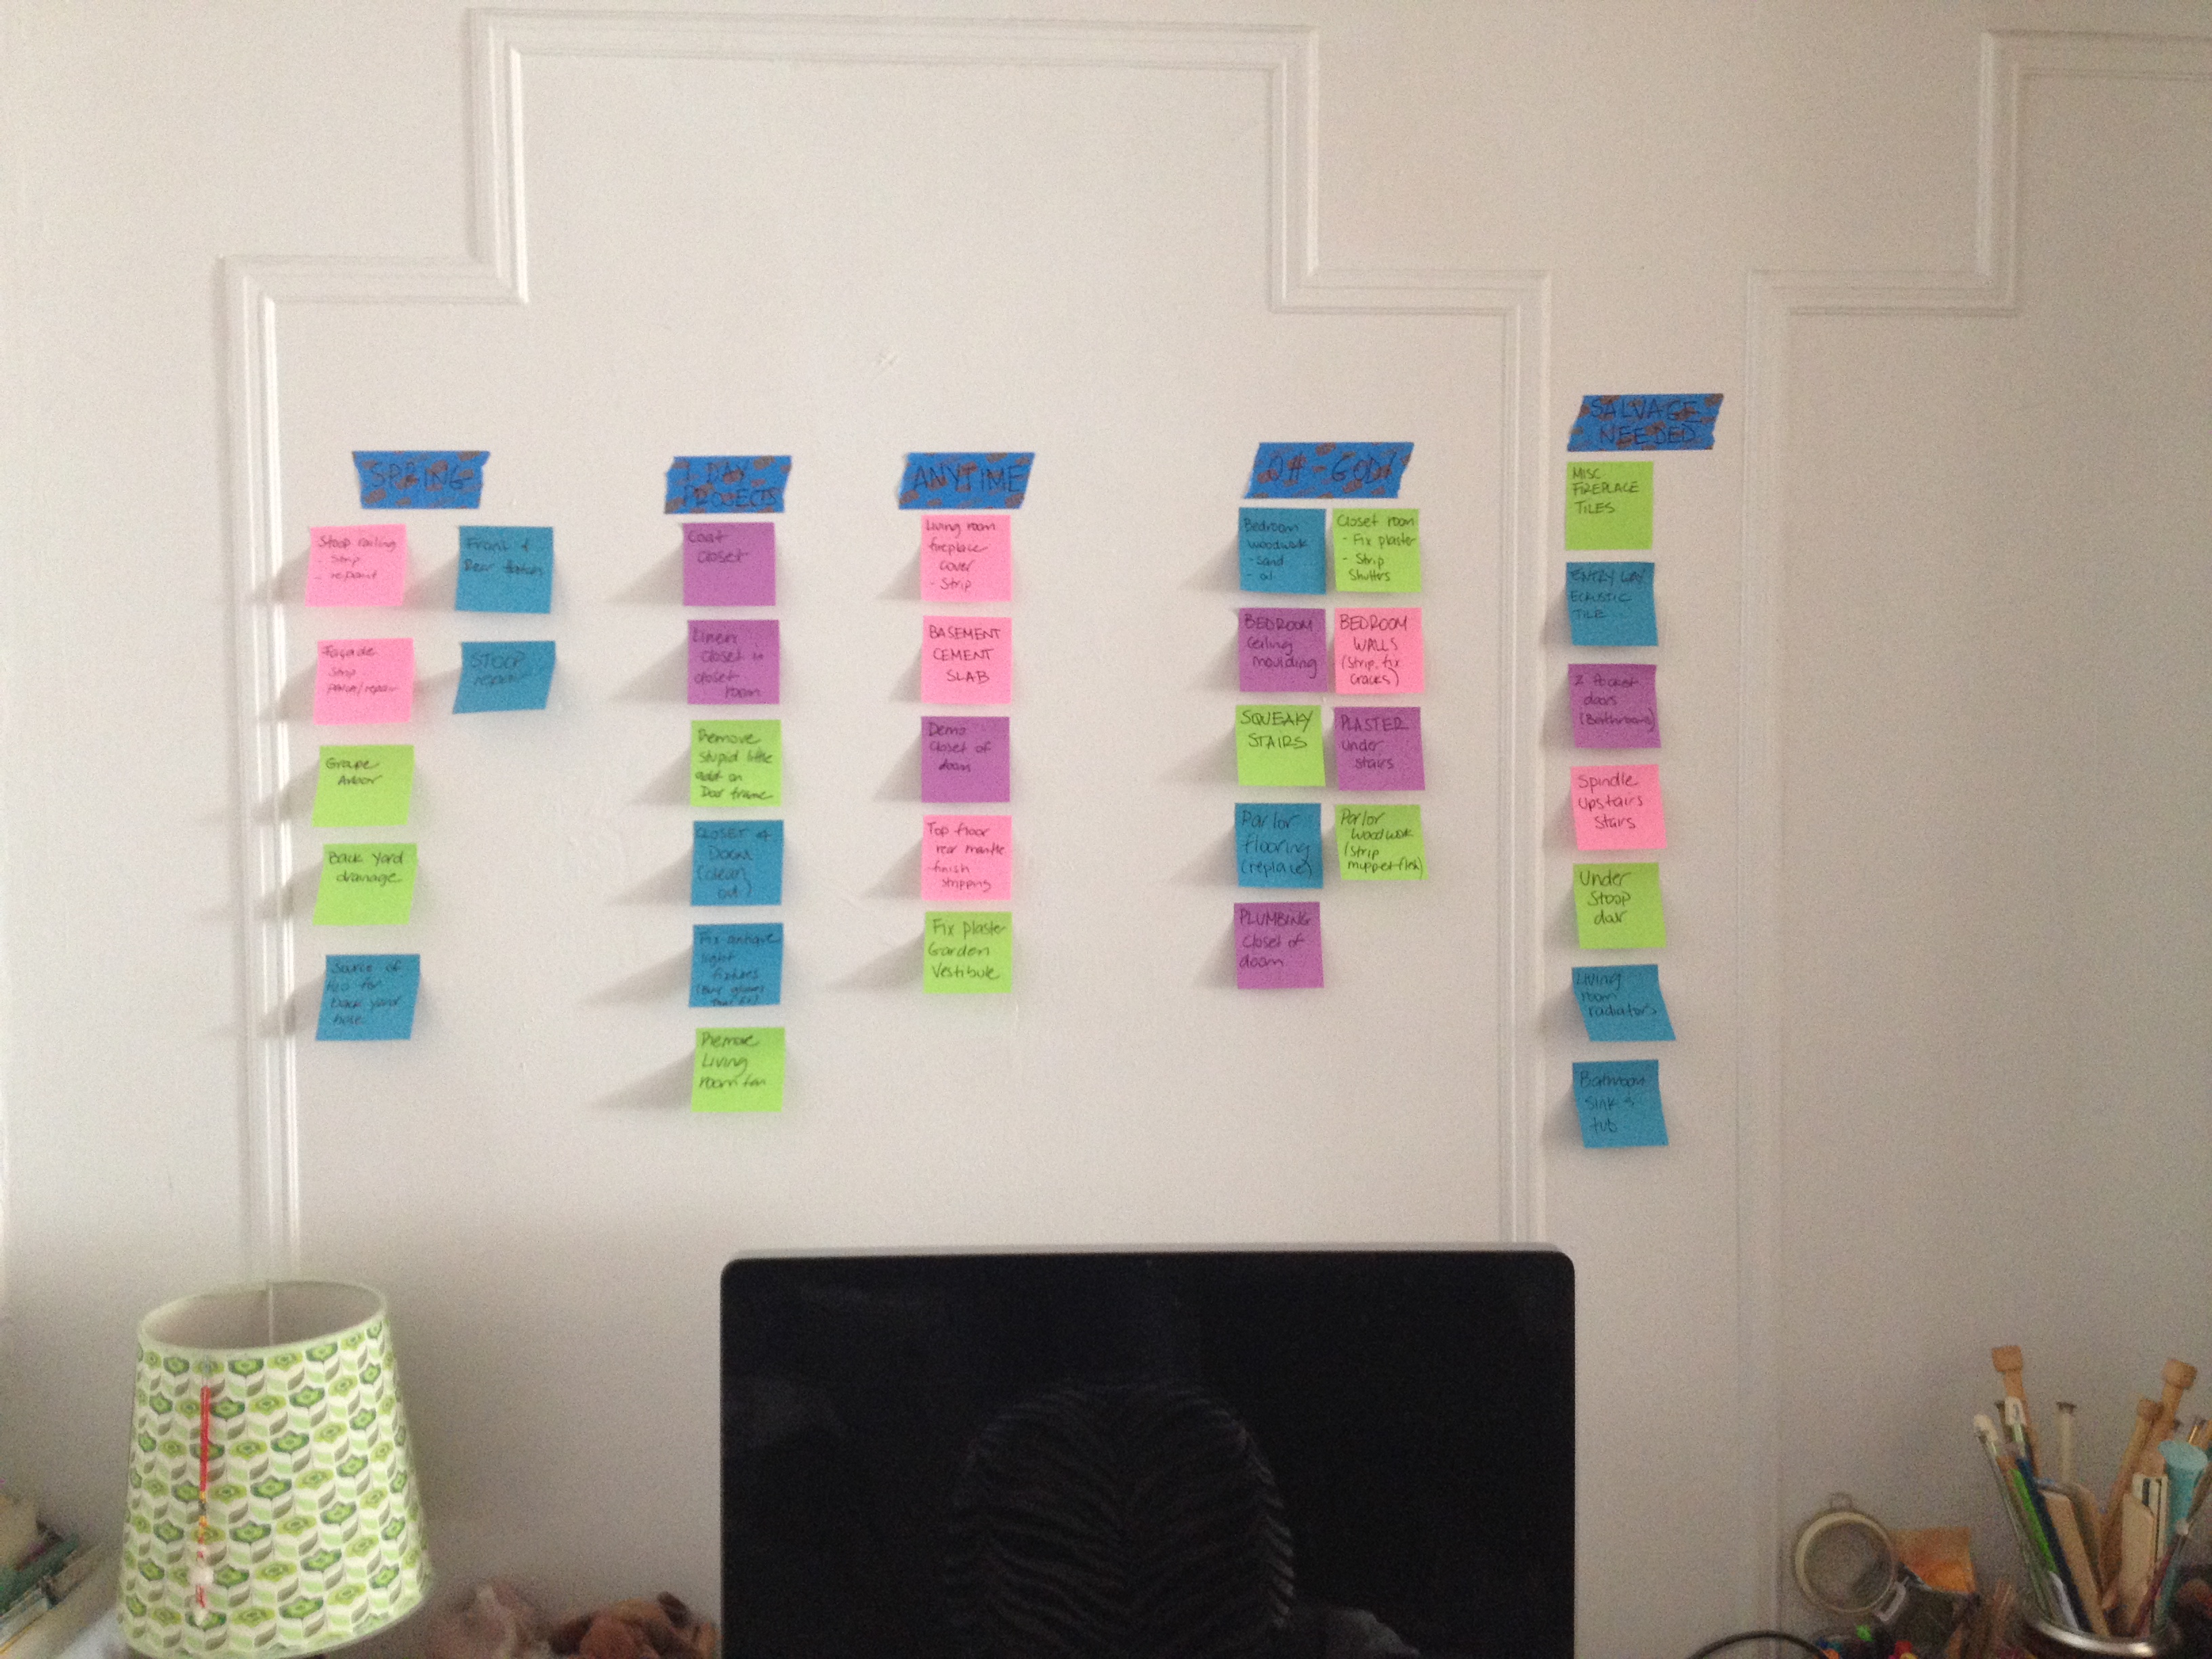
To shake out the moroseness, we came up with a 1-year plan of what we’d like to accomplish between now and December 31st (actually this is the bare minimum I’d like to see done so that I can continue to fake it as a quasi-legit grown up). The list is divided into 4 major categories: Spring, 1-Day Projects, Anytime and Oh-God! It breaks down like so:
1-Day Projects. This includes the small annoyances that we put up with so that we can focus on “the big projects.” I decided that if we can tackle some of the smaller things, the overall DIY mood may improve.
* Coat Closet – make parlor floor coat closet a bit more functional/less gross. Give it a good cleaning, paint walls, install shelves for shoes.
* Living room fan – remove ugly ceiling fan in front parlor, which we don’t use anyway.
* Fix old lighting fixtures purchased at salvage shop. Buy globes that fit
* Remove stupid little add-on wall in parlor floor hallway
* Linen closet – turn old roof access ladder closet into linen closet. Clean and patch walls, install shelves.
* Closet of doom – clean out room of all its contents.
Anytime projects. These projects are not weather dependent and can be done at anytime. Got some time? Great, get some of these cross off (at least that’s the idea)…
* Living room fireplace cover – strip paint, put it back in its original place (remove existing cover and take to Build It Green)
* Basement Cement Slab – The removal of the old asbestos tiles in the basement left the floor bumpy. Needs a layer of cement on top
* Closet of doom: demo dry wall and assess plumbing
* Top floor rear mantel – finish stripping
* Fix plaster in garden level vestibule.
Spring Projects. These are important for a variety of reasons: moisture control, rust prevention, general safety, and saving the brownstone from one more freeze-thaw cycle under all that paint.
* Complete façade stripping project
* Front & Rear hatches (replace)
* Stoop railing – finish stripping, paint
* Raise grape arbor to create enough space for seating area beneath
* Back yard drainage project
* Source of water for backyard hose
* Stoop – repair steps
Oh-God! Projects. These are the most daunting projects on the list. The stripping of the façade should probably be in this category, but I remain deluded determined that “it’s no big deal.”
* Bedroom woodwork – sand and oil
* Bedroom ceiling – finish spackle, add moulding & trim
* Bedroom walls – strip, fix cracks, prime and paint
* Parlor flooring – replace cheap-o stick on parquet with actual flooring
* Fix plaster under stairs, fix squeaky stairs (the plaster is helping this along by falling off in chunks – yippie!)
* Closet room – fix plaster
* Closet of doom – fix plumbing
* Parlor woodwork – strip (muppet flesh paint be gone!)
And that’s about it for the year. I’m hoping things get it done, because there is a ton more where this came from.
Stubborn paint
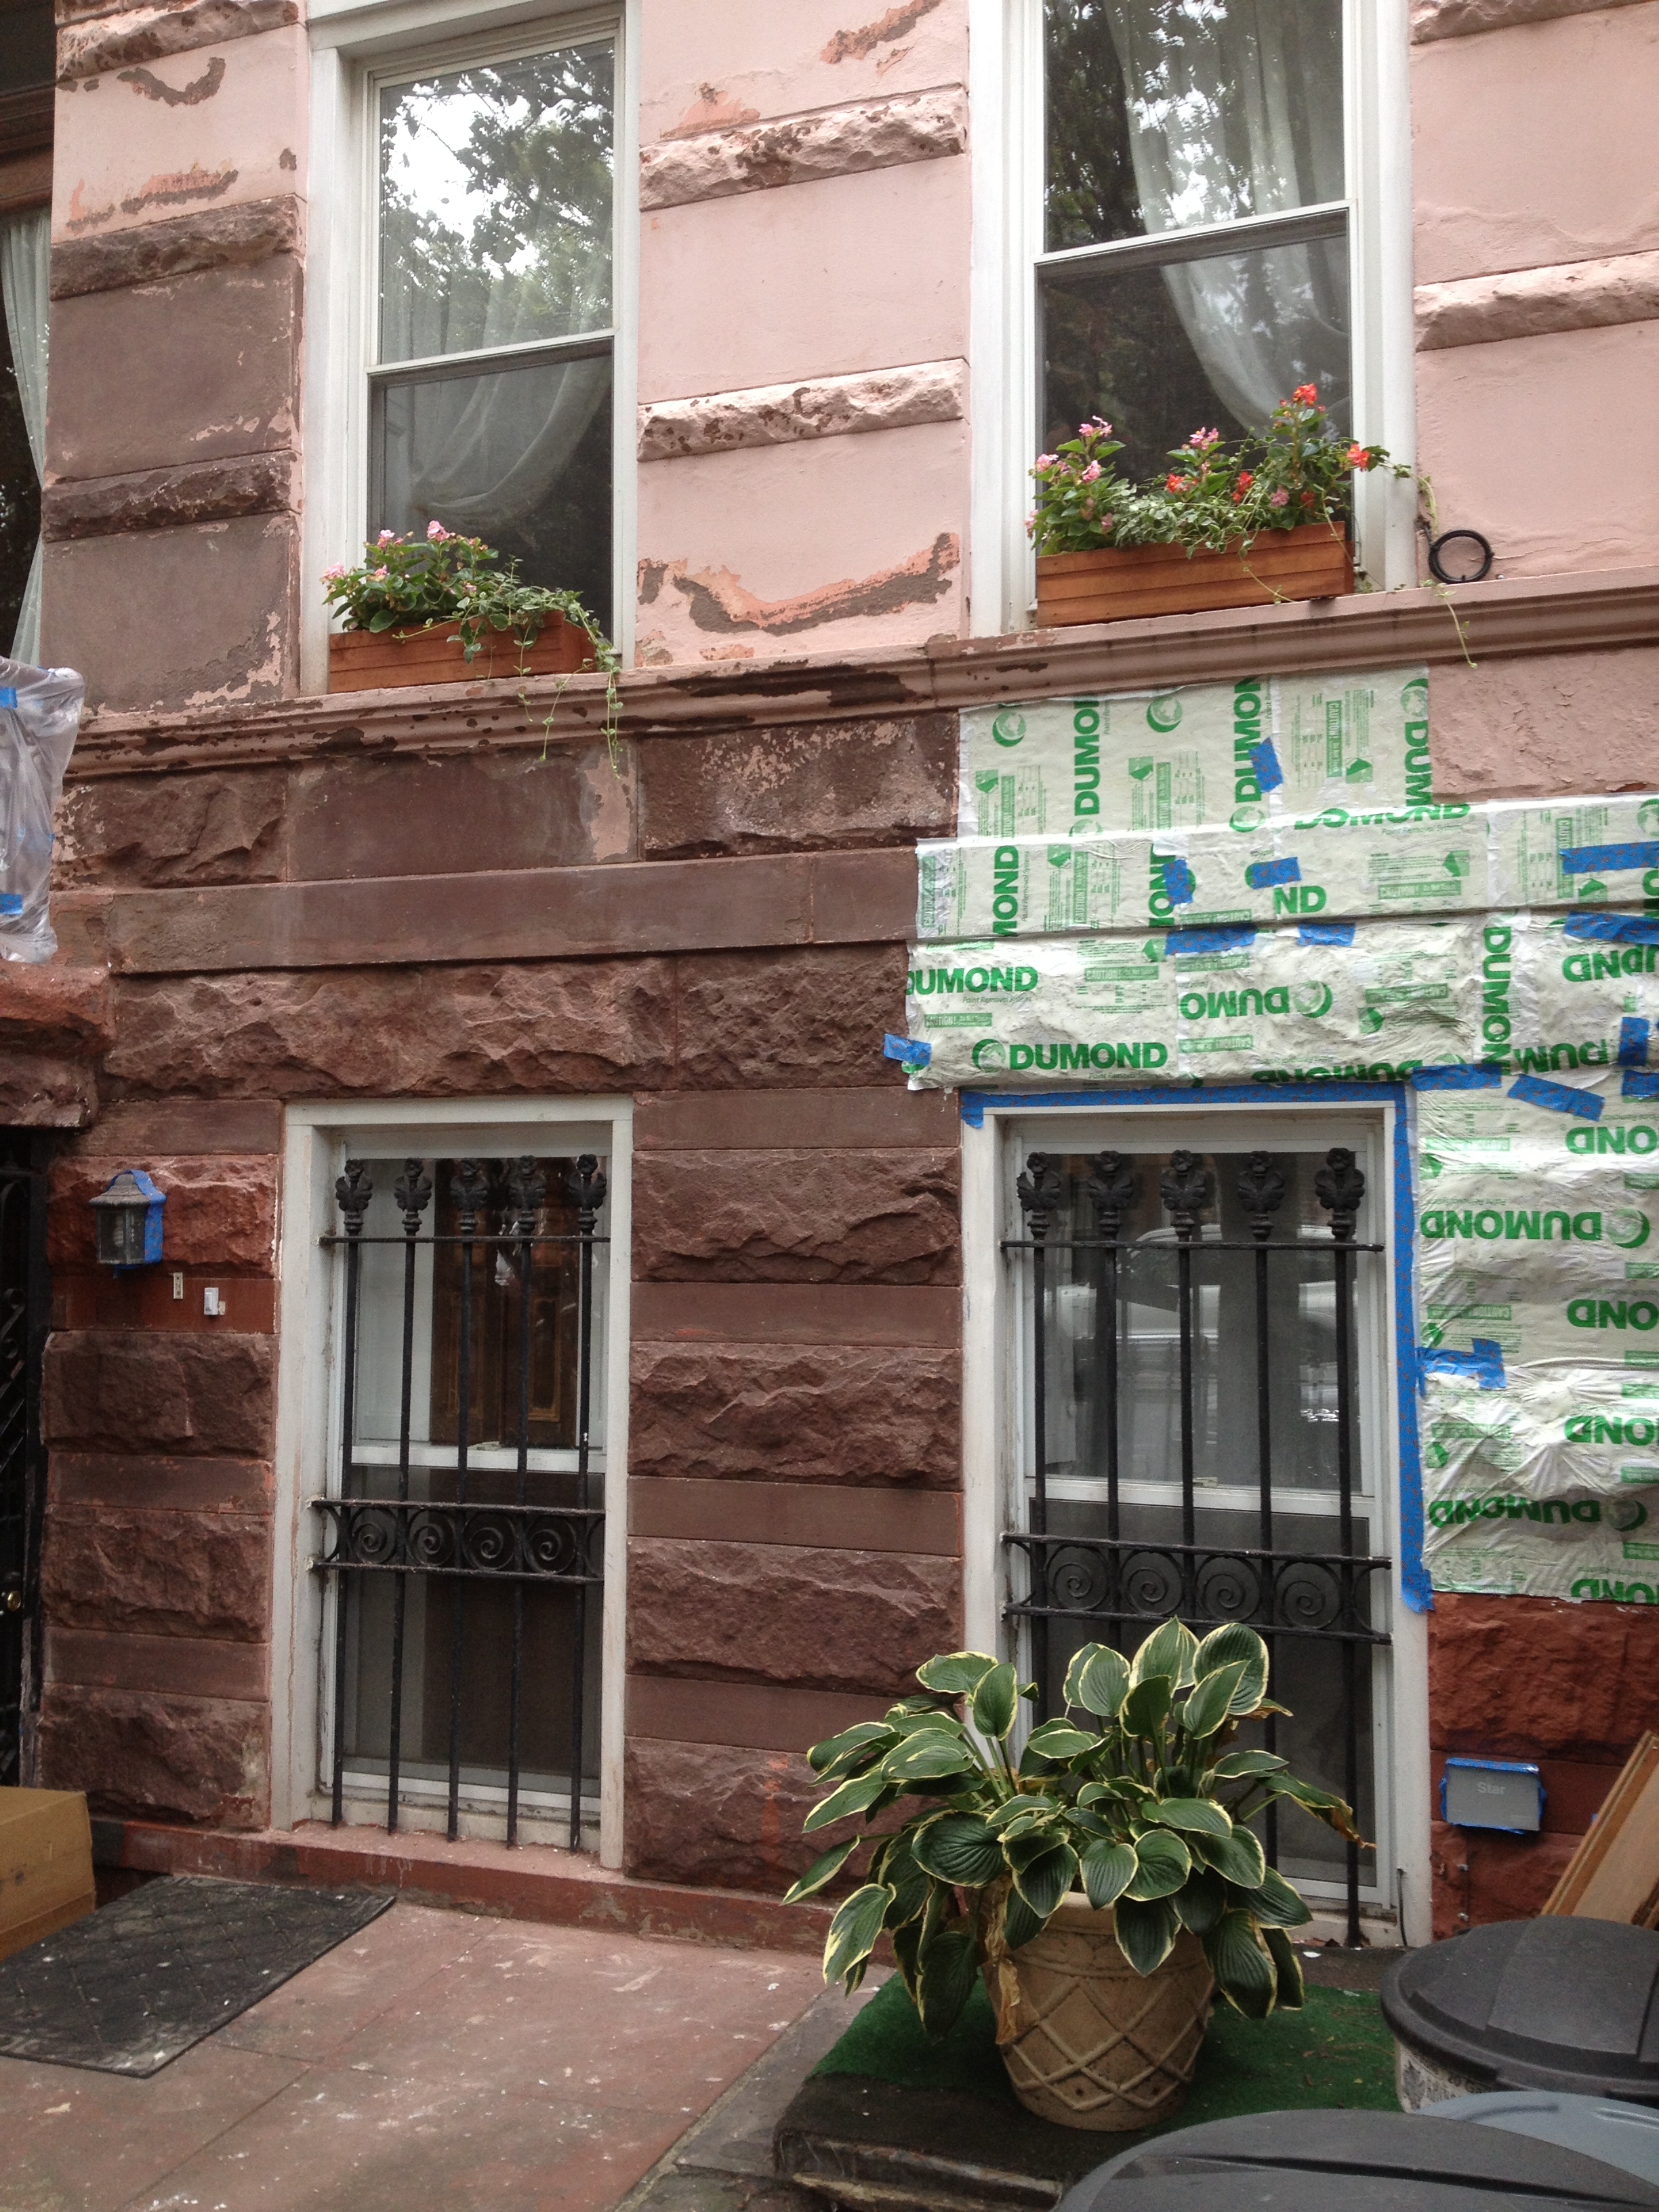
Progress is slow but steady, with a good portion of the paint on the garden level gone. For most part, it’s a pretty straight forward process: apply the goop, cover with paper, wait, scrape, wash. Repeat if necessary. But since this is a learn-by-doing type of project, I found out that removing paint from where the stone has been patched is nearly impossible. It takes a combination of Peel Away 1 and Peel Away 7, and still the results are ‘meh’ at best. You can see splotches of stubborn pink on the far right of the wall on the top of the stoop, and also under one of the parlor windows. It simply does not want to go away. I’ve experimented with dwell times and it seems that a minimum of 24 hours is necessary. In some cases, 48 is actually better. Rain doesn’t seem to be a problem, so long as the area is covered with the paper stuff. Just to be safe, I tape up the edges with painter’s tape.
The exposed stone in the photo has not been washed with the citric acid neutralizer yet, so you can still see the white-ish film of alkalinity in some spots. I figured once the garden level wall is finished, I’ll neutralize all at once, since until then it gets constantly splashed and gunked up.
It’s been fairly tedious do get this far, yet it’s also quite satisfying to pull huge chunks of paint off. The fact that the neighbors constantly remark on my stubbornness to take on this project also means I need to see it through – at least up to where I can safely reach. I am hoping that by Sunday the lower portion of the wall (from the parlor windows on down) will be finished. Fingers crossed!
And…. scene!
The paint is off the woodwork in our bedroom. Yey!
Over the course of three days, our amazing paint stripping expert and her helper stripped the fireplace and fireplace cover, the pocket doors and moldings, the window frame and window seat, the base boards, the picture rails, as well as the moldings of the two other doors.
They used 12 gallons of zip strip, 7 gallons of denatured alcohol and a ton of elbow grease. More photos and details on a later post, but suffice to say the woodwork looks wonderful and, to my surprise, looks brand new – which is a bit weird.

On a less exciting note, we were left with a lot of goober on the walls. The room looks like an alien crime scene:
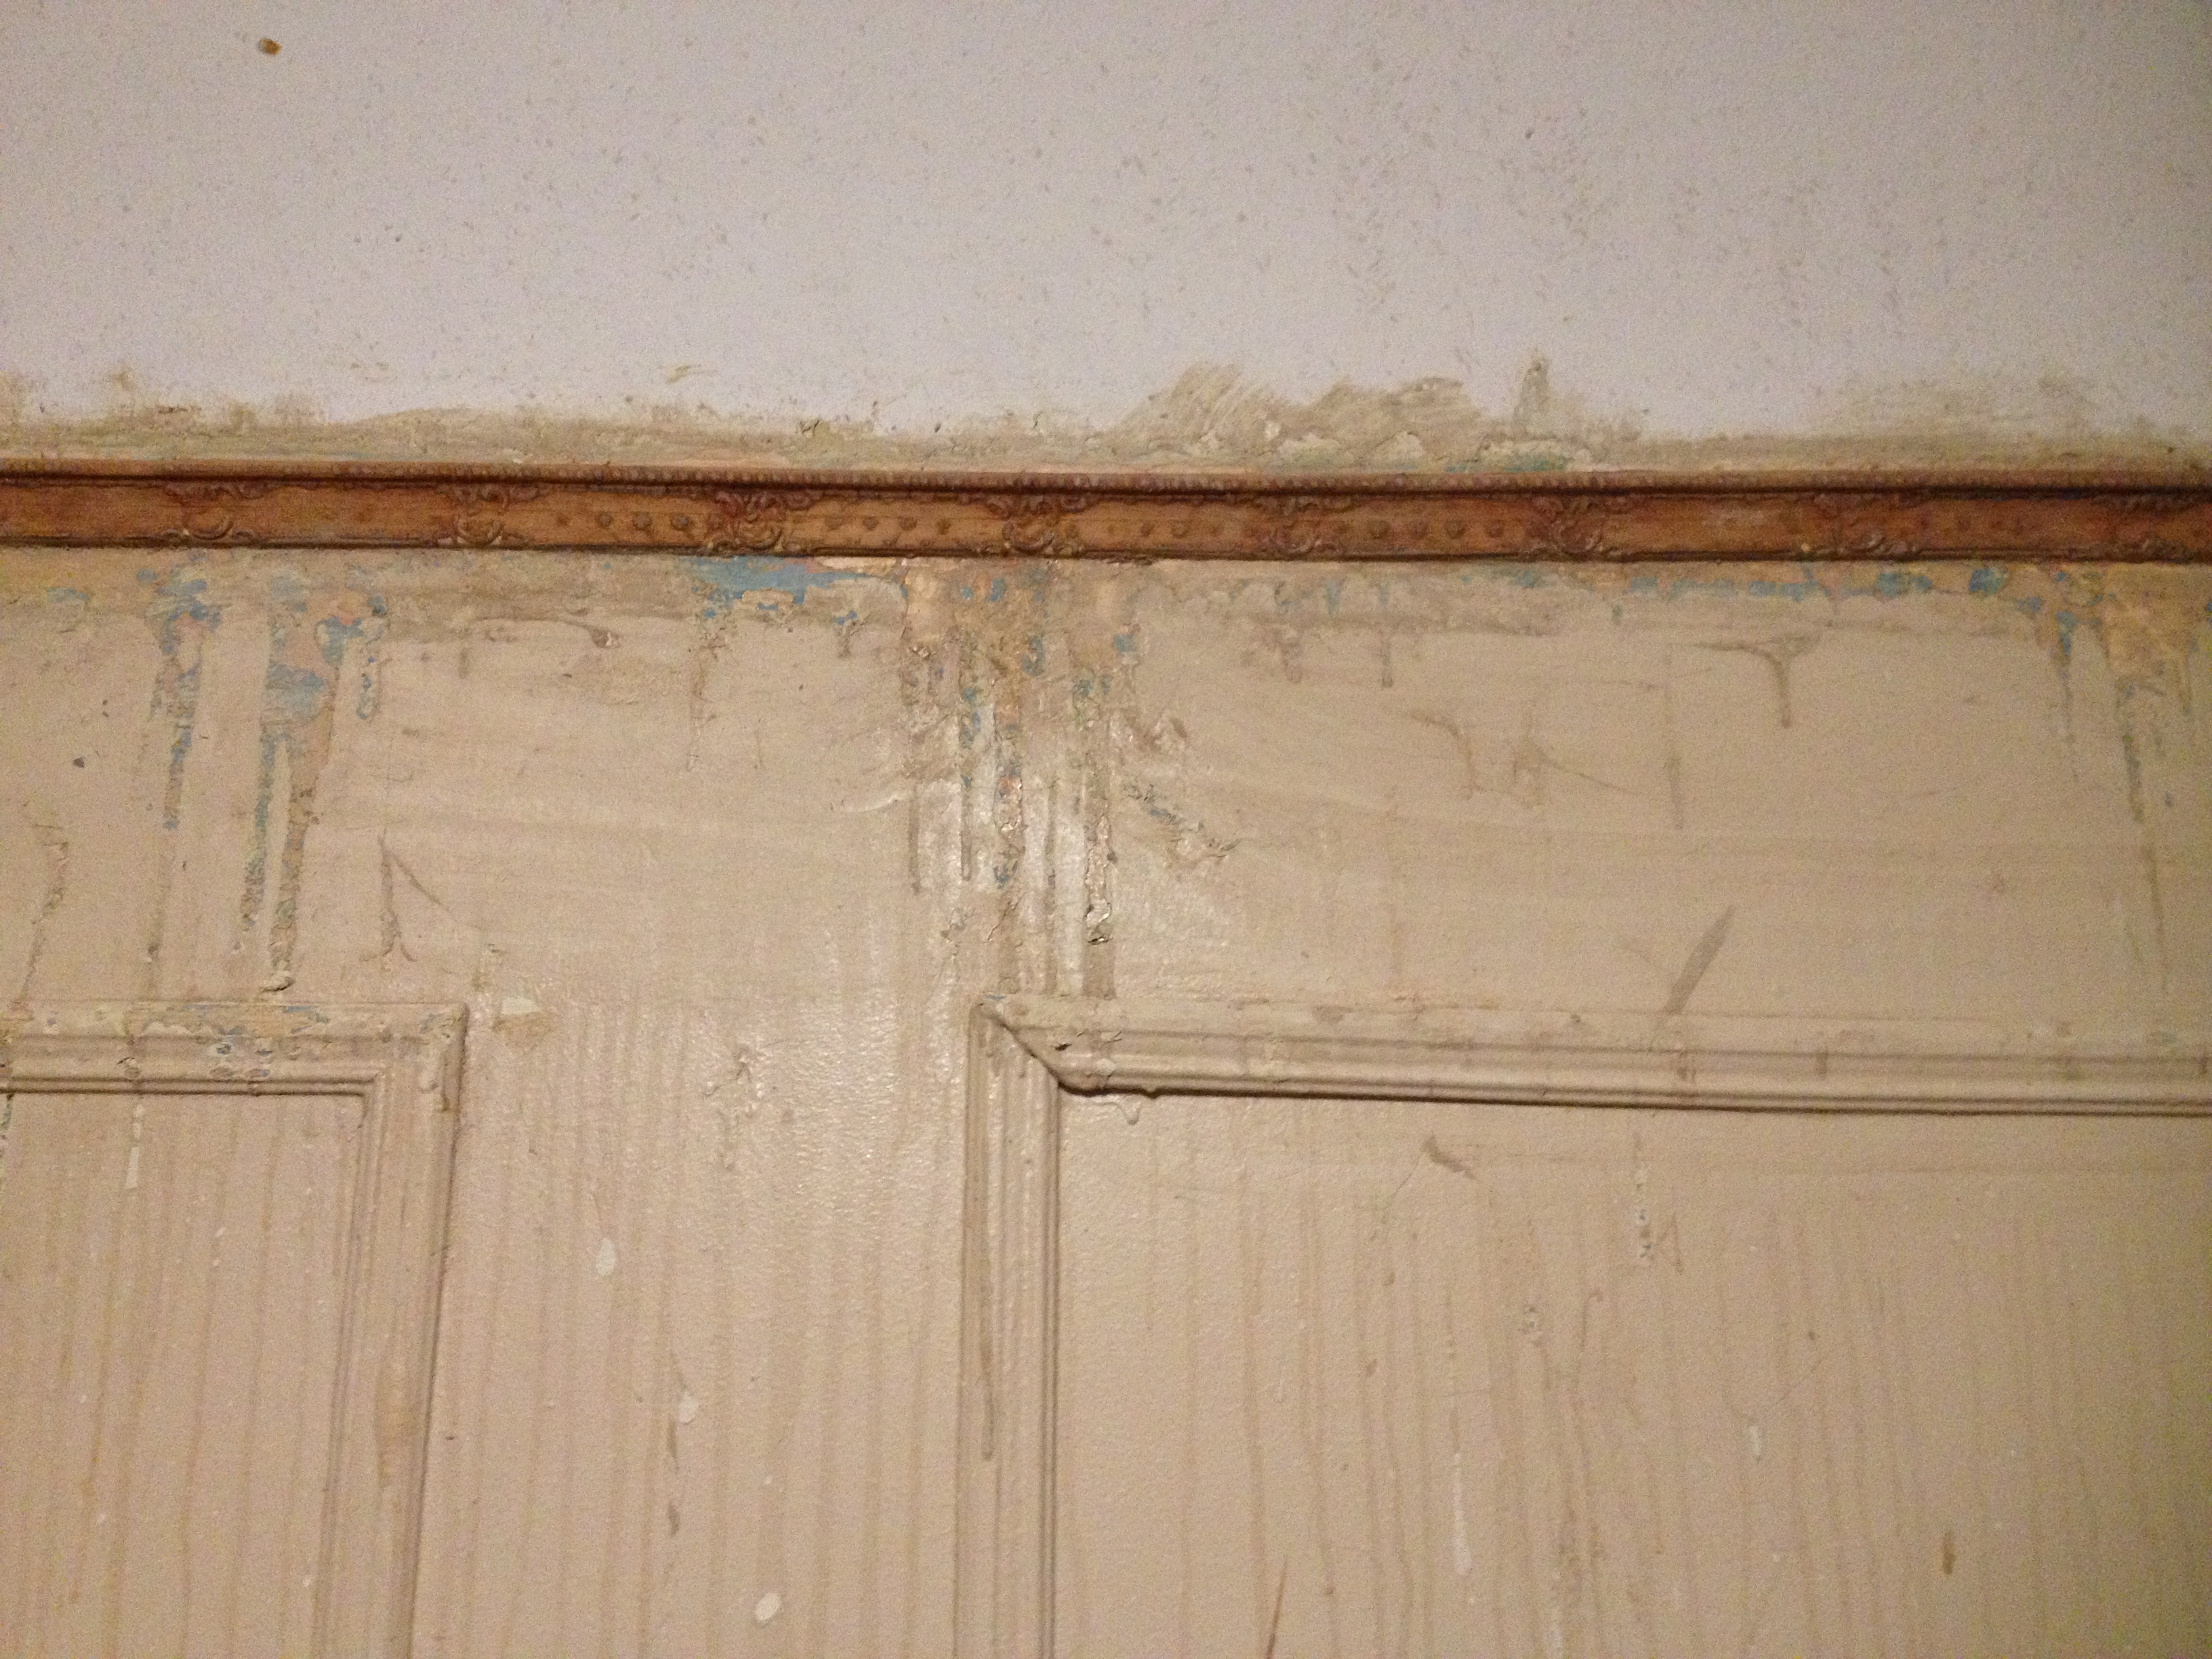 Now to the tedious work of fixing the walls so that we can paint.
And then this happened
Sometimes, even the most hard core DIY needs a little professional help. Since we seem to be a bit morose these days when it comes to getting stuff done around here, we decided to treat ourselves to a little help in the paint stripping department.
Check out the results of day 1:


The initial feeling of being inadequate and unable to get it together to make progress on the house was quickly replaced by “holy crap! That looks awesome!” And with that, I accepted that fact that it’s totally OK to hire someone to help every now and then.
Waking up from a long winter nap
We blew through our funds getting the garden apartment ready to rent, as well as spending money in the very un-glamurous-yet-very-necessary electrical and plumbing departments. Towards the end of last year, with the garden apartment rented, it was time to take a break and save up some cash for the projects ahead. They are:

Façade: This could potentially be a huge cost. The original façade is made of brownstone, which has been painted many times over the years. In its current iteration, it is pink. And it’s peeling. Our hope is once the paint is removed, the brownstone will be in good enough shape to be left alone, sans color. In case you are wondering, this is what it looks like now. Yes, we are the creepy house on the block….

Powder Room: Turning this once-closet back into a bathroom is the first step into a larger project of moving the kitchen down to the parlor level (it’s currently on the top floor, next to our bedroom).
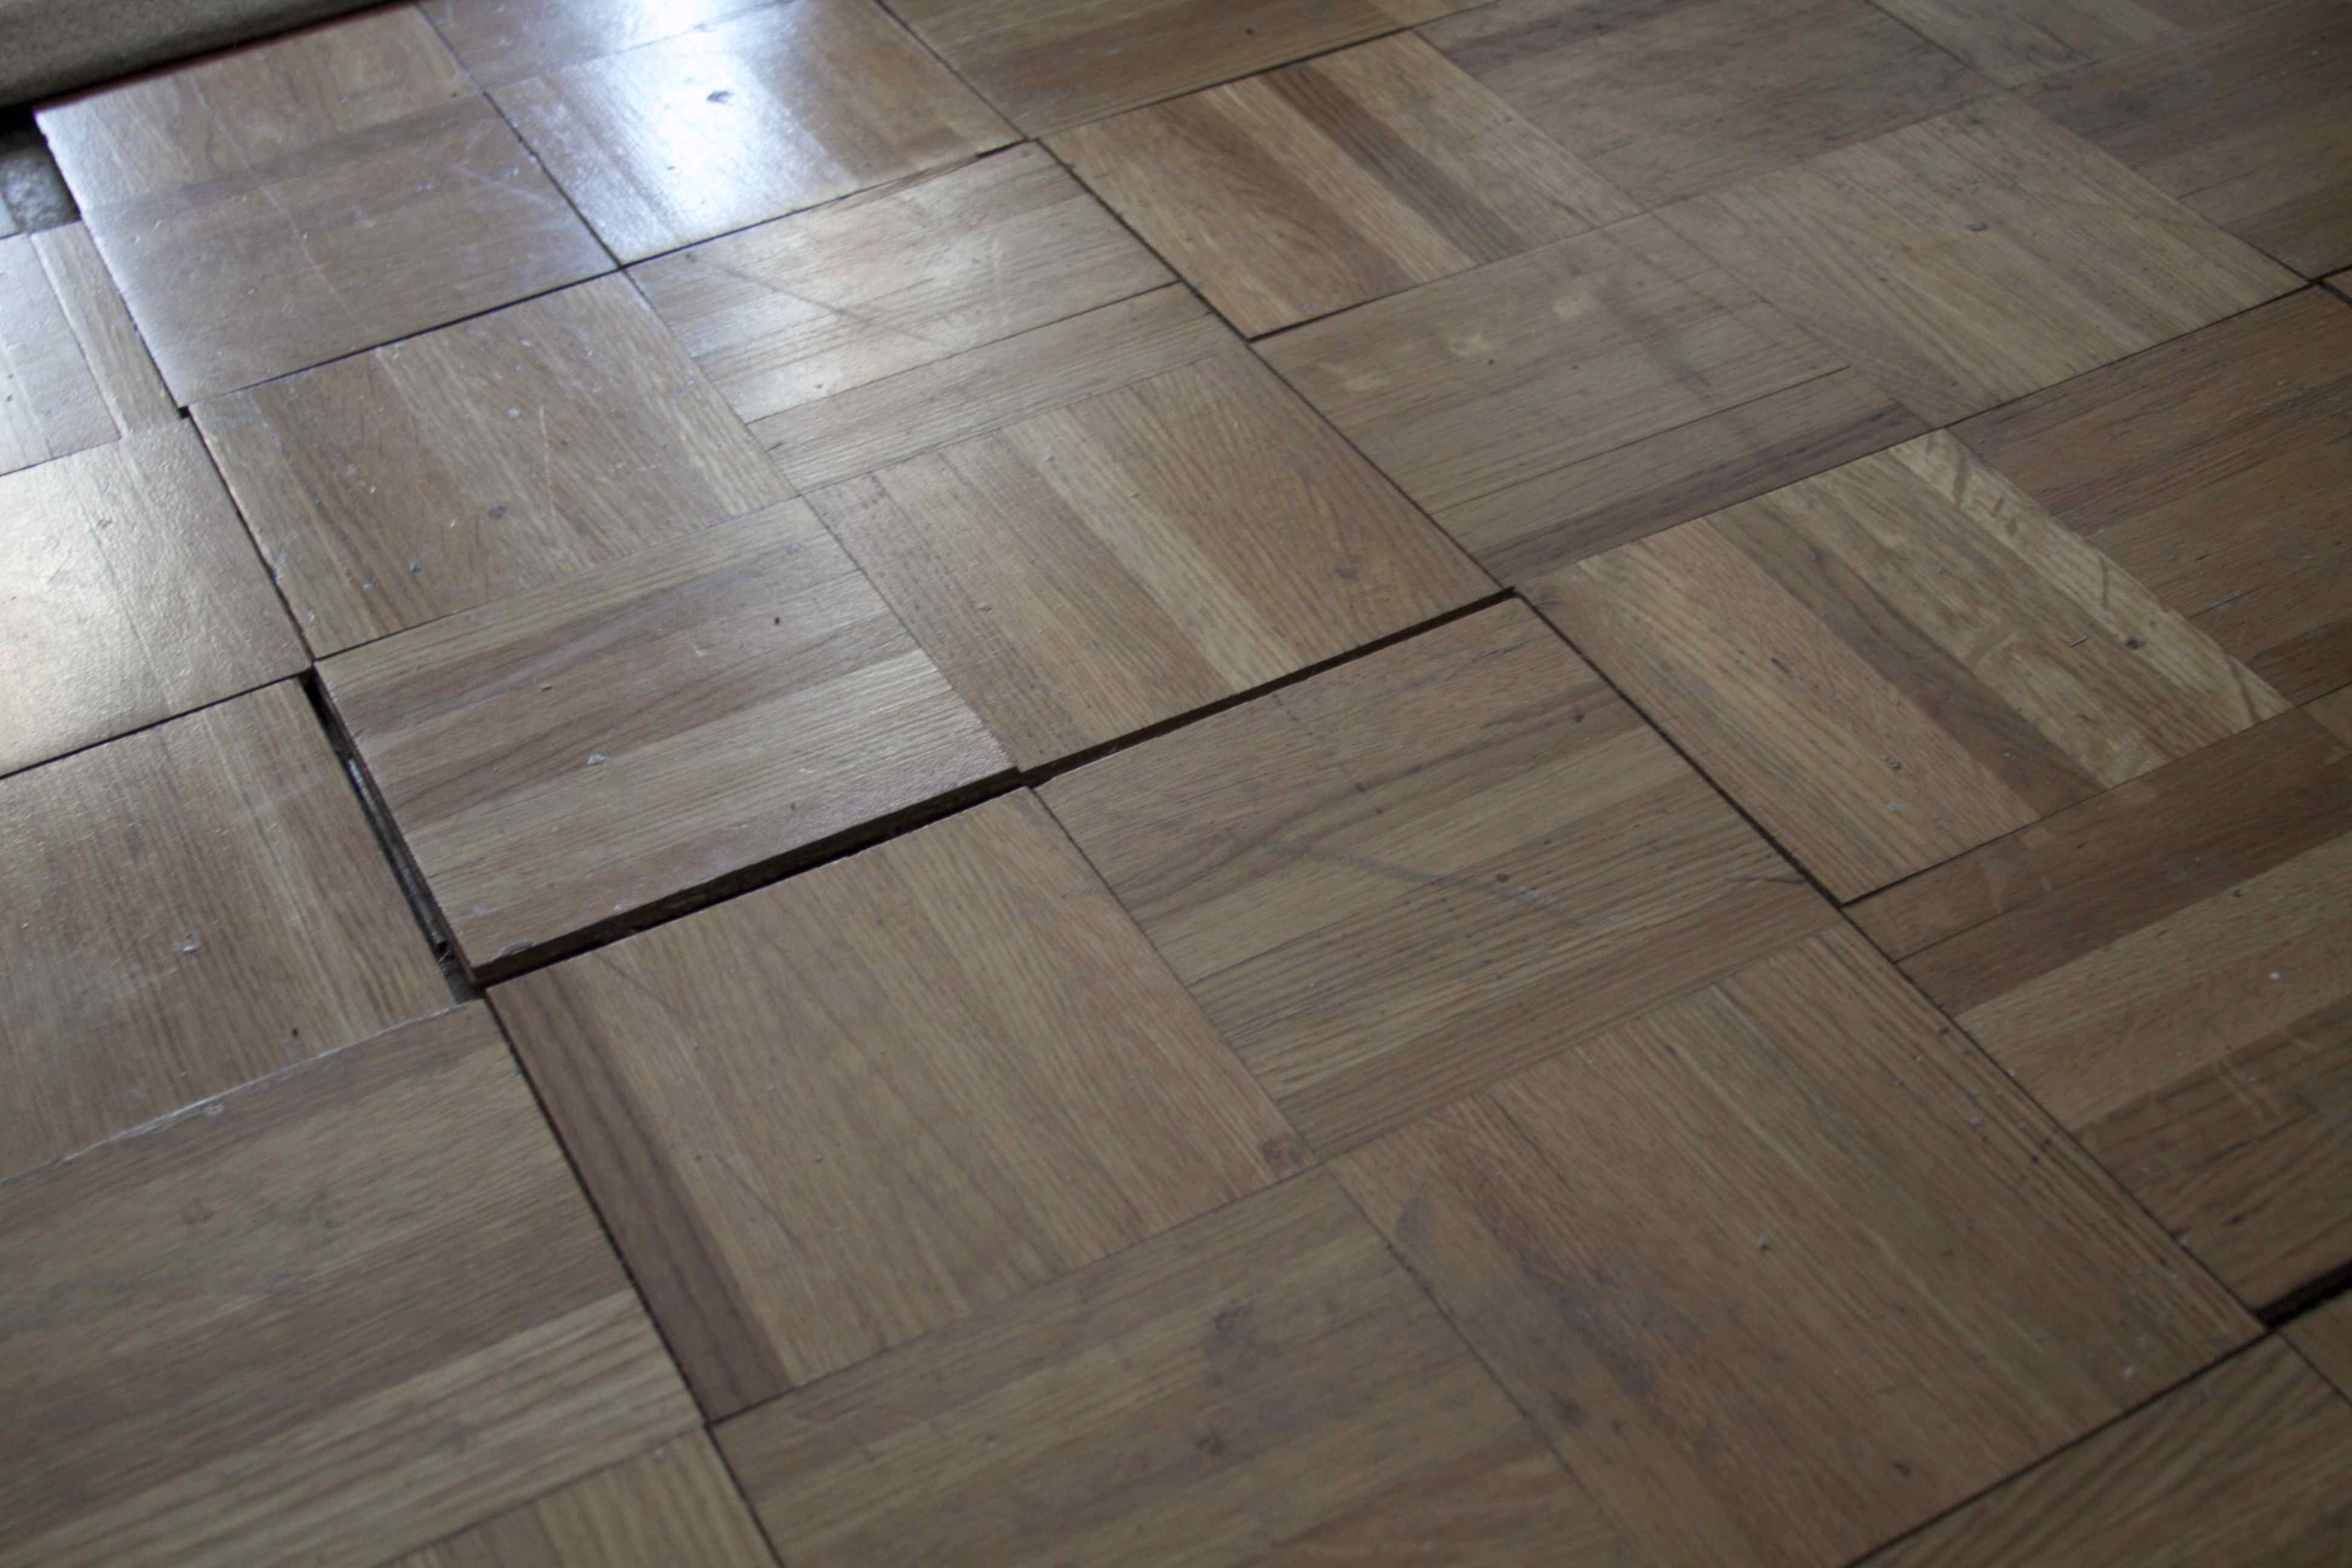
Parlor Flooring: The original parquet floor is long gone. It’s been replaced with fake parquet, which was poorly installed and is lifting all over the place (the splotchy marks on it are not dirt, but residual glue form a sloppy installation). The idea is to replace it with period accurate parquet, with a nice border around it.
New Hatches: our house has two hatches, one in the front, one in the back. The front one was used as a coal chute, not sure what the one in the back was used for. In any case, both hatches are in dire need of replacement. The brick in the front hatch also needs repointing and the chute door needs a little love to make it look less like a horror movie set.
So yes, there is a lot of work ahead…
