So where were we?
Ah, yes, the façade. The epic project to end all projects.
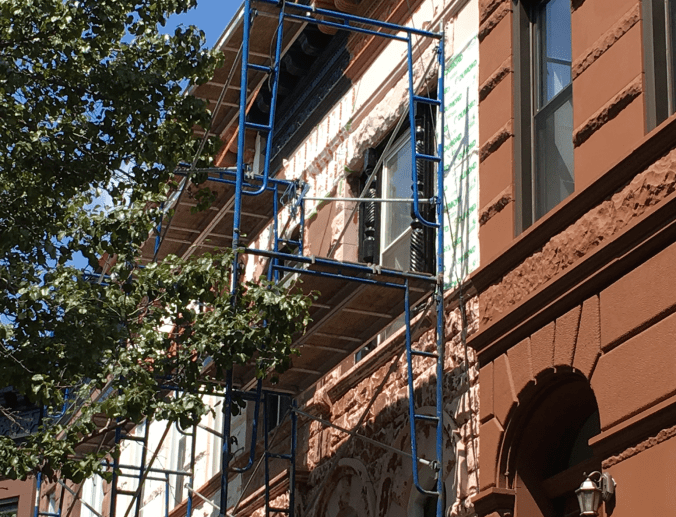
To recap: scaffold went up, and we had 28 days to strip. On day 29, the scaffolding turned into a pumpkin and went on to a different job site.
On the to-do list:
- Repair holes in cornice, paint cornice
- Stip façade
- Remove vinyl flashing form around windows, restore old window frames (hoping those were still there)
- Restore turned columns (which we hoped were still there).
So here is what got done:
Cornice. Our tin cornice had several holes. The part above the corbels is actually really thin – so thin that an overly enthusiastic wayward bird could puncture it.
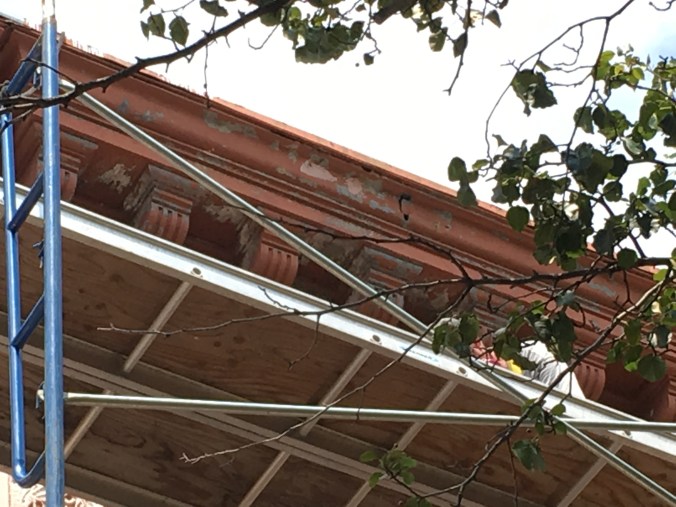
So the holes got patched up with Bondo. The orange paint got scrapped off and the whole thing got coat of oil based paint in flat black.
Here is the cornice in progress:

Here is the cornice all done:

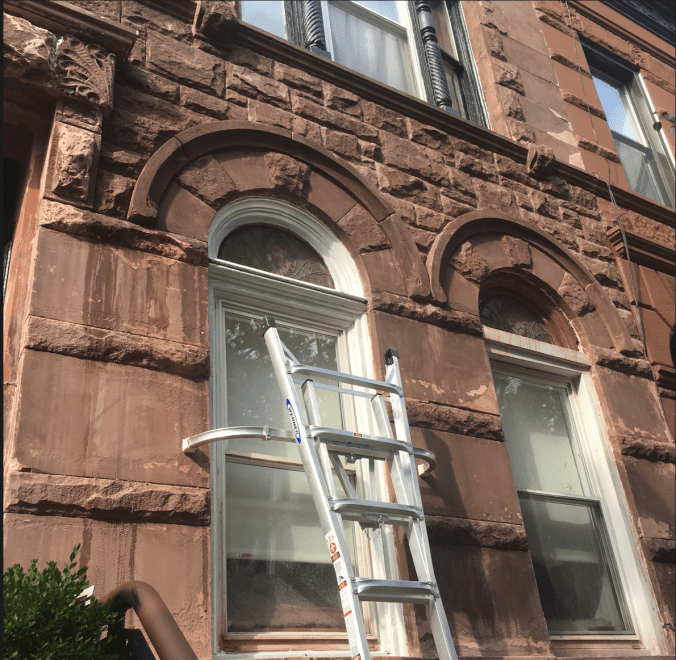
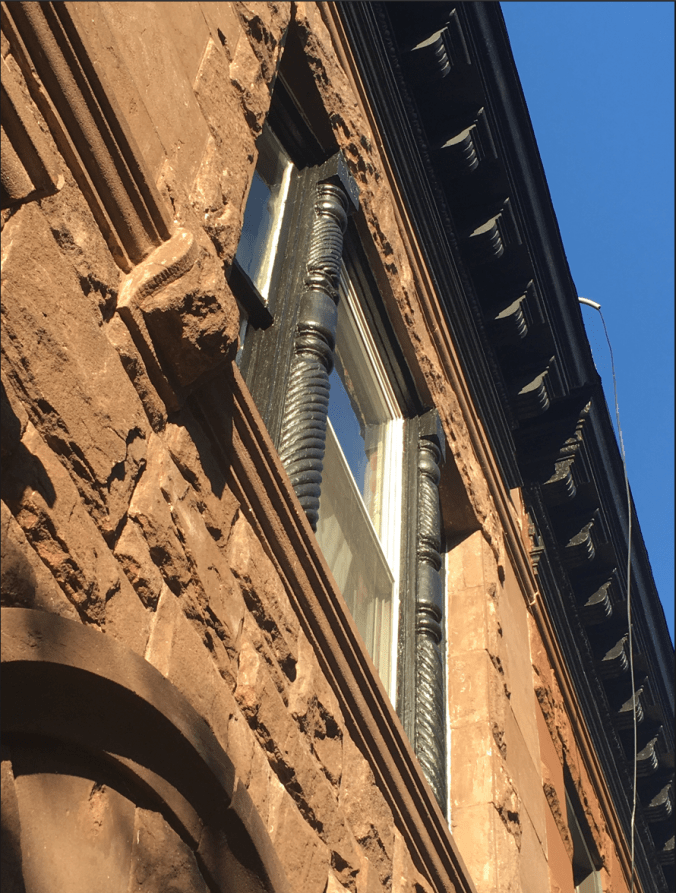
Next up, the windows. The two turned columns were still there, however they were very damaged. The flashing did an excellent job of trapping moisture, which in turn rotted the wood.

Ugly flashing covered the columns
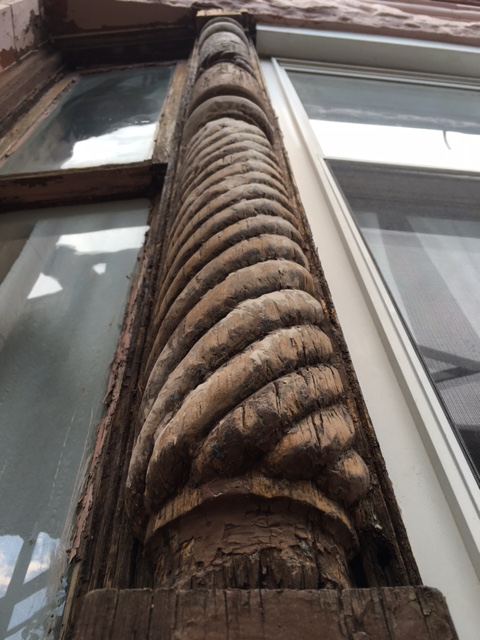
and trapped moisture, which did a number on the wood
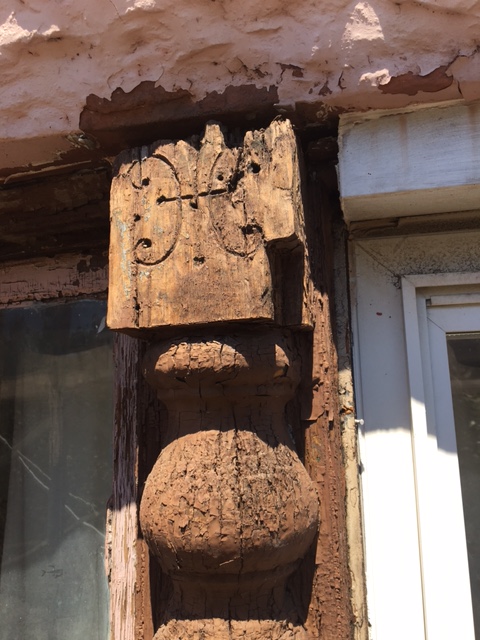
The hubs rebuild and re-sculped the parts of the columns that were missing bits. Eventually these will need to come down for a full restoration, but for now they a) look good enough from street level and b) we stopped any further damage.
A coat of primer and paint and now they look like this:

Columns partially restored and painted to prevent further damage. Paint is left over from the front door project from a couple of years ago.
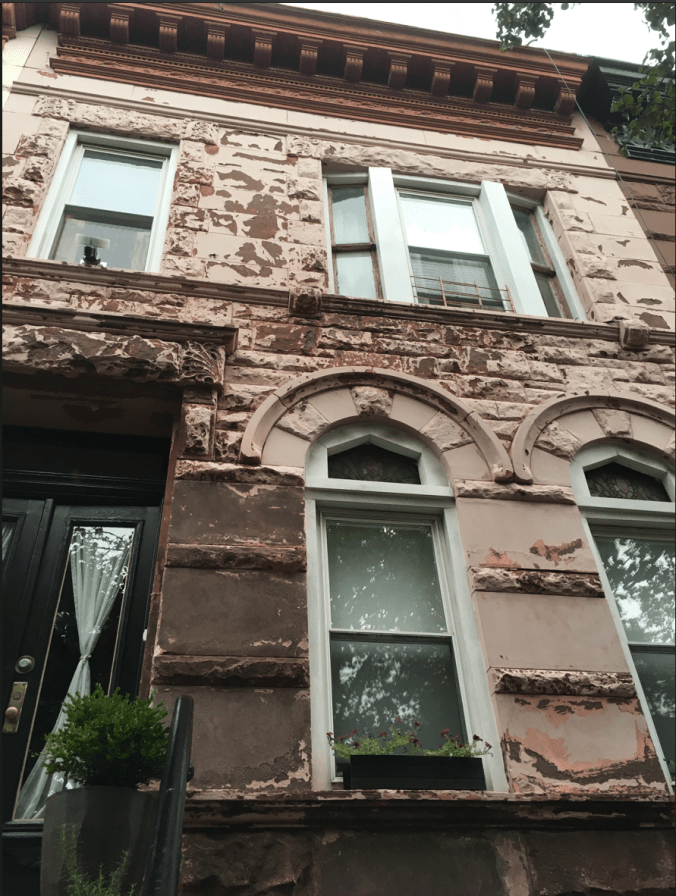
Aaaaand the paint stripping. This one is self explanatory (but I’m working on a post about how to DIY your very own façade stripping, which is really not as scary as it seems). For now, suffice to say: PeelAway1 + Time + Water = pretty brownstone.
Before scaffolding went up , the house looked like this.
The thing with stripping paint is ‘easy does it.’ You have to work in small areas and it’s super hard to resist the urge to just cover the whole damn façade in PeelAway all at once. Don’t! There is a limit to how much you can accomplish in a day, and if you over do it, you’ll be racing daylight (and exhaustion) to get it all off before it hardens beyond removal (which means you have to apply paint stripper to the paint stripper, and that’s just counter productive)

After the paint was removed, the stone was washed with citric acid, to bring the pH of the wall as close to neutral as possible. The citric acid, in turn, removed the old mortar in between the sheets of brownstone. So the entire façade was repointed with the appropriate mortar mix (not modern cement, because that will crack the stone).

The gray/light brown stuff on the wall between the window and the door is the runny left-overs of the old mortar. It will be washed off eventually. Will take some elbow grease to get it off.
There are a few areas of stubborn pink paint. These are patches where the stone was improperly repaired in the past. We found it impossible to remove the paint from it, so at some point in the near future, we’ll have a mason drill it out and do a proper repair job. This is one of those things that is well above our DIY skill level.
Palor window frames mid restoration. The white is just premier.
The project started on August 1, with the delivery of the scaffold. The majority of the work was completed by August 22nd, when the hubs had to go back to work. We still worked on it over the weekend, until the scaffold came down on August 29.
How much did it cost?
- Scaffold rental: $603.17
- PeelAway 1 and related supplies: $374.25
- Masonry supplies: $112.02
- Other supplies (window restoration, new ladder, primer/paint, etc): $1,255.89
TOTAL COST: $2,345.33 (plus a whole year’s vacation taken in one chunk).
Cost was one of the two major factors why we decided to tackle this project ourselves. The estimates we were getting just for the façade work (not including fixing the cornice or dealing with the window flashing) started around 60K. The second deciding factor was that none of the contractors we spoke with wanted to use the technique we felt would do the least amount of damage to the stone. We hard a lot of power-washing/jackhammering, so, um…. no.

you guys are hard core!
It’s the biggest thing we attempted thus far. Wasn’t nearly as bad as I thought.
Truly inspiring job well done! It makes our facade restoration look like child’s play.
Thanks! We surprised ourselves, it was not as awful as originally expected.
Such a beautiful stone color! A velvety brown! I bet you increased the value of your property 100%. I just wonder, did you pay more for rent than the mortgage now?